¶ Missing filament presets for Helio supported materials
TL;DR
If you cannot see the filament profile for a material already supported in Helio, you have three options:
Your Situation Use This Method You want the quickest workaround and don’t need precise settings Method 1: Quick Reference Material You want to create a custom profile with your own tested settings Method 2: Create Custom Profile You already have a .jsonconfig file from the manufacturerMethod 3: Import Config File
⚠️ Ensure the
Namein Bambu Studio exactly matches Helio’s internal material name for simulation and optimisation to work.
¶ 🧩 Problem
For some printers, certain filament profiles may be unavailable in Bambu Studio, even though the same materials are already available in Helio’s database.
This means the material can’t yet be selected for simulation or optimisation.
¶ 🔍 Root Cause
Each printer’s built-in material list in Bambu Studio is updated over time.
When a new printer or material becomes available, it may take a little while before the profile appears in the slicer, even though it’s already supported in Helio.
¶ 🛠 Workaround
You can manually add a custom filament profile in Bambu Studio using Helio’s naming convention and safe baseline parameters.
Once created, the material will appear in the material picker can be selected for slicing, simulation, and optimisation.
¶ ✅ Before You Start
- Confirm the material is supported by Helio (Supported materials & printers).
¶ 🏷 Naming Convention
Use the official material name, as Helio uses the same names internally. This ensures the filament maps correctly between Bambu Studio and Helio.
¶ 🧰 How to use the profiles
¶ 🗾 Method 1: Quick Reference Material (Fastest)
Use this method if your supported filament does not have pre-existing configuration files.
¶ Slice your object
- Slice your object using any generic filament of the same type (e.g., Generic PLA)
- Click the Helio Icon → Select your supported material from Helio’s list → Click Proceed Anyway
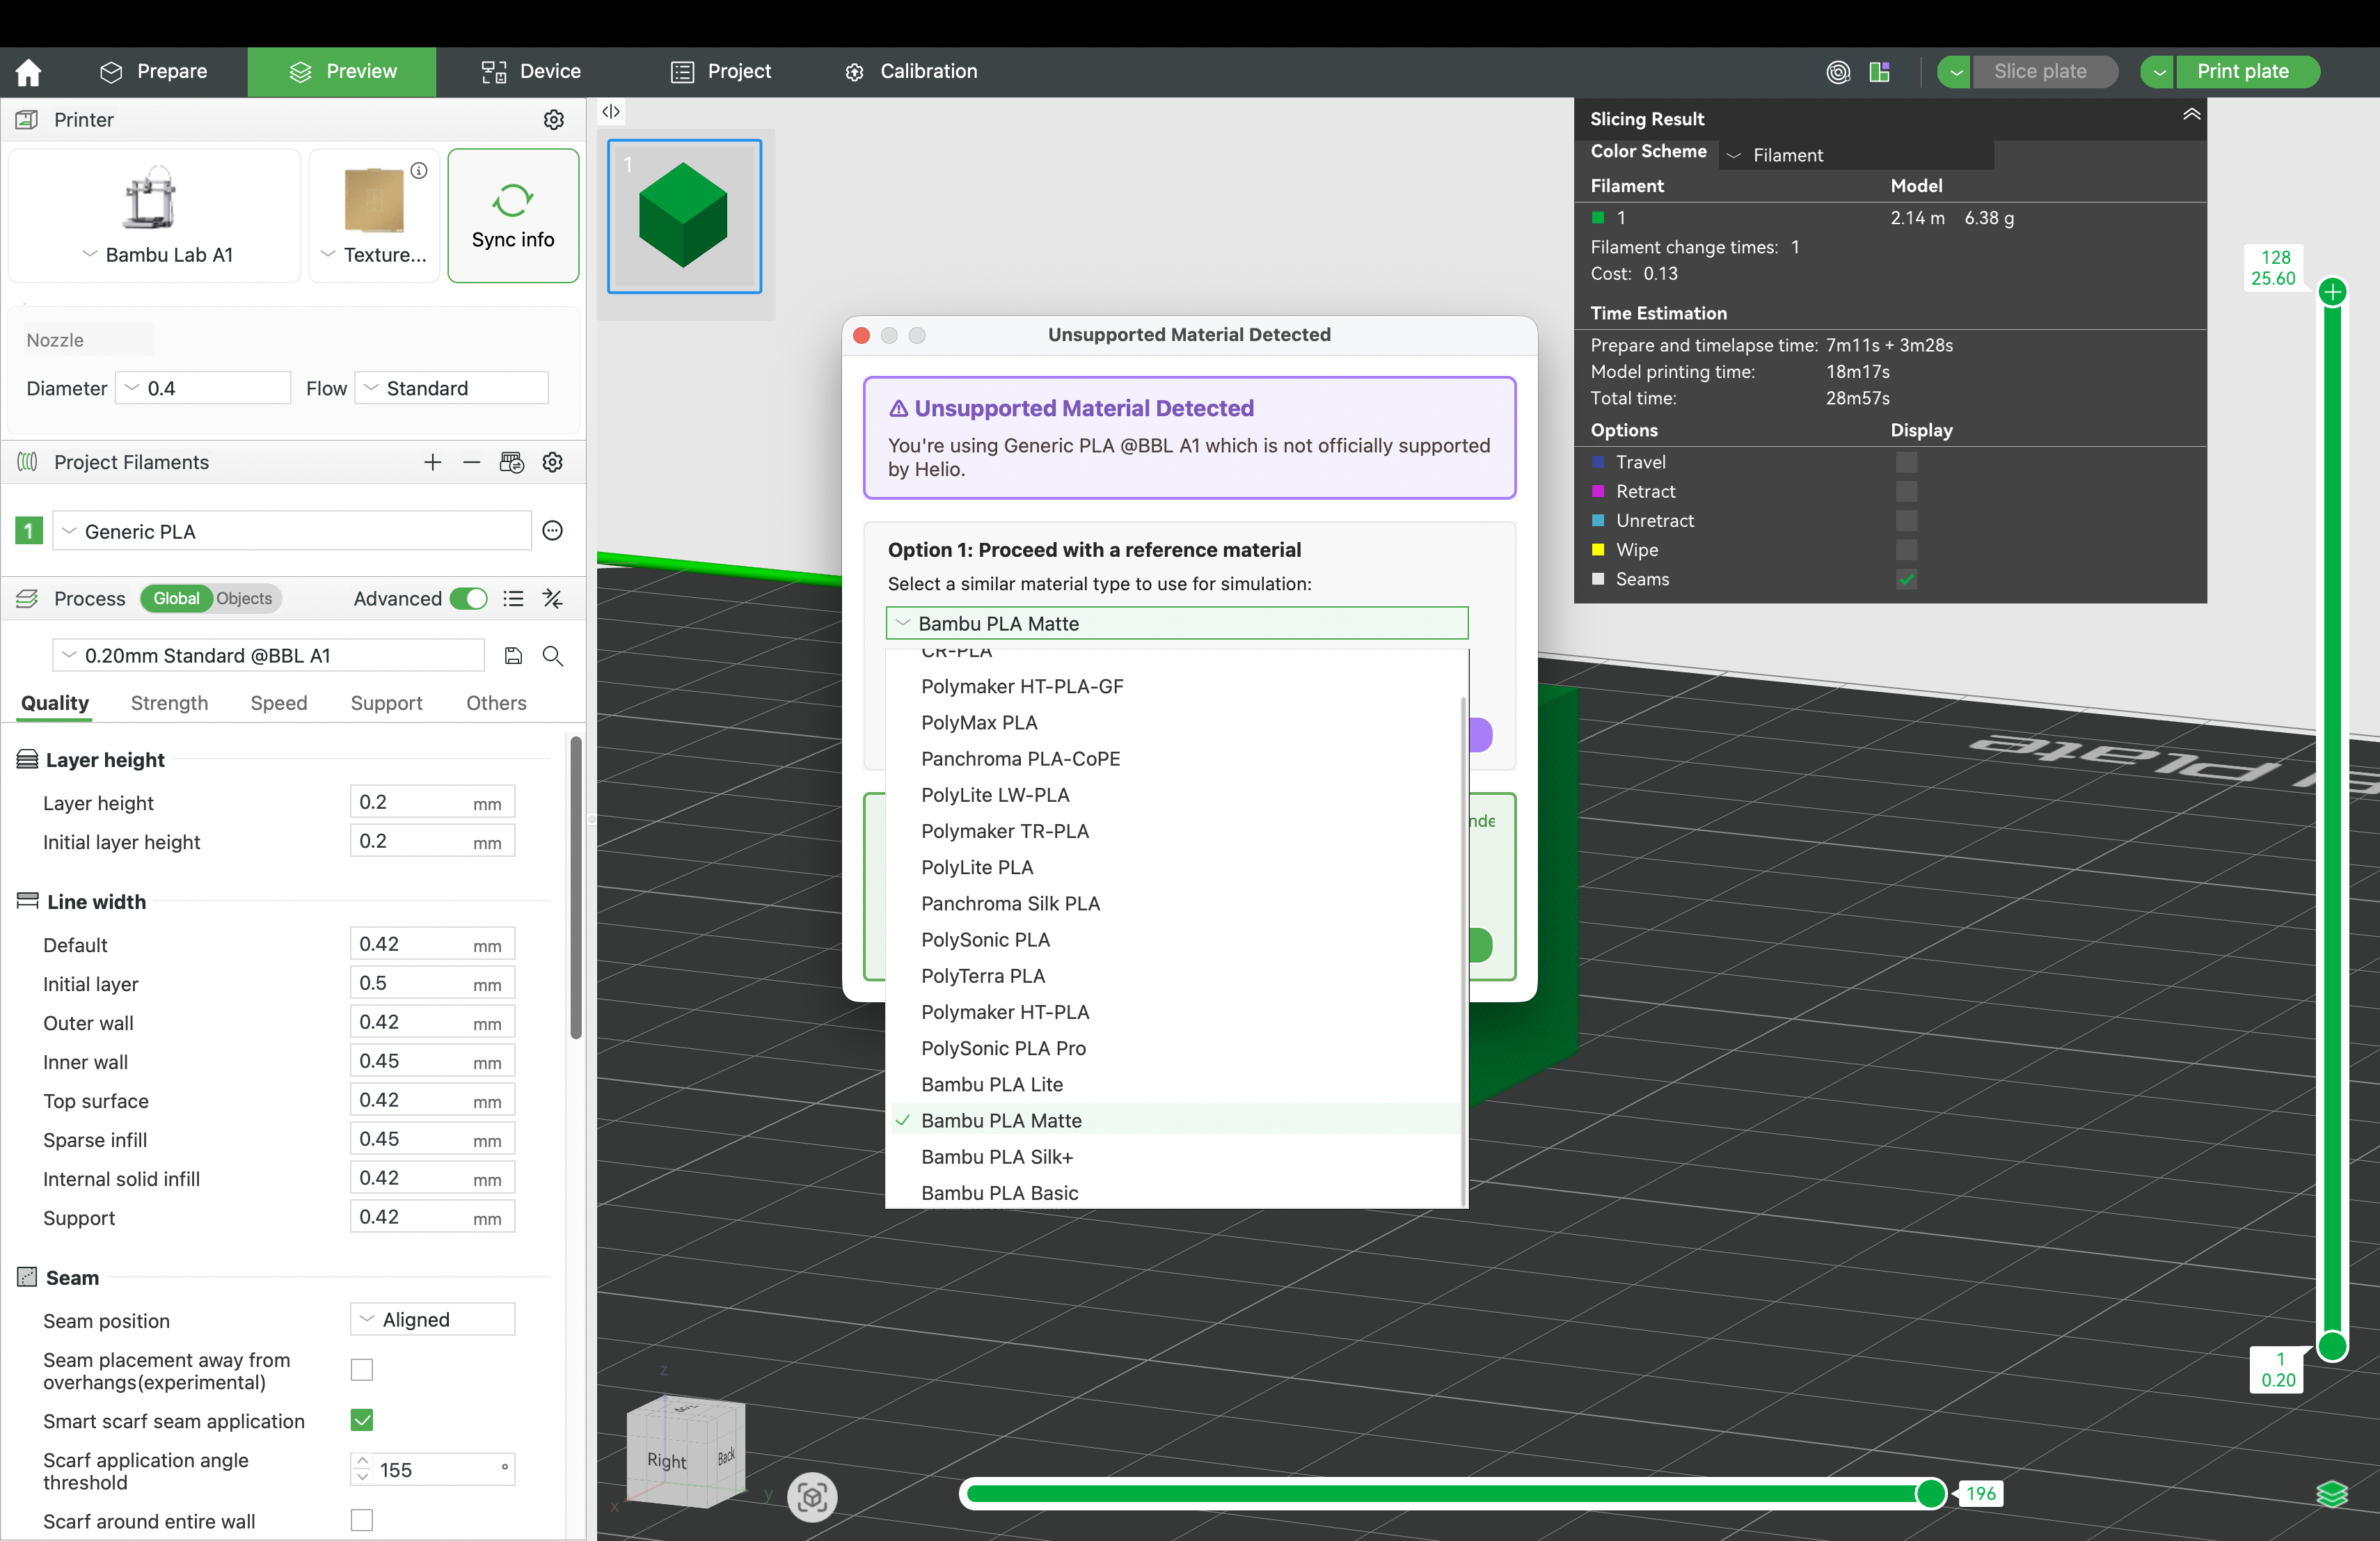
- Run Assess/ Enhance

⚠️ Note: This uses Helio’s material properties for simulation/optimisation, but your slicer settings (temps, speeds) come from the generic profile you selected. For best results, use Method 2 to create a proper custom profile.
¶ 🗾 Method 2: Create Custom Profile
Use this method if you would like to create your own custom material profile, based on the settings you know to work best.
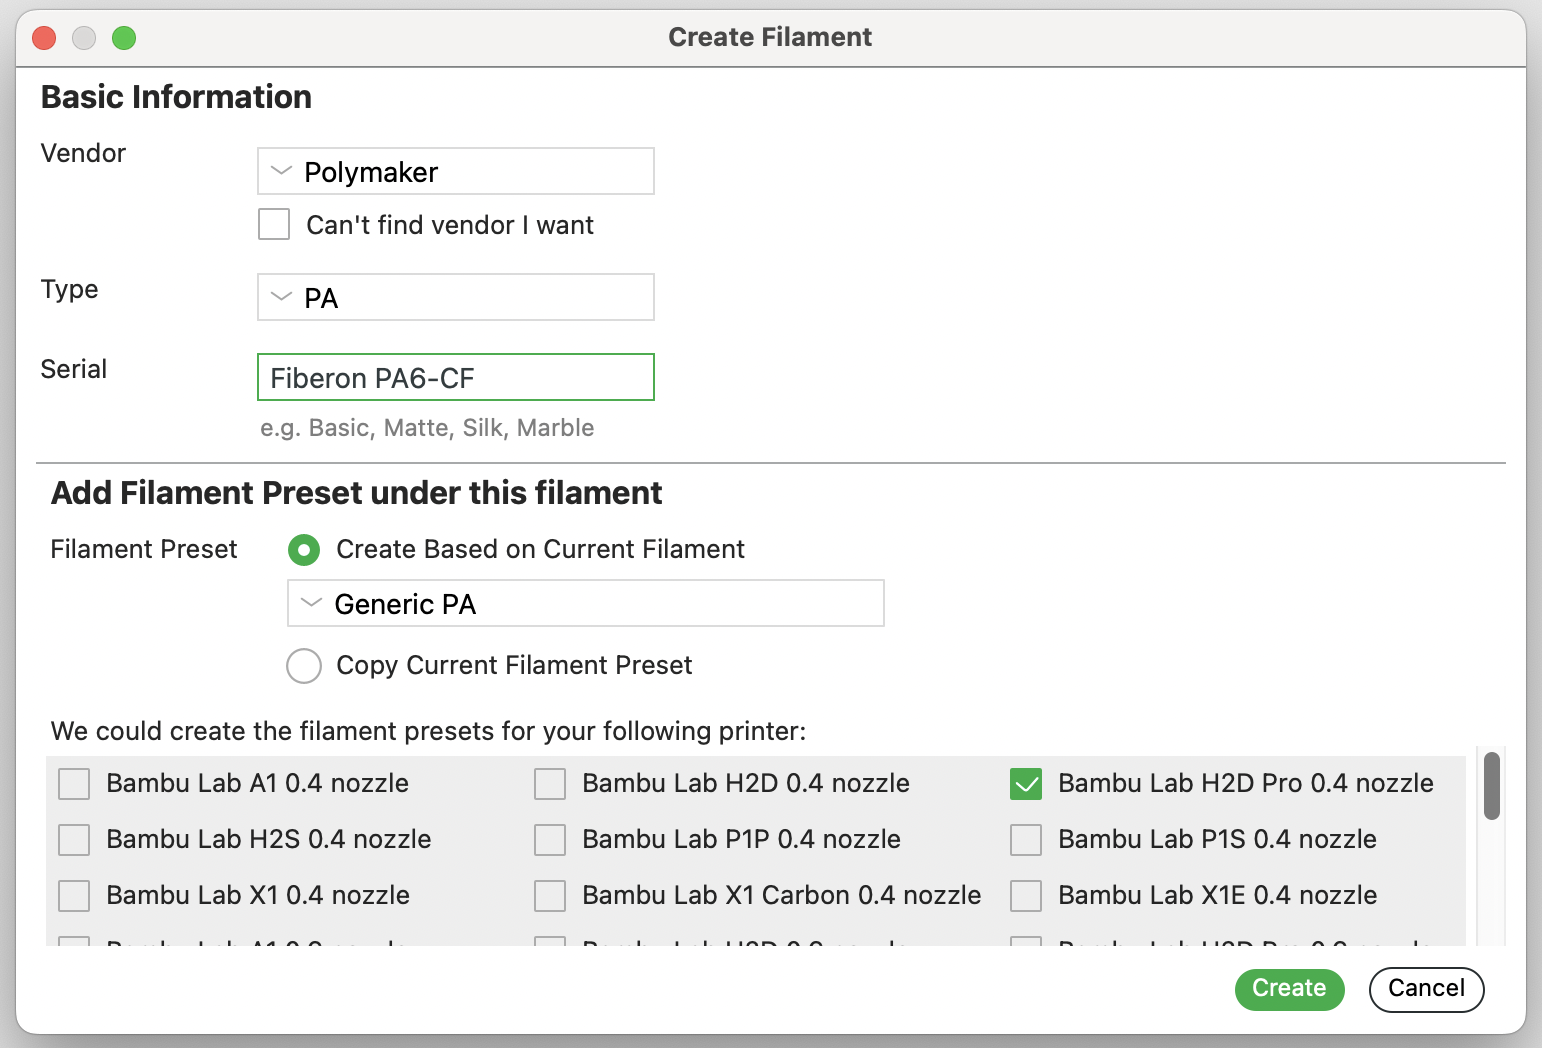
¶ 1. Open the Custom Filaments Menu
- Go to the Prepare tab in Bambu Studio.
- Click the ⚙ Settings icon → Custom Filaments → Create New.
![]()
¶ 2. Fill in the Filament Information
- Vendor: Manufacturer name (e.g., Bambu, Polymaker).
- Filament Type: Polymer type (e.g., PLA, PETG, PA6-CF).
- Filament Name: In the “Serial” field, enter the filament name. Ensure it matches the vendor’s official material name, e.g. Fiberon PET-CF, or PolyLite PLA.
⚠️ Reminder:
- The material needs to be already supported by Helio (confirm here)
- The name needs to match the official material name to map correctly between Bambu Studio and Helio.
¶ 3. Select a Base Filament
- Choose an existing base filament (the closest in type) under “Create Based on Current Filament".
- When creating a custom profile, the base filament you select must already have a profile for your printer. For example, if you’re using an H2D, make sure the base filament (like Generic PLA) already has an H2D profile in Bambu Studio before creating your custom profile from it.
- Select your printer profile(s) — Bambu Studio will create a user filament preset for each one.
¶ 4. Modify Parameters
Adjust these settings according to your best-known parameters or to closely match settings known to print well:
- Nozzle temperature
- Bed temperature
- Cooling fan
¶ 5. Click Save to finish.
Your new filament now appears in User Presets, and you can now select this material for slicing and use it for simulation and optimisation.
¶ 🗾 Method 3: Import Config File
Follow this process if you already have pre-configured filament presets provided by your manufacturer and would like to use those instead. For example, :
¶ 1. Check the filament name
Use your preferred text editor to open your existing configuration file.
Make sure the part of the "Name" field before the @ symbol (e.g., Bambu PC in "Bambu PC @BBL X1C") matches the official material name in our supported materials list.
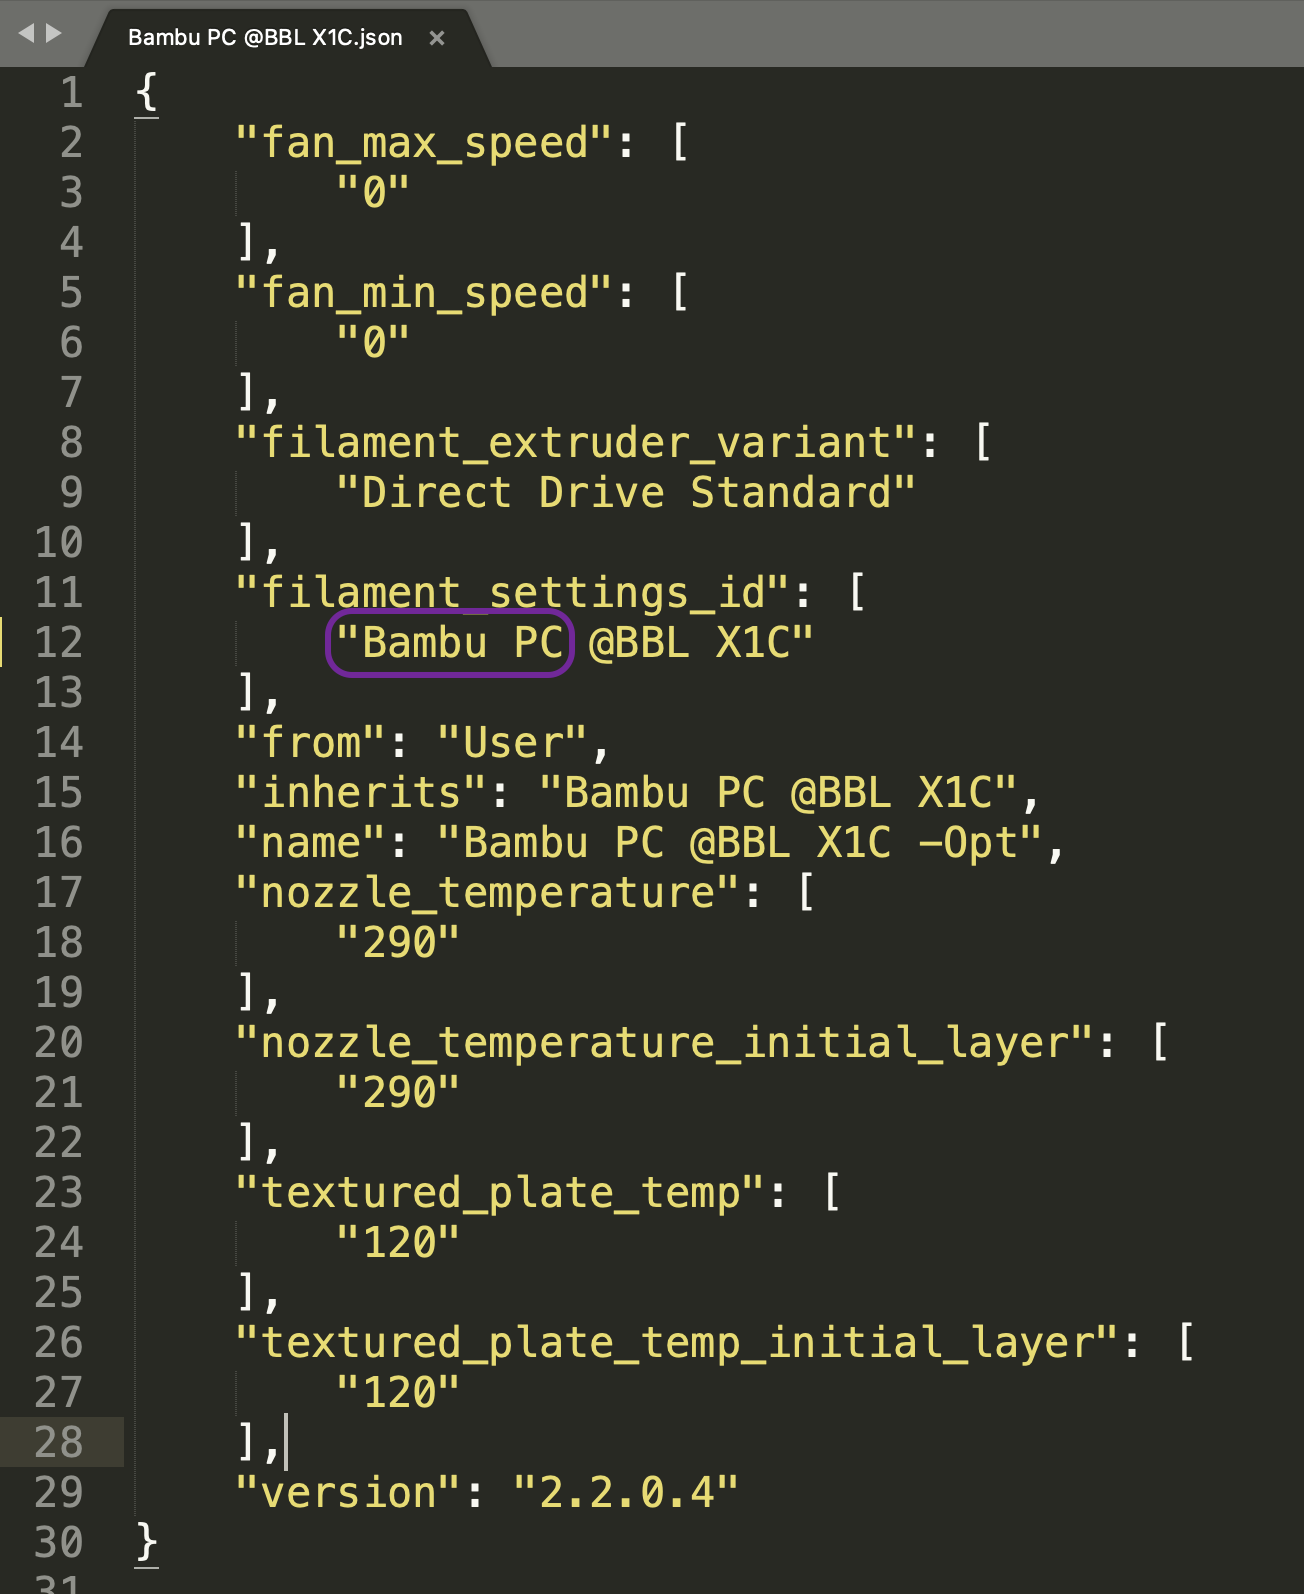
Save your file and close it.
¶ 2. Import your configuration file into Bambu Studio
Go to File → Import → Import Configs and select your configuration file.
After importing, it should appear under Custom Filaments, ready to use for slicing, simulating, and optimizing.