¶ ⚠️ Critical Warning
Helio Optimisation requires your printer to be in good working condition:
- Printer must be well-maintained, not modified (e.g., no AMS Riser or top glass removed), and properly calibrated.
- Build plate must be clean (free of oils, dust, residue). Use the correct build plate for the material. The Bambu PEI plate works for most materials; PC/PA typically require glue
- Filament must be dry — moisture causes extrusion issues and weak bonding.
- Disable any feature that introduces delays to layer time (e.g., time-lapse, pauses) — otherwise optimised G-code will be invalid.
- Review the G-code in the preview and confirm changes before printing. Helio only adjusts your print speeds. Your chamber, nozzle, and bed temps are set in your filament settings.
- Optimisation targets strength and reduced warping, which may trade off some aesthetics. You can balance this via suggestions in the 📖 User Manual.
¶ User Introduction — Helio Optimisation in OrcaSlicer
- This guide will walk you through your first run of Helio Optimisation so you can get printing in as few steps as possible.
- Refer to our list of supported printers and materials here
- For more detail and advanced options, see the full 📖 User Manual.
- For the advantages of optimisation on a filament by filament basis check: Filaments.
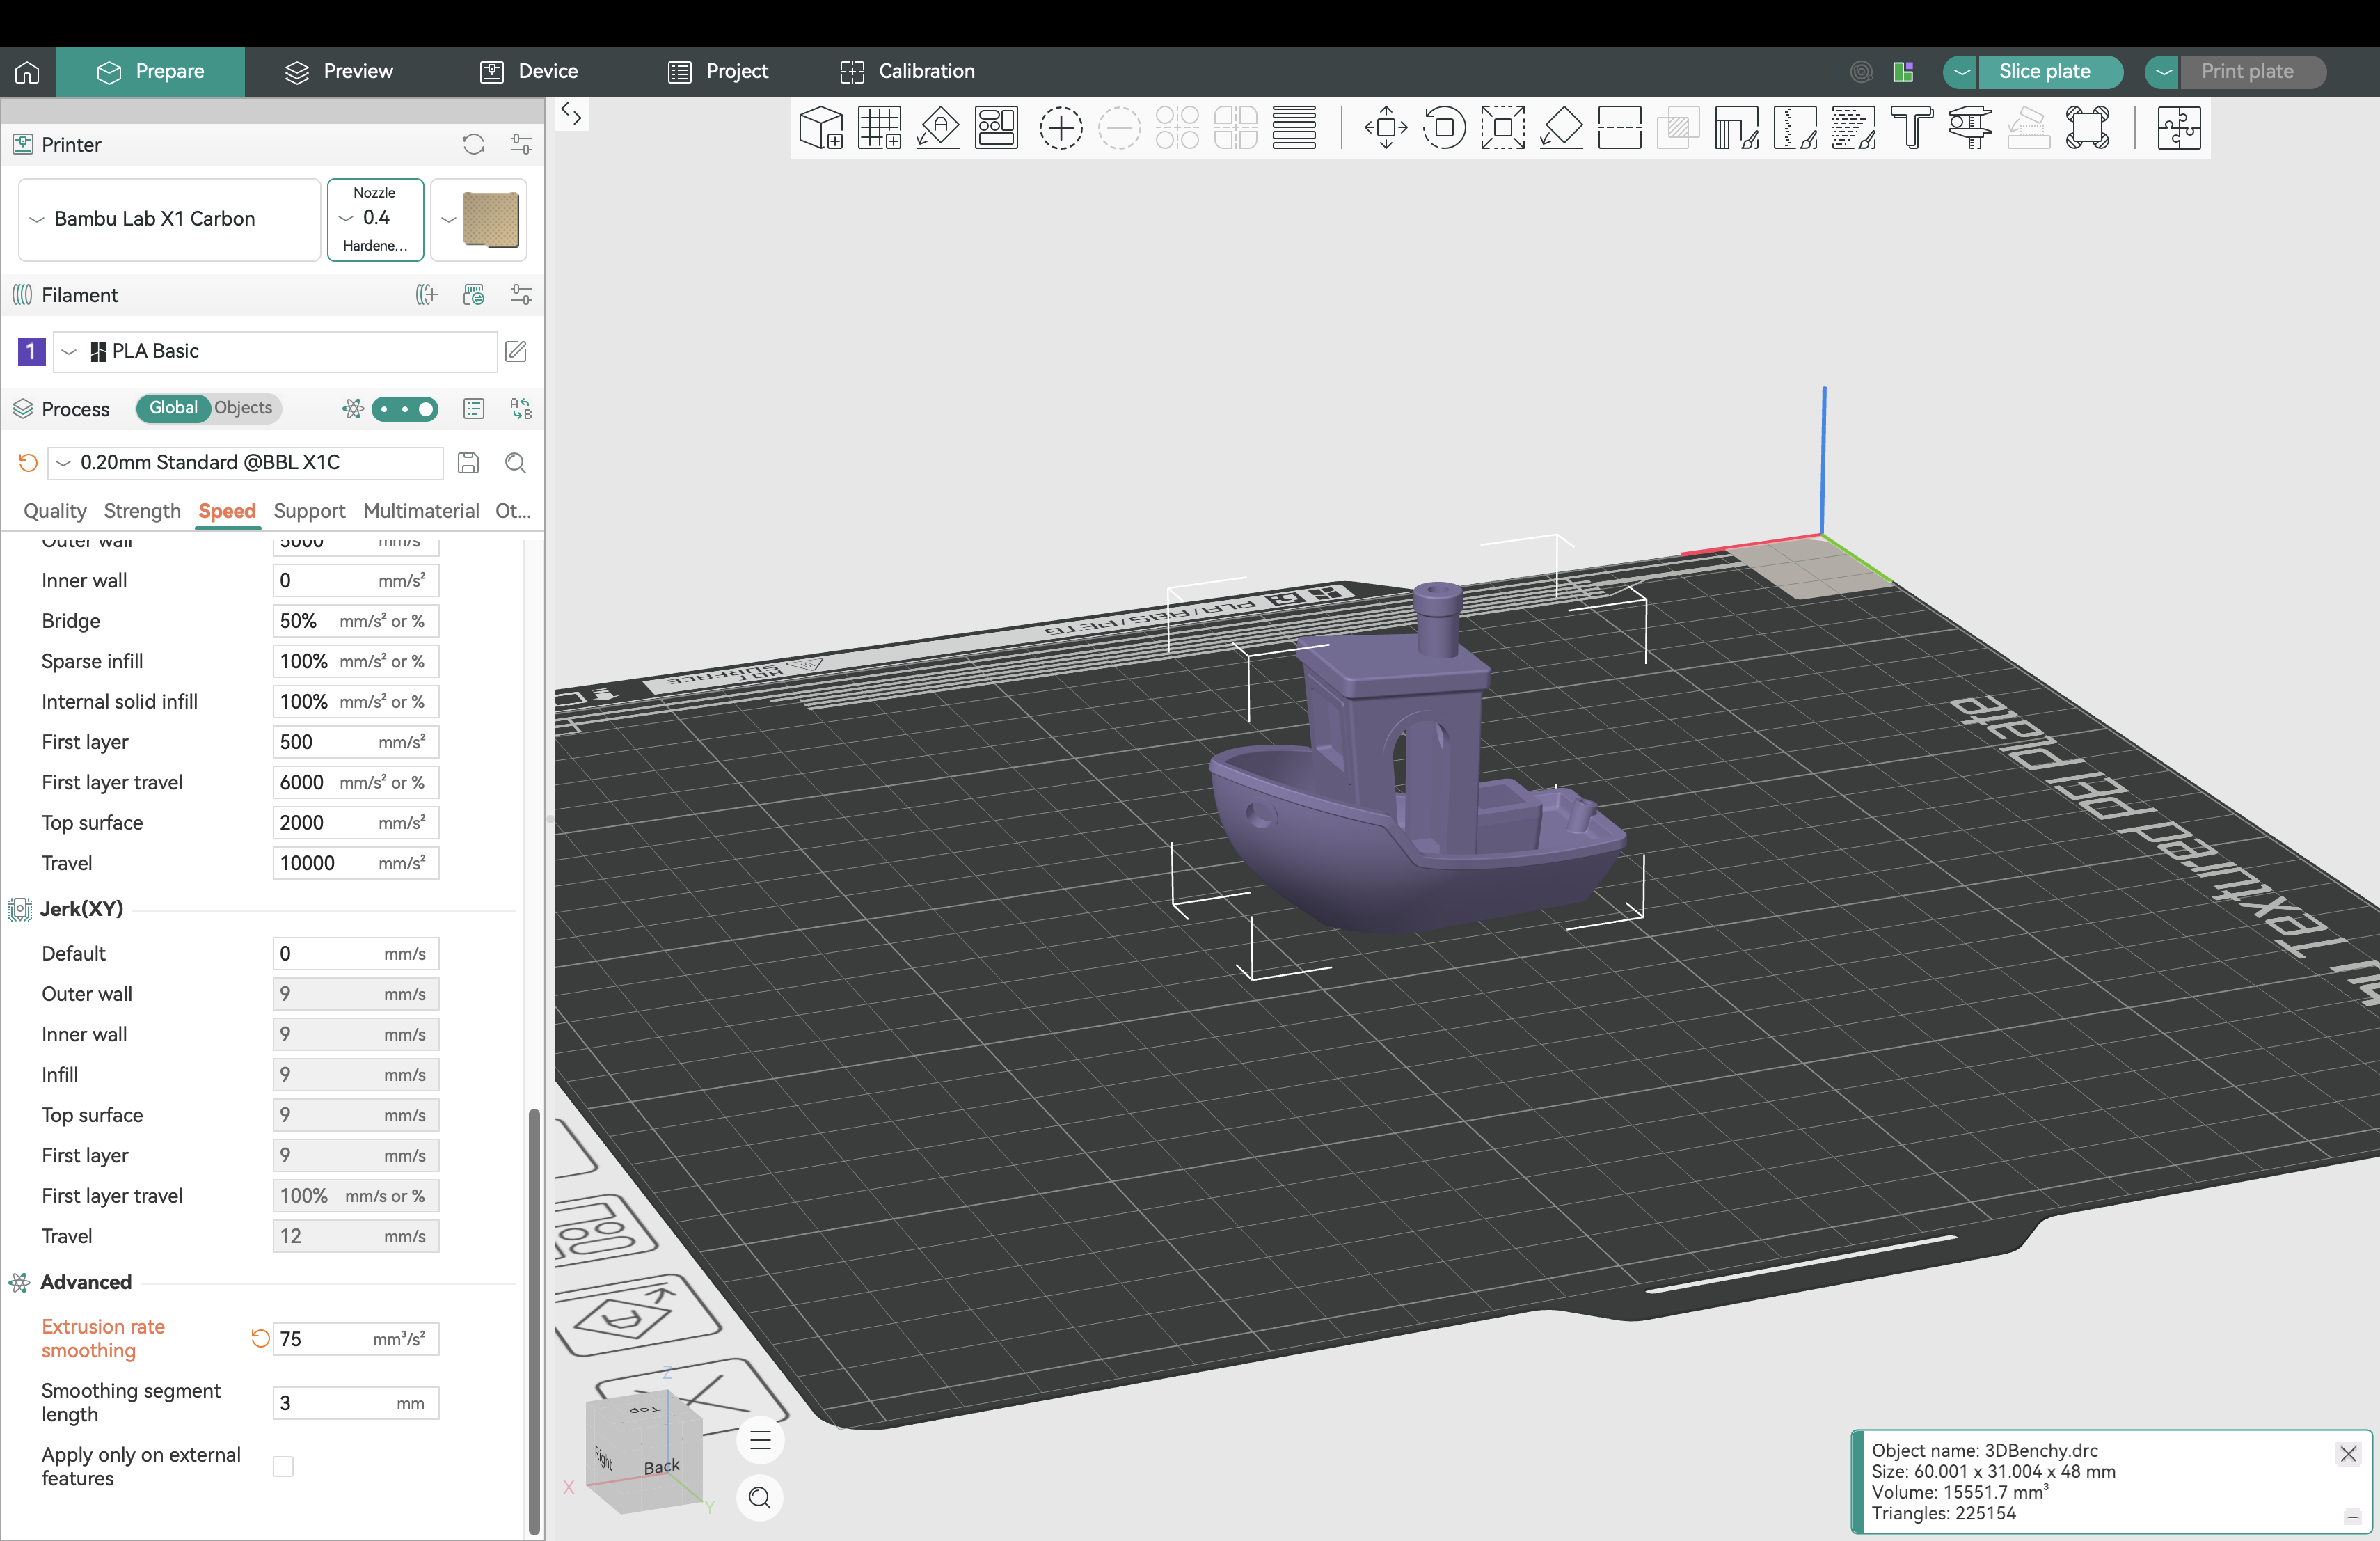
1. Set Extrusion Rate Smoothing = 75
(Speed → Advanced → Extrusion rate smoothing)
A low value makes speed changes smoother when Helio varies speeds across the print.
Recommended for low-Tg materials such as PLA and PETG. Leave at 0 (default) for ABS, PC, and other high-temperature materials.

2. Leave bridges & overhangs at defaults
Helio does not retune these. Keep the slicer defaults or your settings that are already known to work well.
3. Leave seam as "Aligned" or "Back"
Using aligned or back seam forces a repeatable print sequence on each layer. This improves thermal uniformity and gives the optimizer a more stable baseline, leading to more reliable improvements.
4. Slice → Helio Action → Enhance
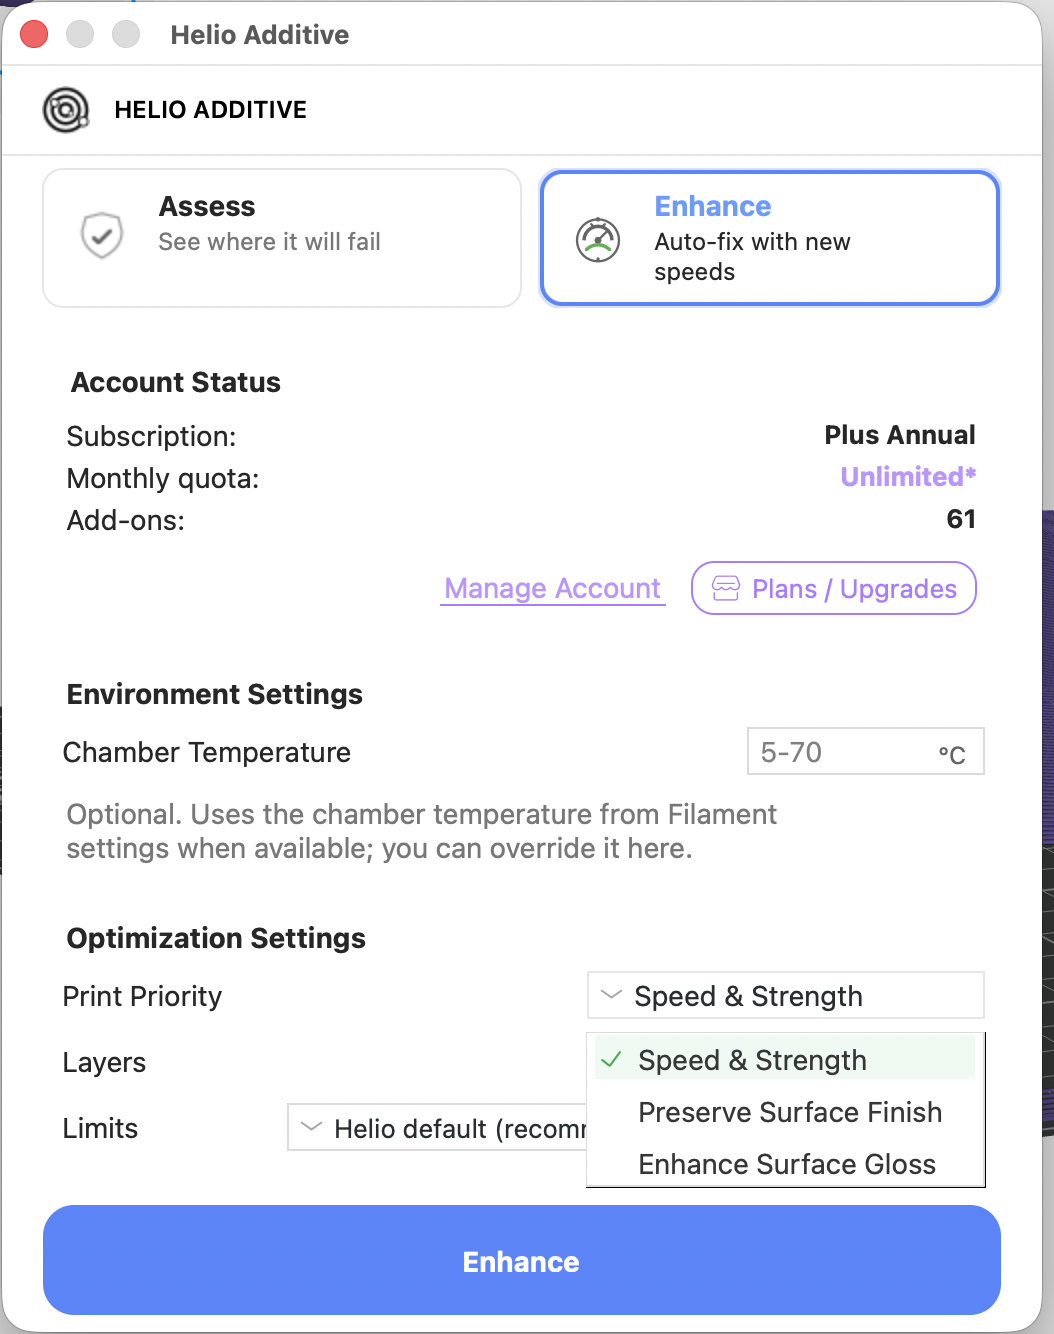
5. Print Priority
In the Helio dialog, set:
- Speed & Strength — fastest print speed with optimal layer bonding
- Preserve Surface Finish — maintains the original surface texture
- Enhance Surface Gloss (available for specific materials) — improves visual quality
6. Confirm and wait for Optimization to complete.
7. Review the summary & gcode in preview, check adjusted speeds, layer times, etc, and if happy go and print.
¶ Material Specific Quick Start Guidance
To get the best from the optimiser for specific materials we recommend the following actions:
¶ Low-Tg materials (PLA, PETG)
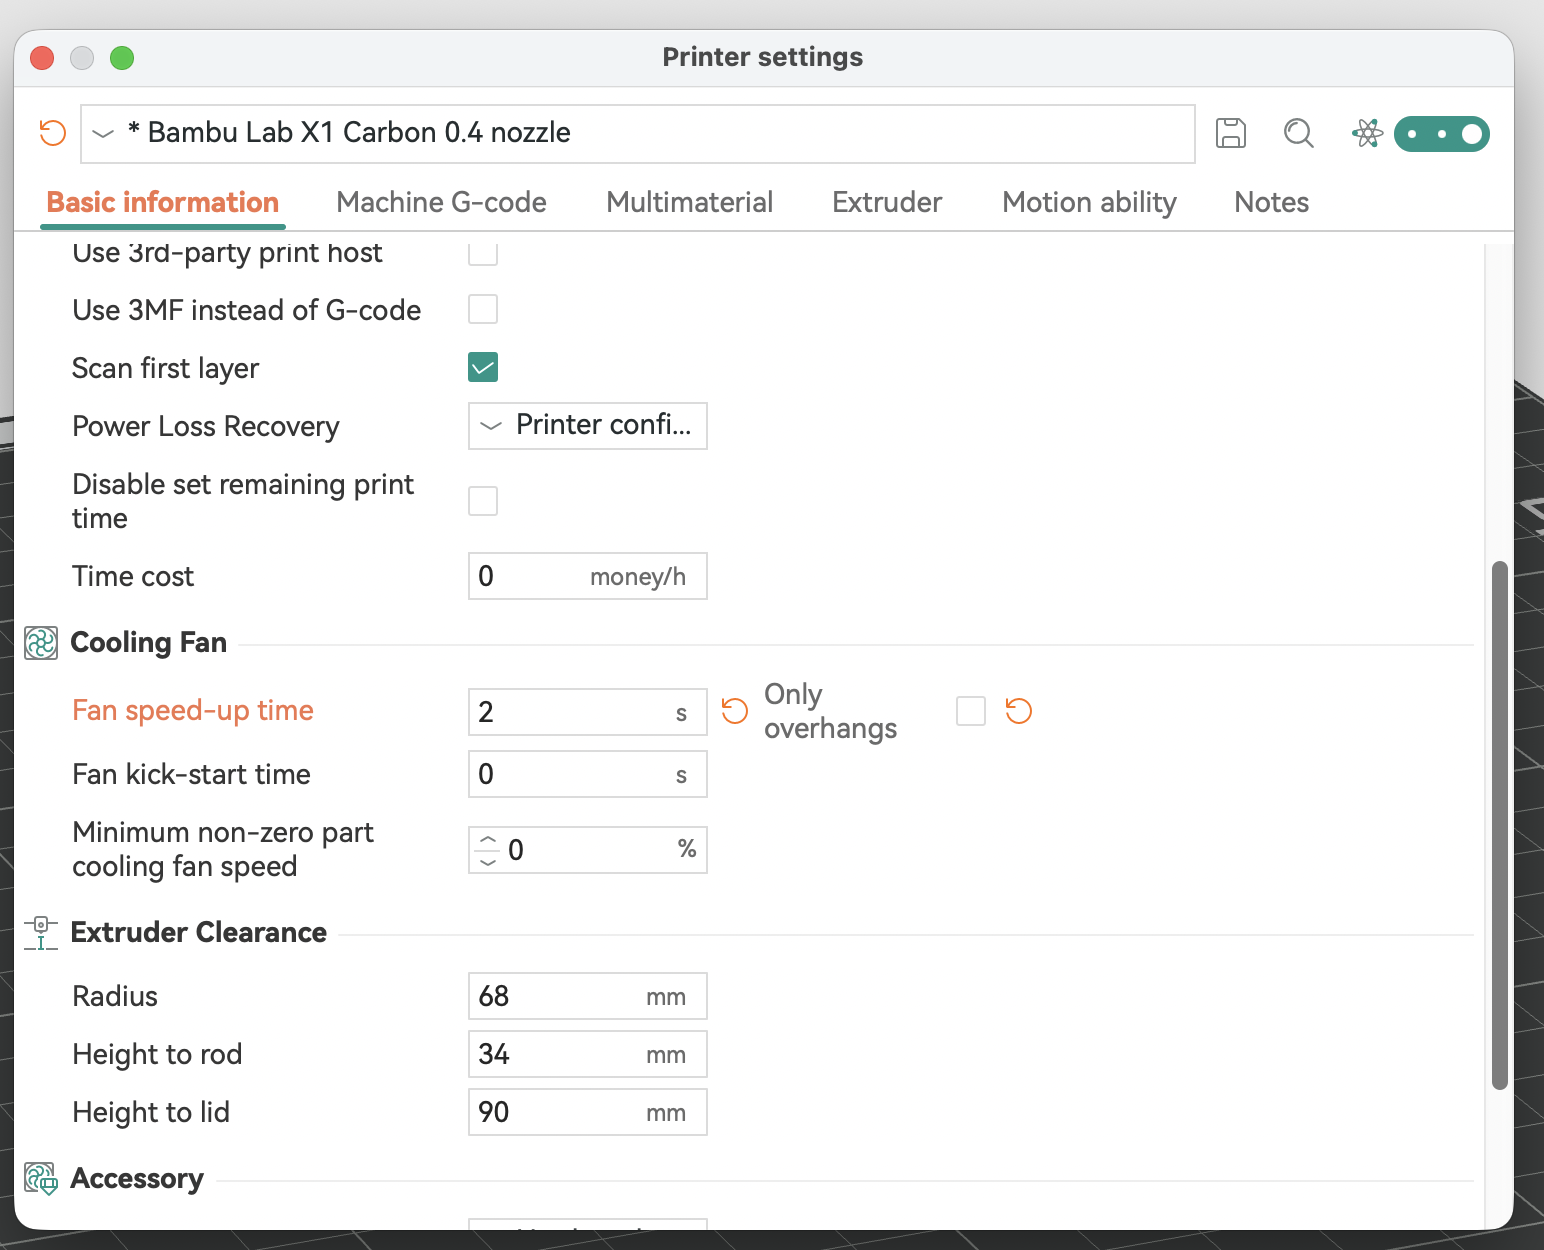
1. Printer → Basic information → Pre start fan time = 2 s
Ensures the fan is spinning before delicate regions. Disable 'only overhangs' to make sure it applies to all sections of the print

2. Keep all other defaults (e.g. fan profile).
3. Slice → Helio → Enhance → Confirm → Print.
¶ High-Glass Transition Temperature (Tg) Materials (PC, ABS/ASA, PA)
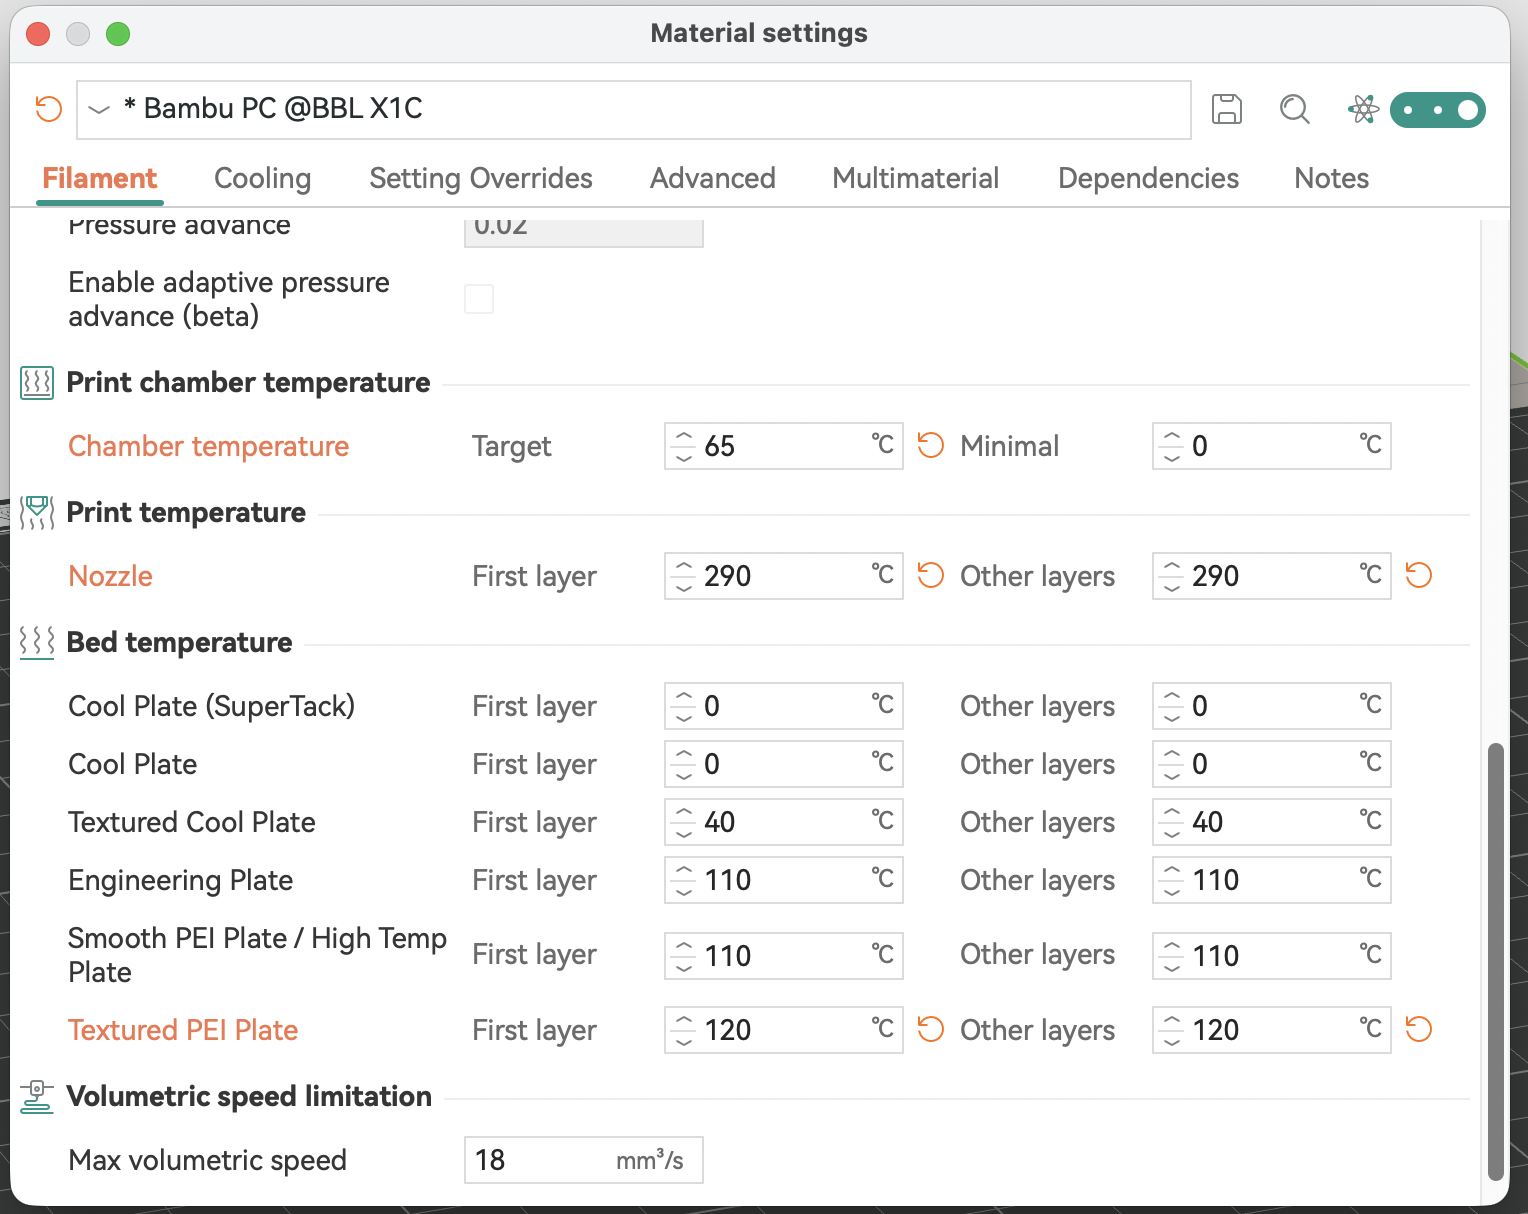
1. Bed temp = max recommended.
2. Chamber temp = max (if supported).
3. Nozzle temp = top of recommended range (or per temp tower).
3. Slice → Helio → Enhance → Confirm → Print.
¶ ⚡ Performance Notice
Enhance(Optimisation) takes longer than Assess (simulation) because multiple simulations are run to find the best solution:
- Rough guide: parts up to half build volume optimise in reasonable time.
- Larger parts → set slicer to minimum layer time and run Assess only.
¶ ⚠️ Known Limitations
- Filament swaps or long pauses break thermal continuity.
- Timelapse photography interferes with layer timing.
- Non-standard slicer mods are unsupported.
- Exotic materials may not be covered unless listed in caps table.
¶ ✔️ Reminder
Helio Enhance is designed to reduce warping and improve strength. Aesthetics may change slightly, but you can balance strength vs. finish using the User Manual’s guidance. Always review the G-code preview before printing.