¶ ⚠️ Critical Warning
Helio Optimisation requires your printer to be in good working condition:
- Printer must be well-maintained, not modified (e.g., no AMS Riser or top glass removed), and properly calibrated.
- Build plate must be clean (free of oils, dust, residue). Use the correct build plate for the material. The Bambu PEI plate works for most materials; PC/PA typically require glue.
- Filament must be dry — moisture causes extrusion issues and weak bonding.
- Disable any feature that introduces delays to layer time (e.g., time-lapse, pauses) — otherwise optimised G-code will be invalid.
- Review the G-code in the preview and confirm changes before printing. Helio only adjusts your print speeds. Your chamber, nozzle, and bed temps are set in your filament settings.
- Enhance targets strength and reduced warping, which may trade off some aesthetics. You can balance this via suggestions in this manual.
¶ 📖 User Manual — Helio Enhance in Bambu Studio
New here? The Quick Start Guide is a 60-second walk-through. This page is the authoritative reference.
¶ Table of Contents
- What Helio Does
- Quick Start Essentials (with WHY)
- Modes of Operation
- Key Slicing Parameters (Pre-optimisation)
- Material-Specific Guidance
- Performance, Scope & Limits
- Best Practices
- When Not to Use Optimisation
- Troubleshooting
- Glossary
¶ What Helio Does
Helio modifies your sliced G-code using physics-based thermal simulation:
- Simulates according to your filament profile (nozzle, bed, chamber, cooling).
- Adjusts layer time to keep voxels in the material’s bonding window for stronger parts.
- Changes speed layer-by-layer to reduce residual stresses and warping.
- Starts optimisation from Layer 2 (first layer is left for adhesion tuning).
- Focuses on interlayer bonding strength; aesthetics can be balanced separately.
- Does not alter nozzle/bed/chamber temperatures, extrusion width/height, or fan profiles; those remain in your slicer.
¶ Quick Start Essentials (with WHY)
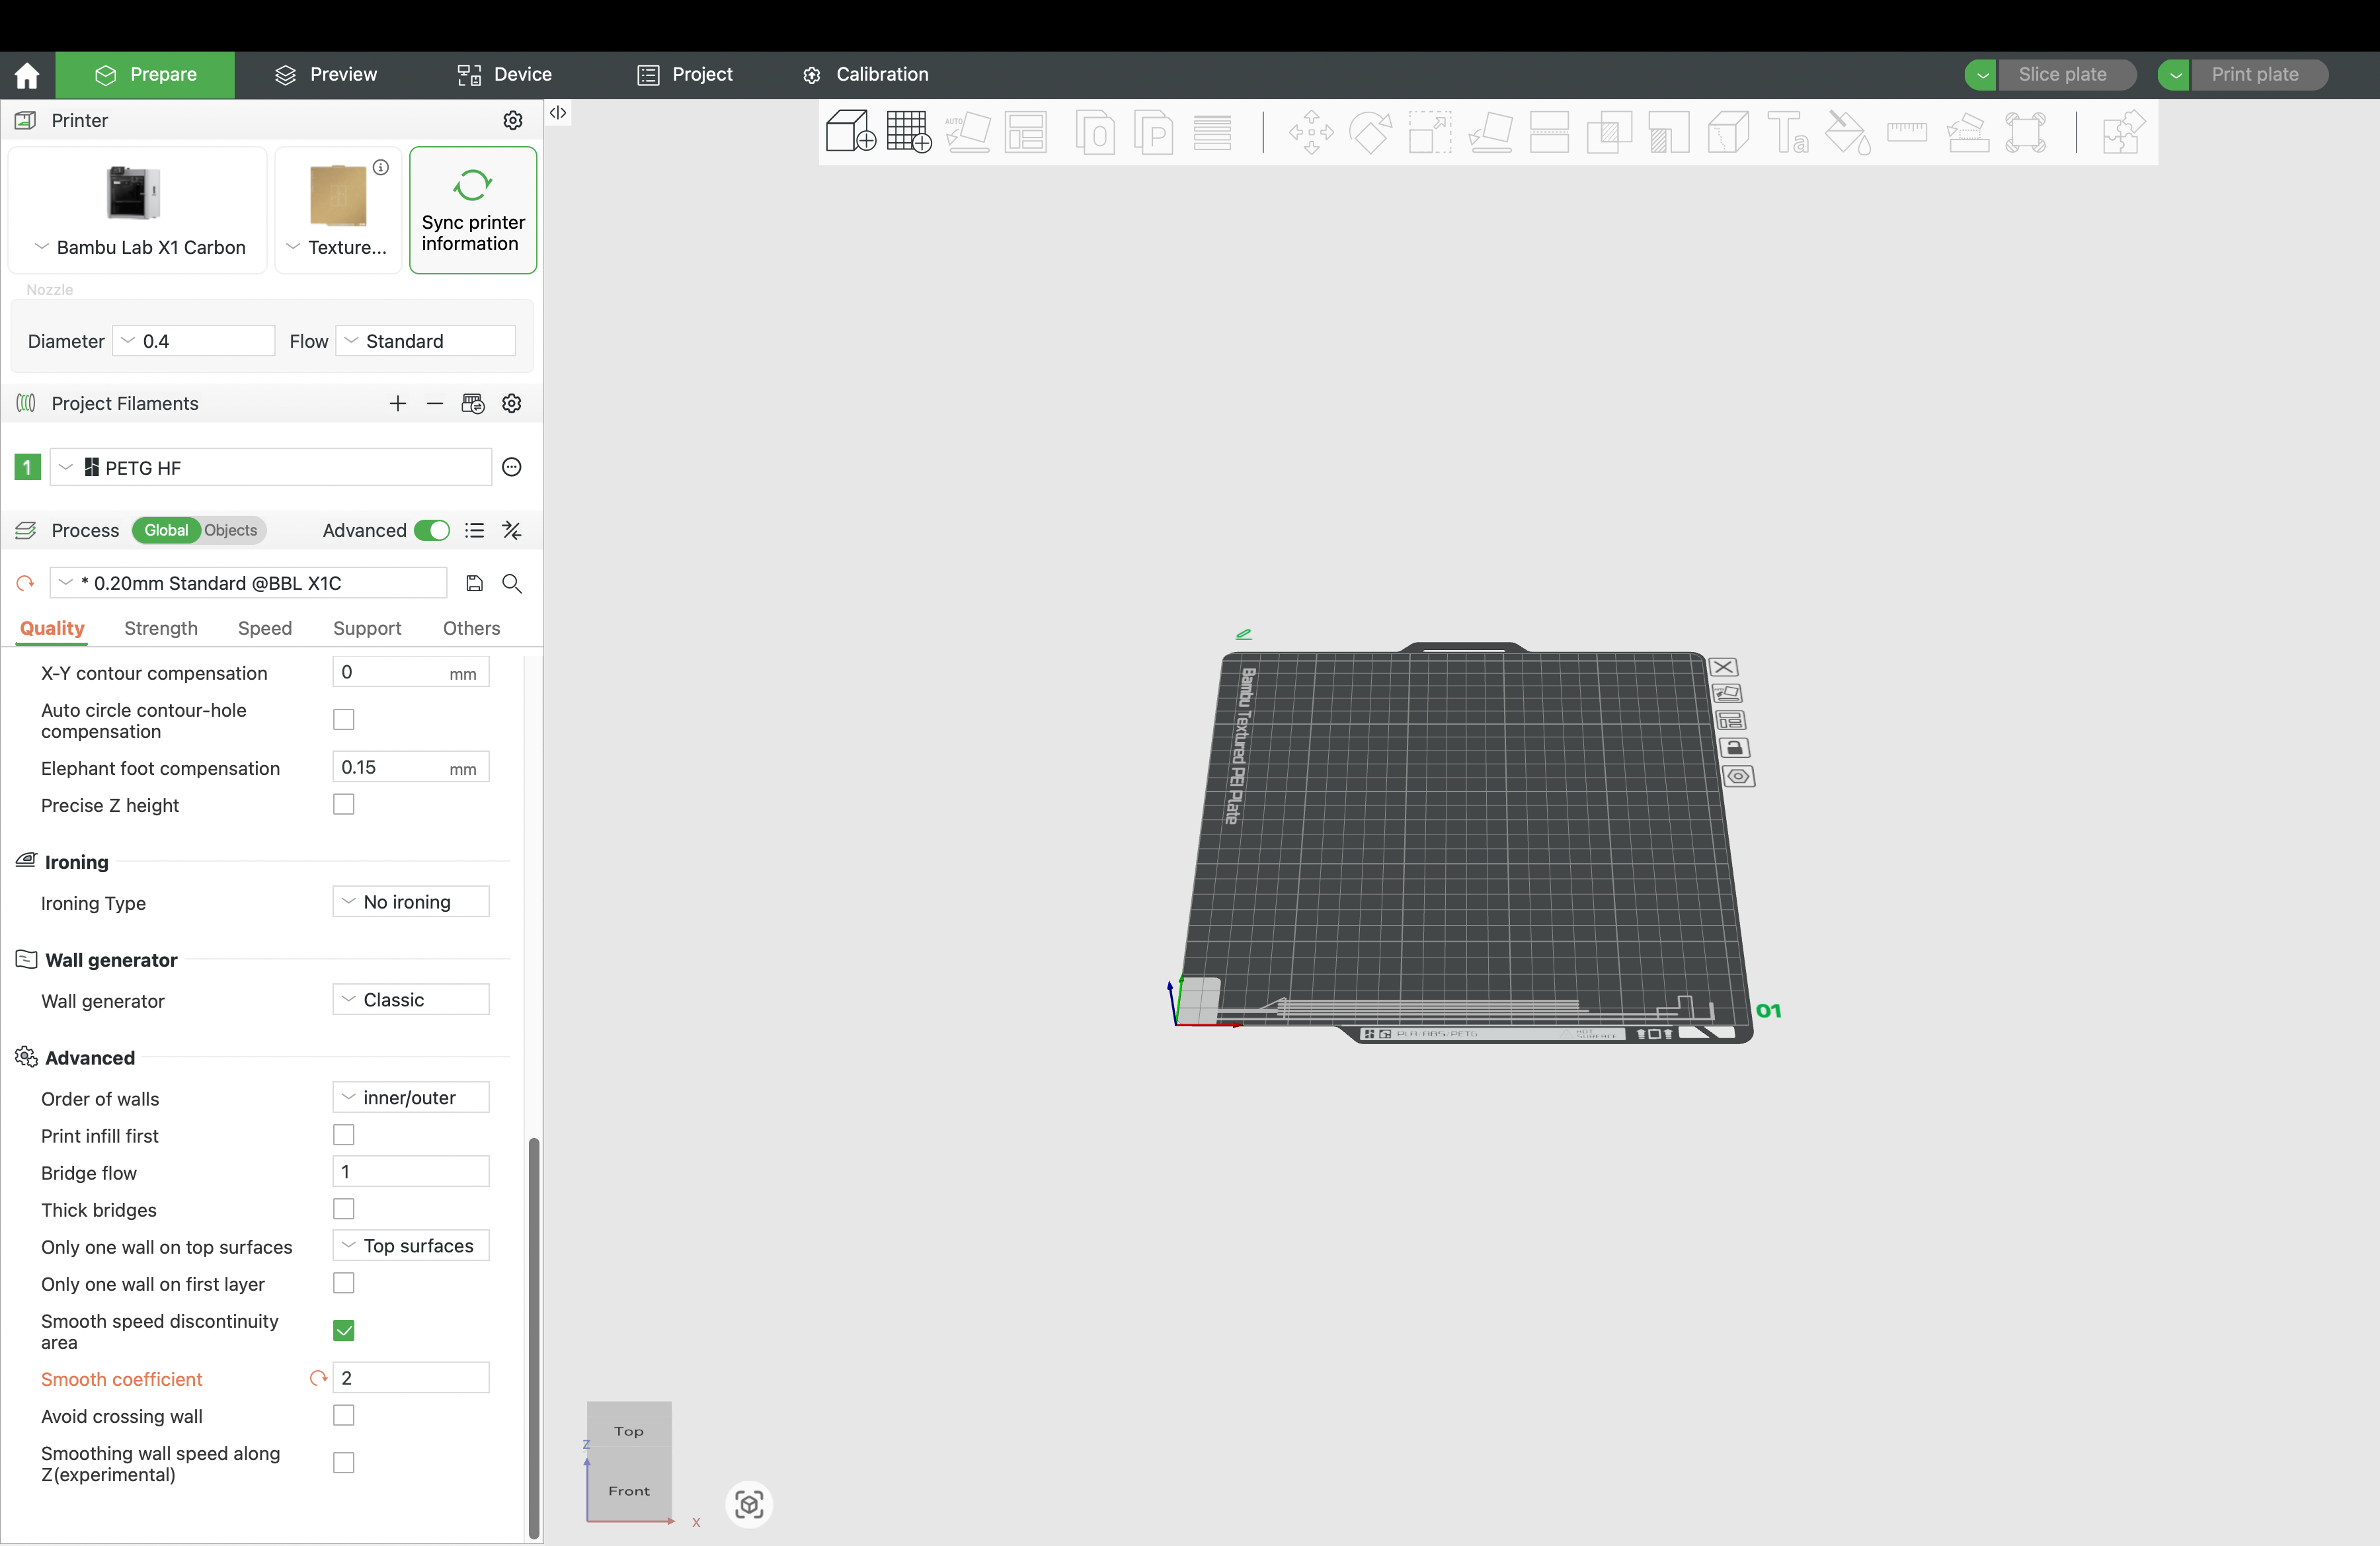
1. Set Smooth Coefficient = 0.2
(Quality → Advanced → Smooth coefficient)
A low value makes speed changes smoother when Helio increases speeds.
Why: Helio often raises speeds to shorten layer time and keep layers warm. Smoother transitions reduce jerk/accel spikes and ringing, and give the optimiser more headroom to vary speed without artefacts.

2. Leave bridges & overhangs at defaults
Helio does not retune these. Keep the slicer defaults or your settings that are already known to work well.
Why: Bridges/overhangs are edge cases where pushing speed can collapse features. By leaving proven settings untouched, Helio can safely optimise global timing without risking these sensitive regions.
3. Slice → Helio Action → Enhance
Why: Enhance runs multiple simulations to find speeds that keep each layer in the bonding window while respecting your flow caps.
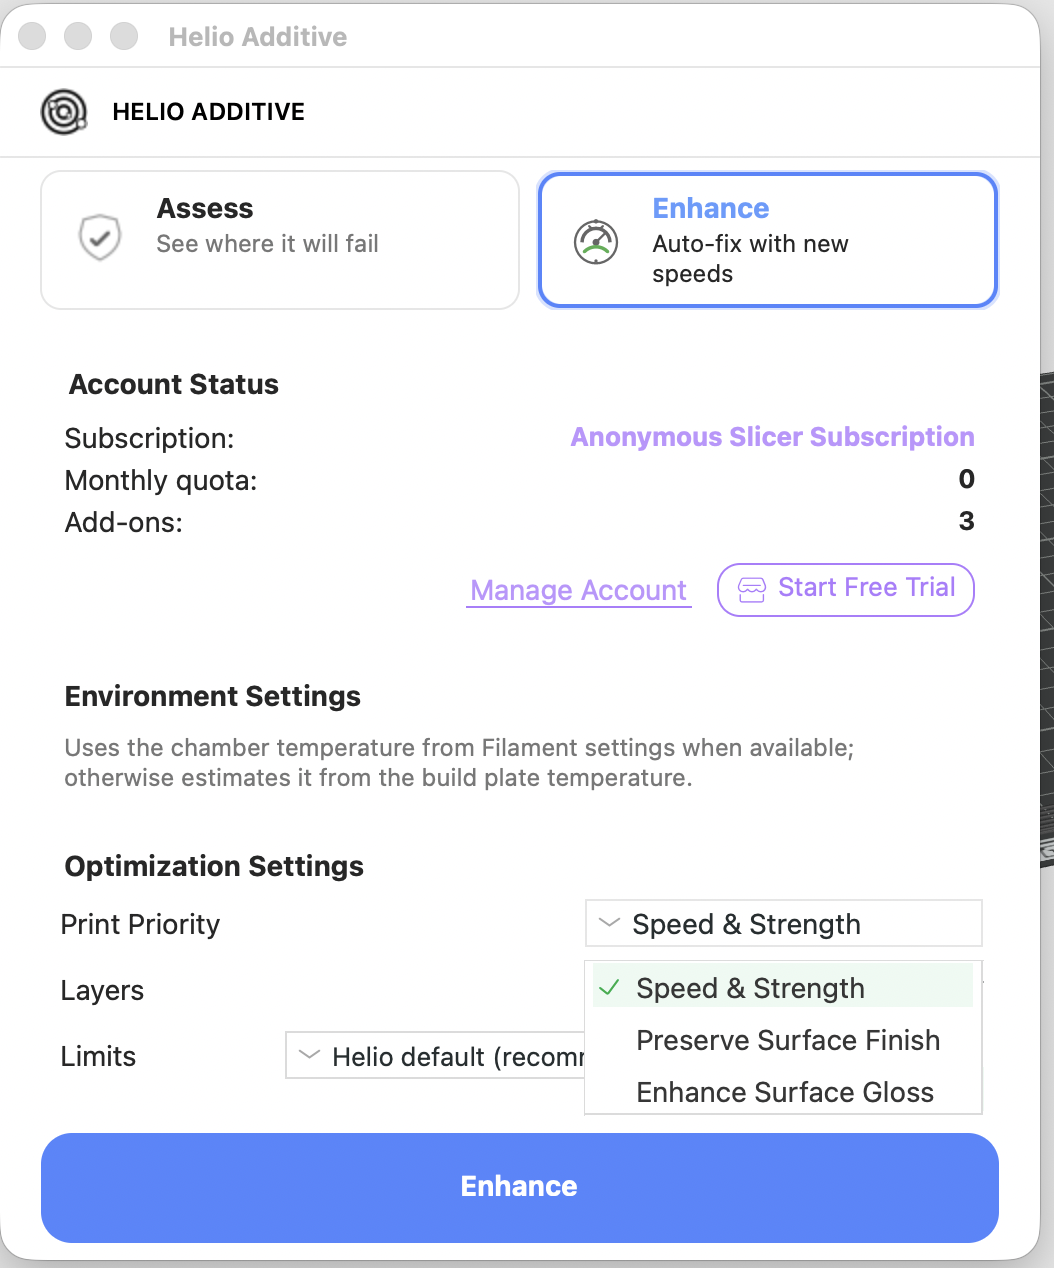
4. Print Priority
In the Helio dialog, set to:
- Speed & Strength — maximises layer bonding and mechanical strength
- Preserve Surface Finish — prioritises the original slicer-defined surface quality
- Enhance Surface Gloss — delivers the best visual quality (available for specific materials i.e PLA Silk+)
Why: Helio regulates extrusion temperature by adjusting print speed. Applying this control to outer walls can introduce small speed variations that affect surface appearance.
Use Preserve Surface Finish to keep a slicer-tuned finish, Enhance Surface Gloss to further improve visual appearance, or Speed & Strength to allow temperature-driven speed correction on the entire object for more uniform bonding.
5. Confirm and wait for Optimization to complete.
6. Review the summary & G-code in preview, check adjusted speeds, layer times, etc., and if happy, print.
Why: The preview lets you validate that speed ramps and layer-time changes align with your intent or prior experience before you commit material.
¶ Modes of Operation
Note: for sub 0.2 mm layer heigths & unsupported materials only slicer defaults mode is possible. In all modes you can optionally pick your print priority, limit optimisation to specific layers (e.g., focus only on chimneys, needle tips).
¶ Helio Default Mode (recommended)
- Balances bonding strength while squeezing speed where possible.
- Minimal user input.
¶ Slicer Default Mode
- You can override limits: max volumetric flow (mm³/s) and per-feature speed caps .
- Starts from the slicer’s own defaults (often conservative); adjust upward/downward as appropriate.
Use Slicer Default Mode if you:
- Know your filament’s real flow rate ceiling (e.g., from flow and temperature tower calibrations).
- Are using a high flow nozzle that can achieve higher flow rates than standard.
¶ Key Slicing Parameters (Pre-optimisation)
¶ Smooth Coefficient
Controls how smoothly speeds ramp when Helio changes speed.
Recommended: 0.2.
Why: Gentler ramps reduce ringing/overshoot when Helio varies speed to meet layer-time goals.
¶ Outer Wall First vs. Infill First
- Outer wall first → best aesthetics (crisper surfaces).
- Infill first → safer for extreme overhangs/bridges.
Why: Printing the outer wall first locks in the surface finish before internal heat affects the contour; printing infill first gives marginally more support/thermal mass for challenging spans.
¶ Cooling / Fans
Keep your known-good cooling profile. Helio doesn’t change fan curves.
For low-Tg (PLA/PETG), set Pre-start fan time = 2 s (Filament → Cooling).
Why: When Helio raises speed, segment times shrink. Pre-starting the fan ensures it reaches target RPM before delicate regions, avoiding under-cooling or temperature spikes.
¶ Special case: No controlled chamber (bed-only heating)
If your enclosure warms over time from the bed alone, treat each job as start-from-cold. Vent the enclosure between runs.
Why: Stable starting conditions make Helio’s thermal predictions more accurate and repeatable.
¶ Material-Specific Guidance
¶ Low-Tg materials (PLA, PETG)
1. Filament → Cooling → Pre-start fan time = 2 s
Ensures the fan is spinning before delicate regions.
Why: Helio may increase speed, reducing dwell time. Pre-spin avoids the fan lagging behind requested RPM, which could otherwise soften small features or round sharp corners.


2. Keep all other defaults (e.g. fan profile).
Why: Your slicer profile is already tuned to prevent PLA/PETG deforming on small features. Helio focuses on timing; it won’t change fan curves.
3. Slice → Helio → Enhance → Confirm → Print.
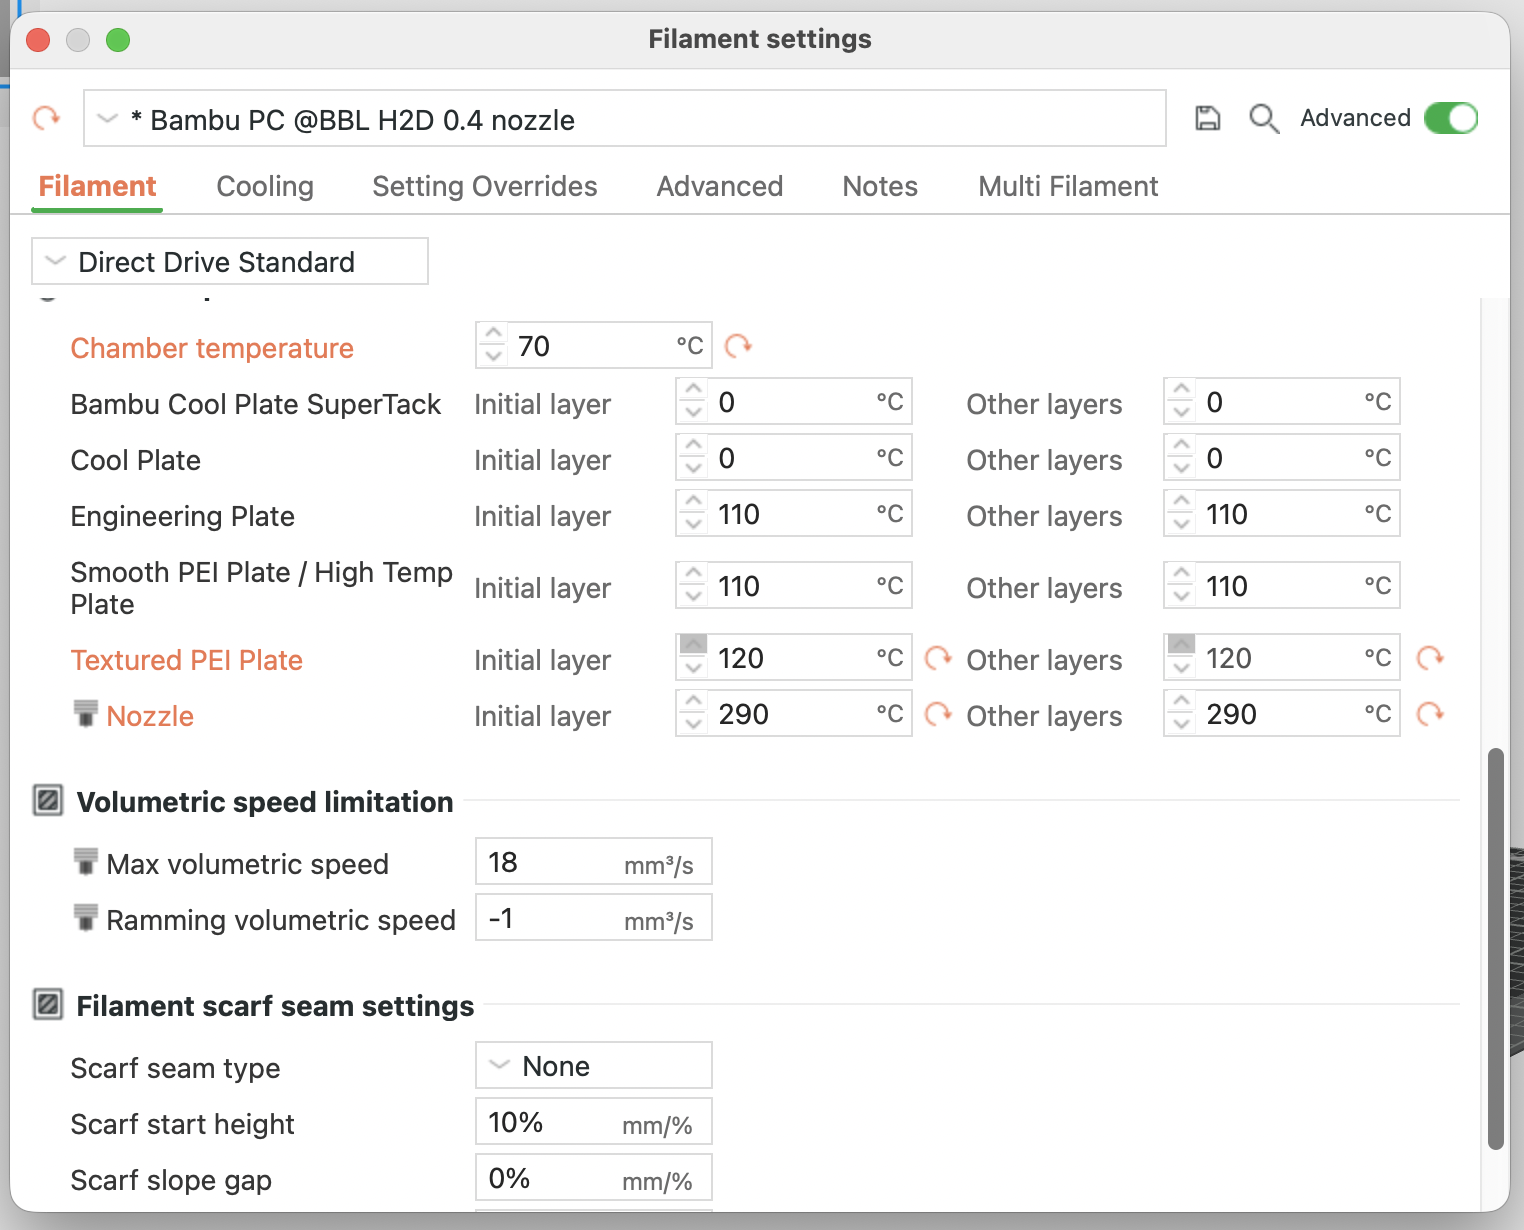
¶ High-Glass Transition Temperature (Tg) materials (PC, ABS/ASA, PA)
1. Bed temp = max recommended.
2. Chamber temp = max (if supported).
3. Nozzle temp = top of recommended range (or per temp tower).
Why: A warmer baseline widens the bonding window and reduces thermal gradients → less residual stress/warping. Helio manages speed/layer time; you set the thermal environment.
4. Slice → Helio → Enhance → Confirm → Print.
¶ Performance, Scope & Limits
¶ ⚡ Performance Notice
Enhance takes longer than assess because multiple simulations are run to find the best solution:
- If optimisation fails or you stop it, your quota is refunded.
- Rough guide: parts up to half build volume optimise in reasonable time.
- Larger parts → set slicer to minimum layer time and run assess only.
Known limitations
- Filament swaps and long pauses break thermal continuity.
- Timelapse photography interferes with layer timing.
- Non-standard slicer modifications are unsupported.
- Exotic materials may not match caps unless listed above (use Slicer Defaults Mode to set safe caps).
¶ Best Practices
- ✅ Clean the build plate before every print.
- ✅ Keep filament dry (dry box or pre-drying).
- ✅ Close enclosure for high-Tg materials.
- ✅ Check fans/filters for consistent airflow.
- ✅ Keep firmware & slicer updated.
- ✅ Always review the G-code preview before printing.
¶ When Not to Use Enhance
- Large, uniform parts where layer times are naturally stable.
- Full build-volume parts (consider assess only).
- Prints that must include long pauses or timelapse.
¶ Troubleshooting
- Use the Print Debugging Flowchart for step-by-step diagnosis.
- Check that the critical warning pre-conditions are satisfied.
- If speeds seem capped too low/high, verify the caps (Helio vs. Slicer Defaults) and your nozzle diameter/layer height assumptions.
- If outer surfaces look different than expected, try switching the print priority and/or switch to Outer wall first in slicer.
¶ Glossary
- Bonding window: Temperature/time range where adjacent layers fuse well.
- Layer time: Time between successive passes over a given region; shorter time generally means a warmer layer.
- Volumetric flow (mm³/s): Extrusion volume per second; determines the speed ceiling for a given nozzle/line geometry.
- Thermal continuity: Assumption that heating/cooling proceeds without unexpected delays (e.g., pauses, timelapse).
¶ ✔️ Reminder
Helio Enhance is designed to reduce warping and improve strength by managing layer time and thermal history. Aesthetics may change slightly; you can balance strength vs. finish using the options described above. Always review the G-code preview before printing.