¶ 🧊 Helio Fork of Orca Slicer with Thermal Simulation & Optimisation
Analyse thermal behavior directly inside Helio's fork of Orca Slicer using Helio Additive's physics-based engine — for stronger, more reliable prints.
- 🌡️ Preview layer-by-layer thermal performance
- 🔍 Catch weak bonding or overheating before you print
- 🎯 Works with A1-series, X-series, P-series, H2D, H2D Pro and H2S printers + supported filaments (see full list)
No hardware changes. No new slicer. Just smarter simulation built in.
¶ 💡 Our Vision
We have lofty goals to keep Helio accessible as a practical simulation tool for everyday 3D printing. We’re not attempting to be Ansys or another heavy FEA service — Helio is built to be lightweight, fast, and user-friendly.
¶ 🛠️ How to Use
¶ 1. Enable Helio
Plug in icon → Enable Helio Additive → Agree to Terms & Policies → Agree and Proceed → Run Your First Optimisation
Follow the pop-up guide at the bottom-left on your app to start enhacing your prints!
Once enabled, a personal access token (PAT key) is claimed. This key lets our system verify you allowing your G-code files to upload to our systems.
ℹ️ Free PAT Keys Quota
We currently have a global quota of 50,000 PAT keys. If your key doesn’t generate automatically, it means the quota is currently full— we will continue to update the quota as we scale
¶ 2. Enhance (Subscription)
Automatically adjusts layer times via safe speed changes to improve bonding, reduce warping, and often shorten print times.
This is a quick start guide. For a more in-depth walkthrough, see the detailed guide.
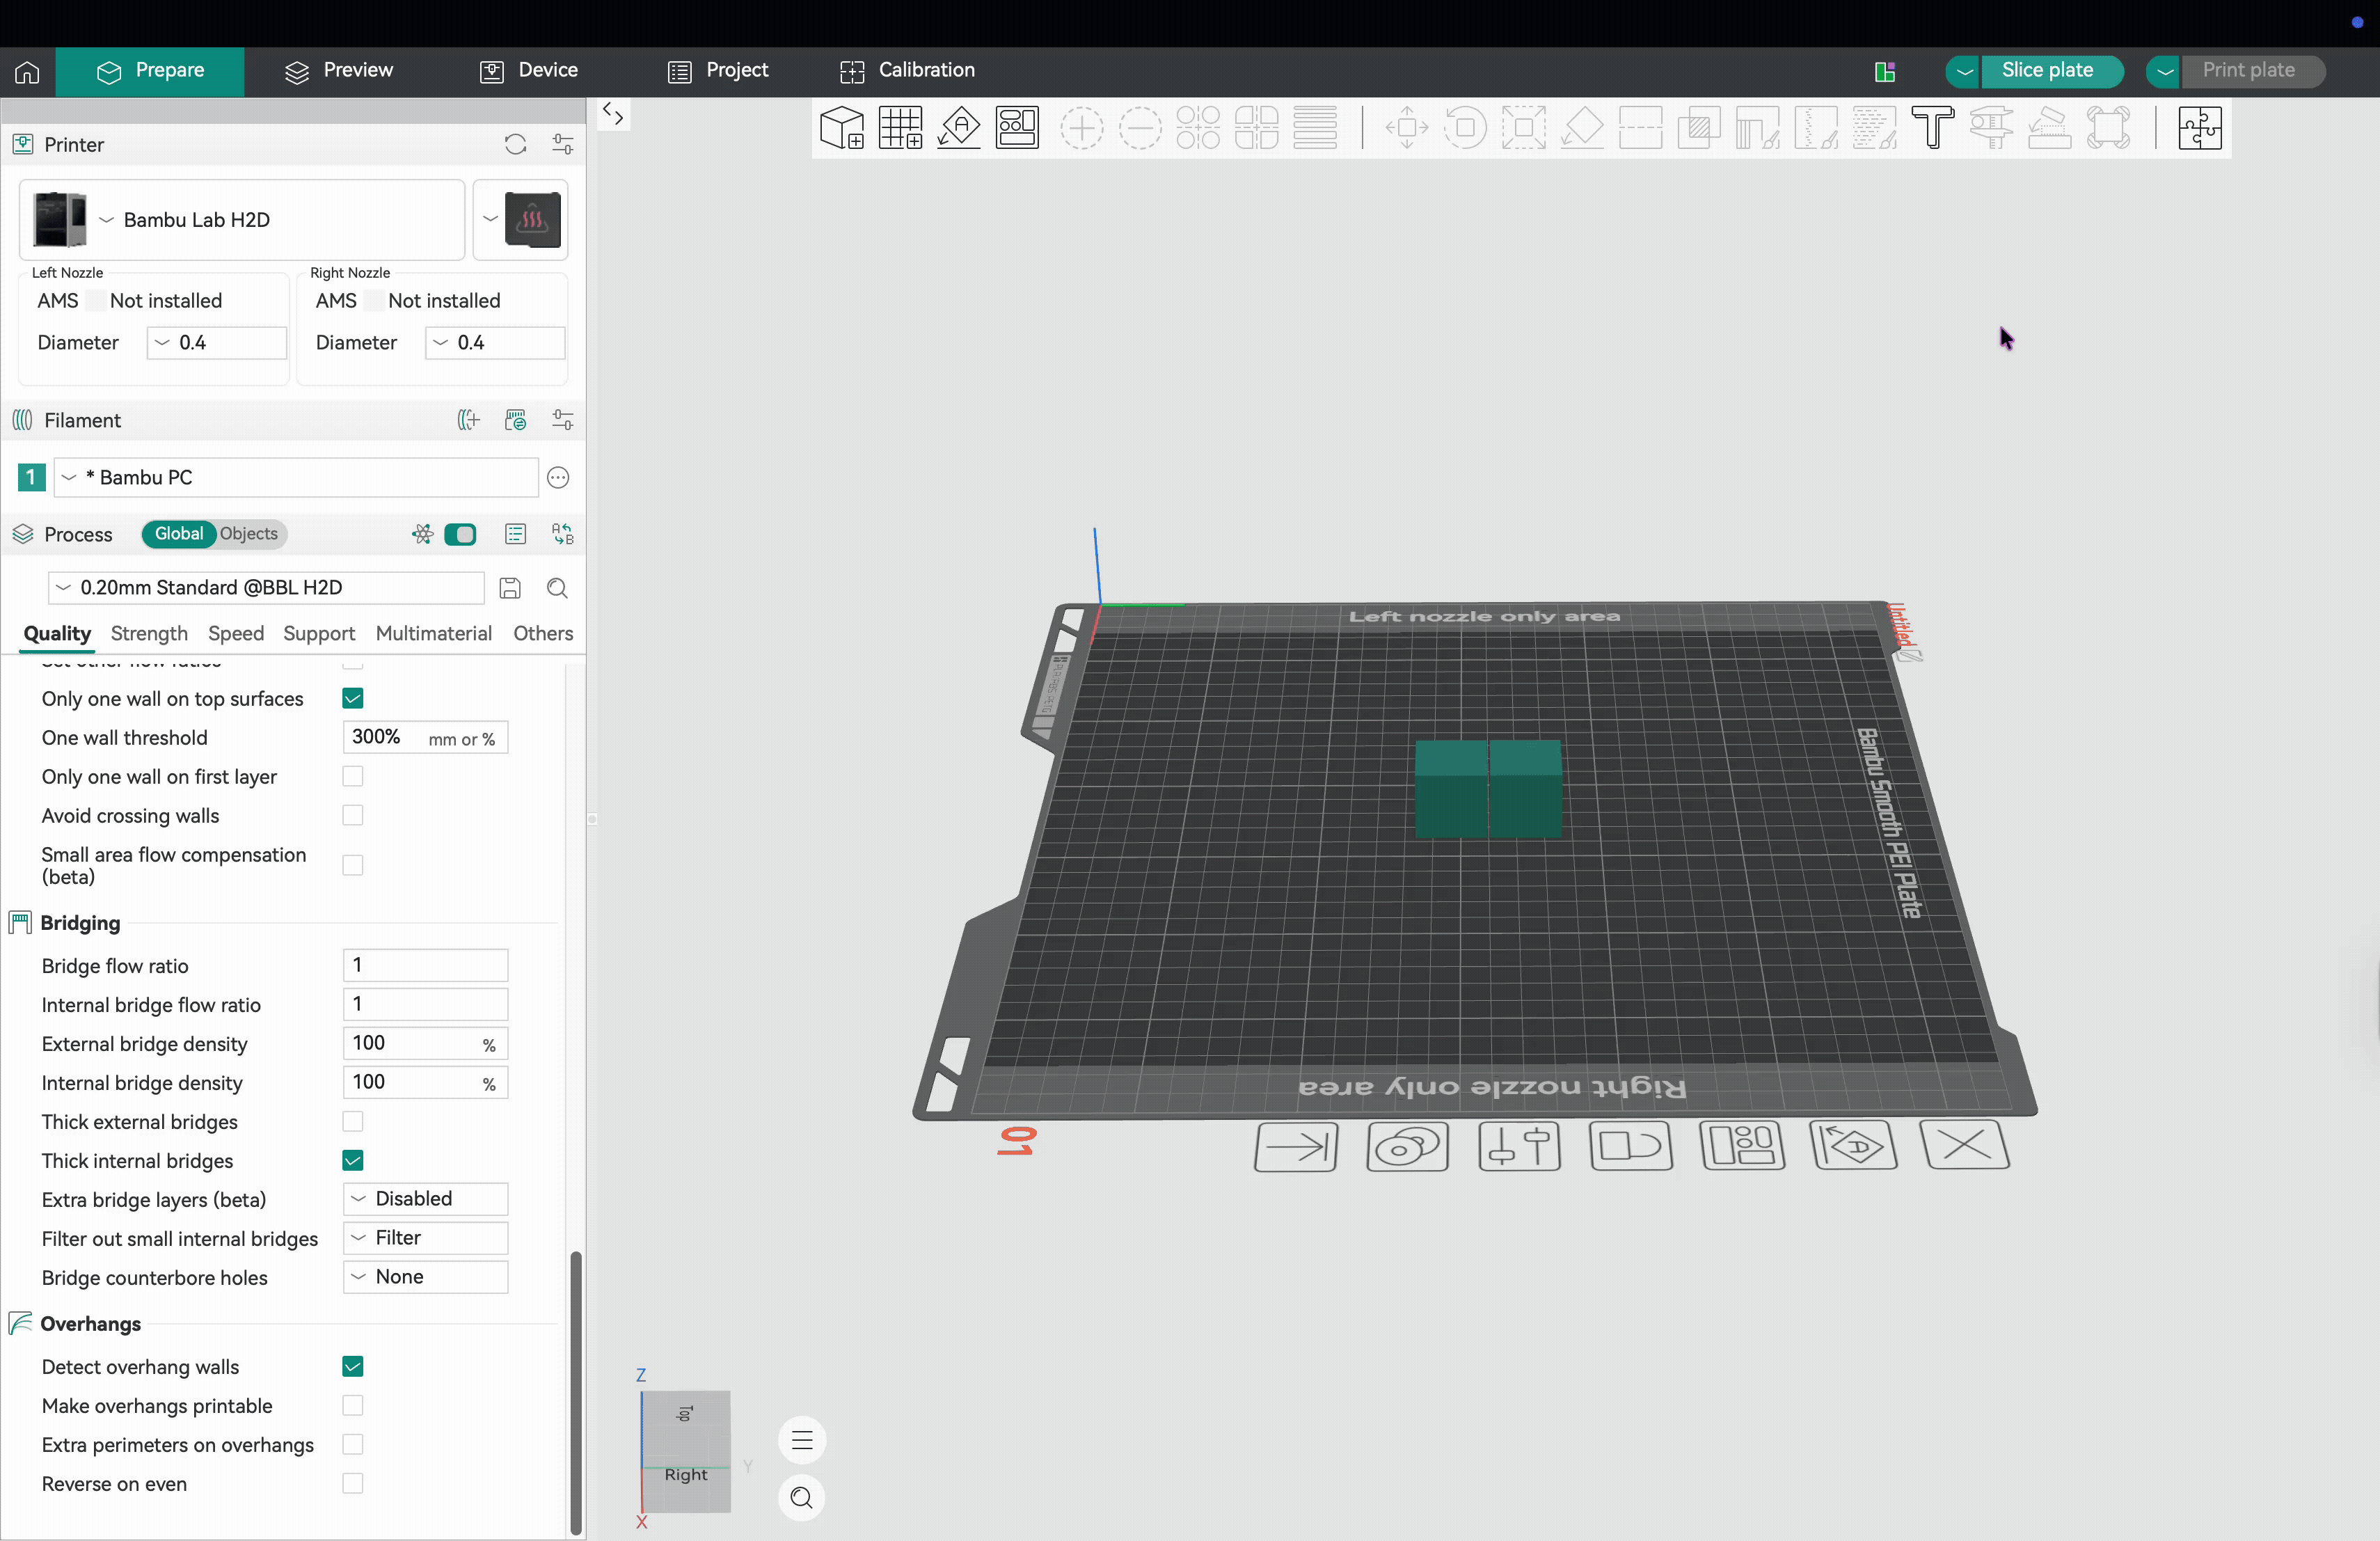
¶ 2.1 Slice Your Model
Use Orca Slicer as normal to slice your model.
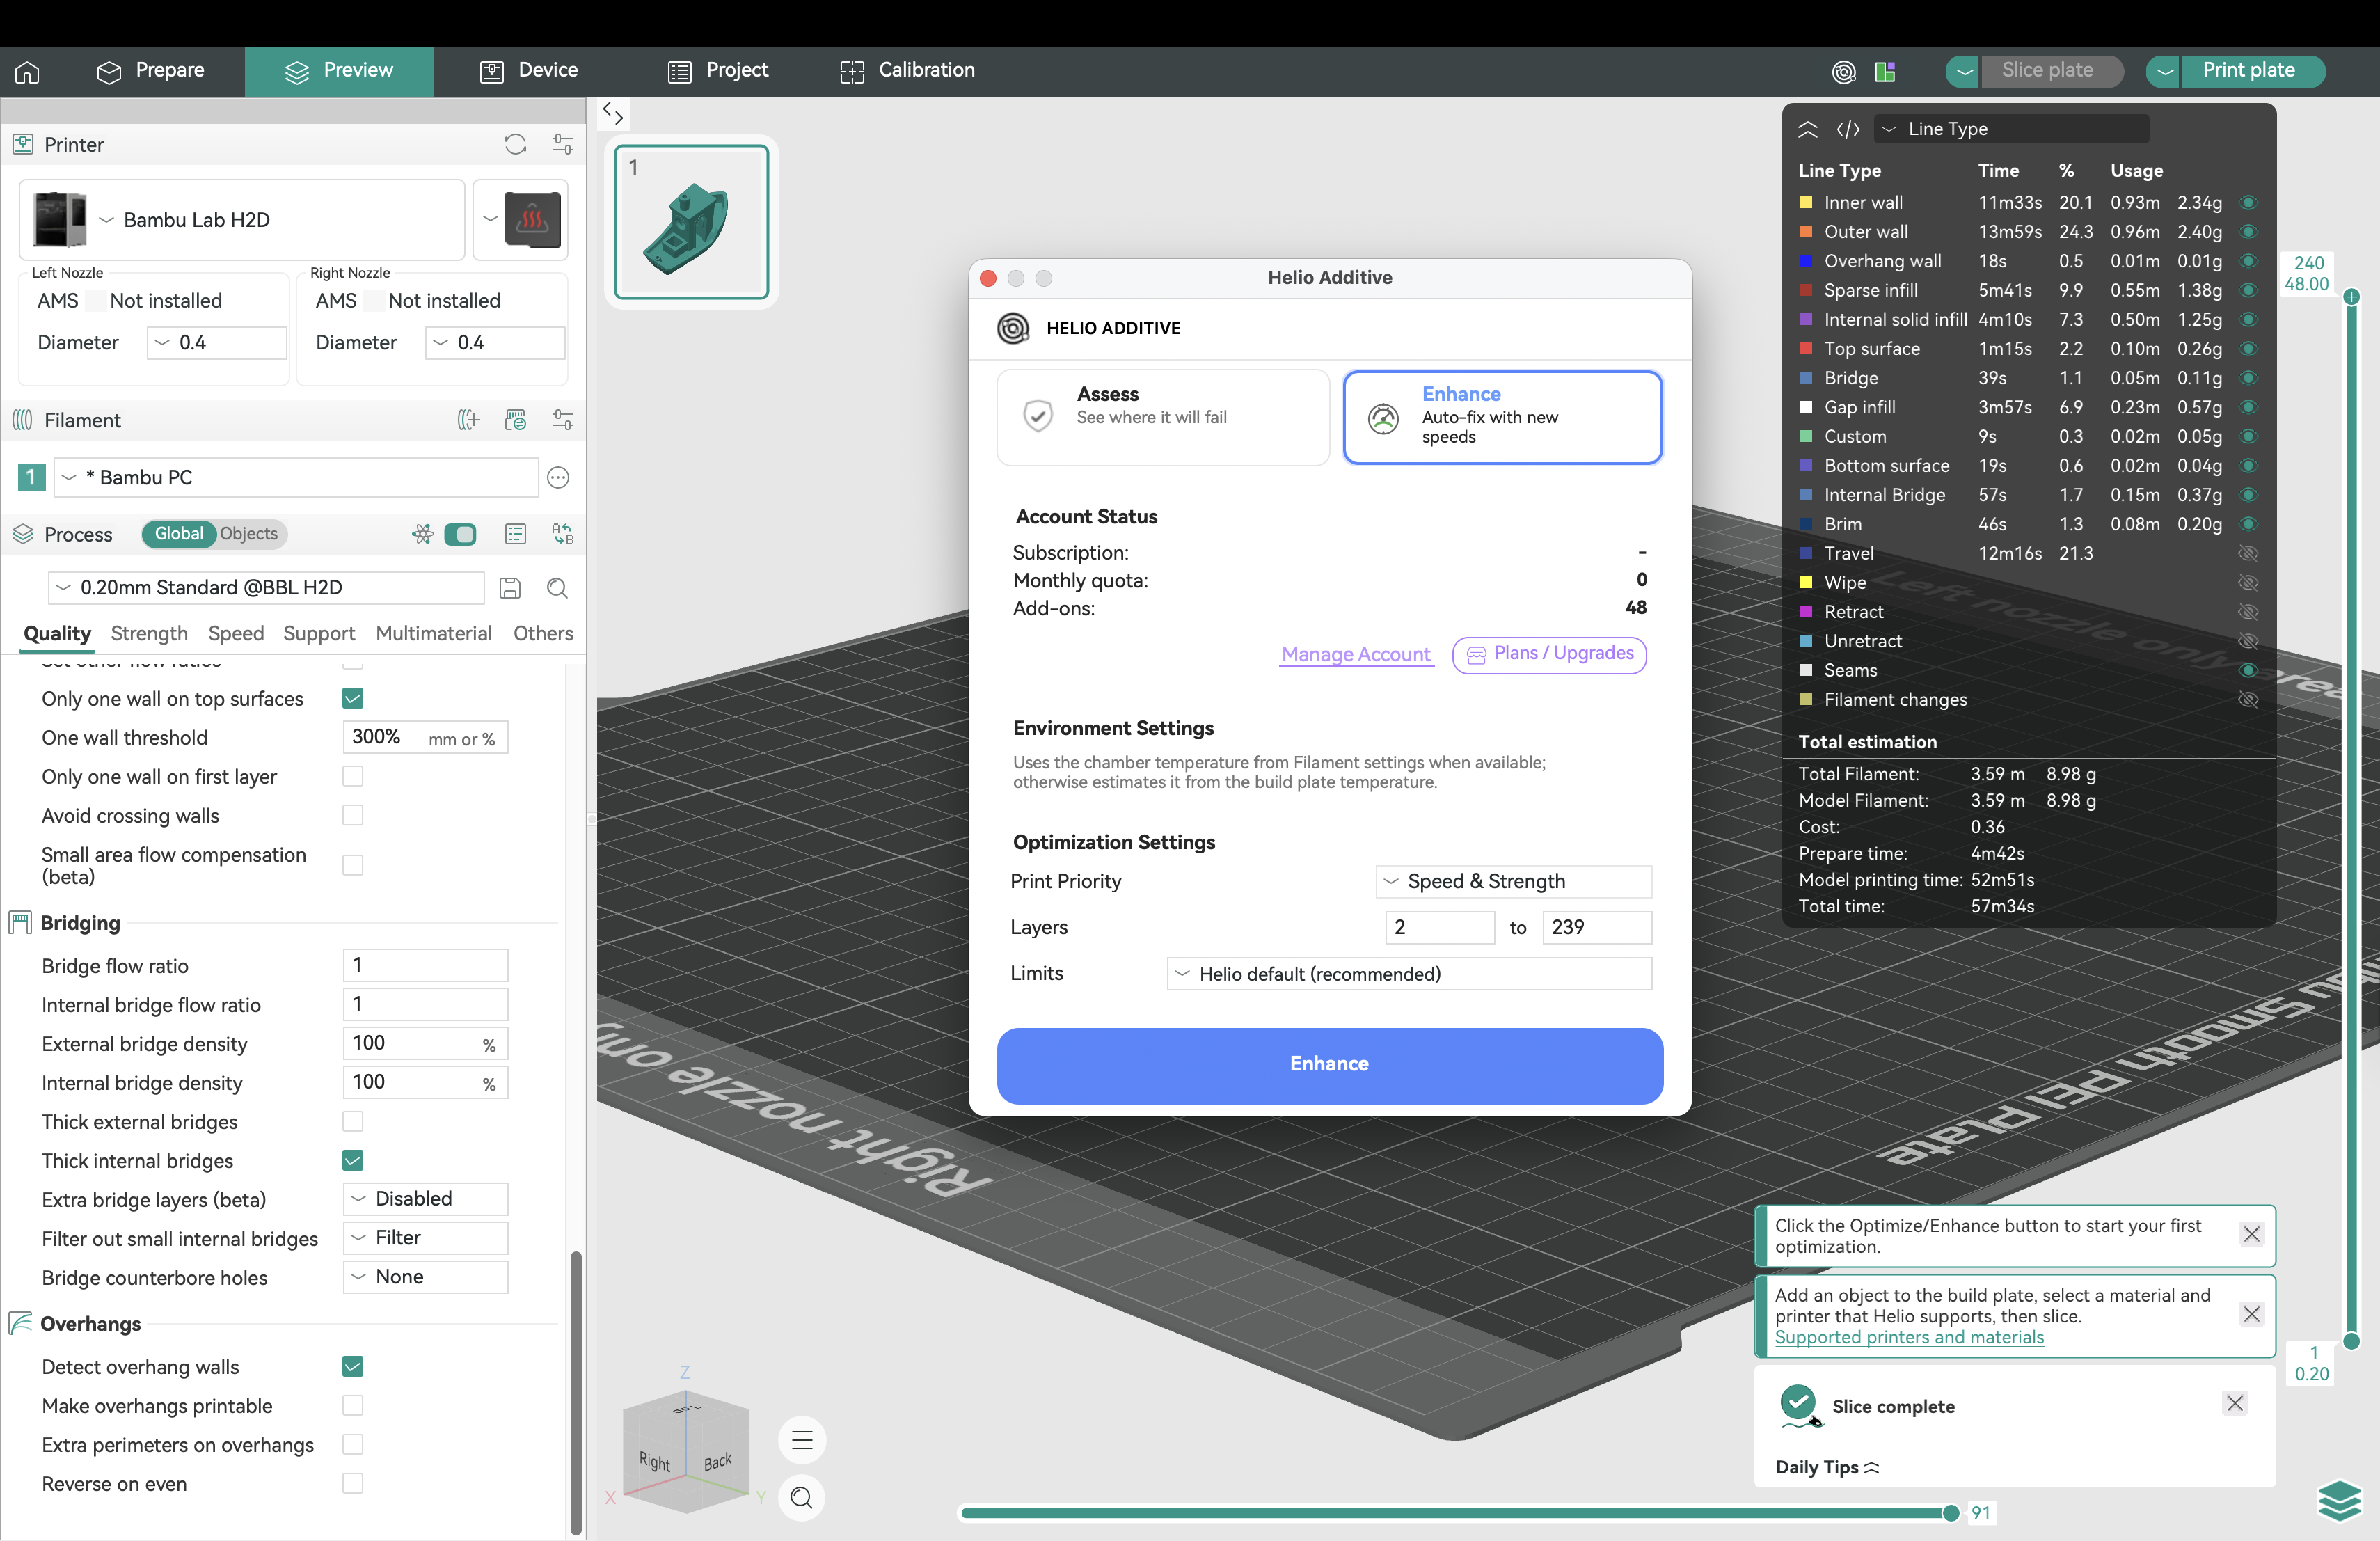
Click the Helio button → Enhance:
¶ 2.2 Start Free Trial/ Activate Your Subscription
Once your free trial is over, upgrade anytime to keep enhancing:
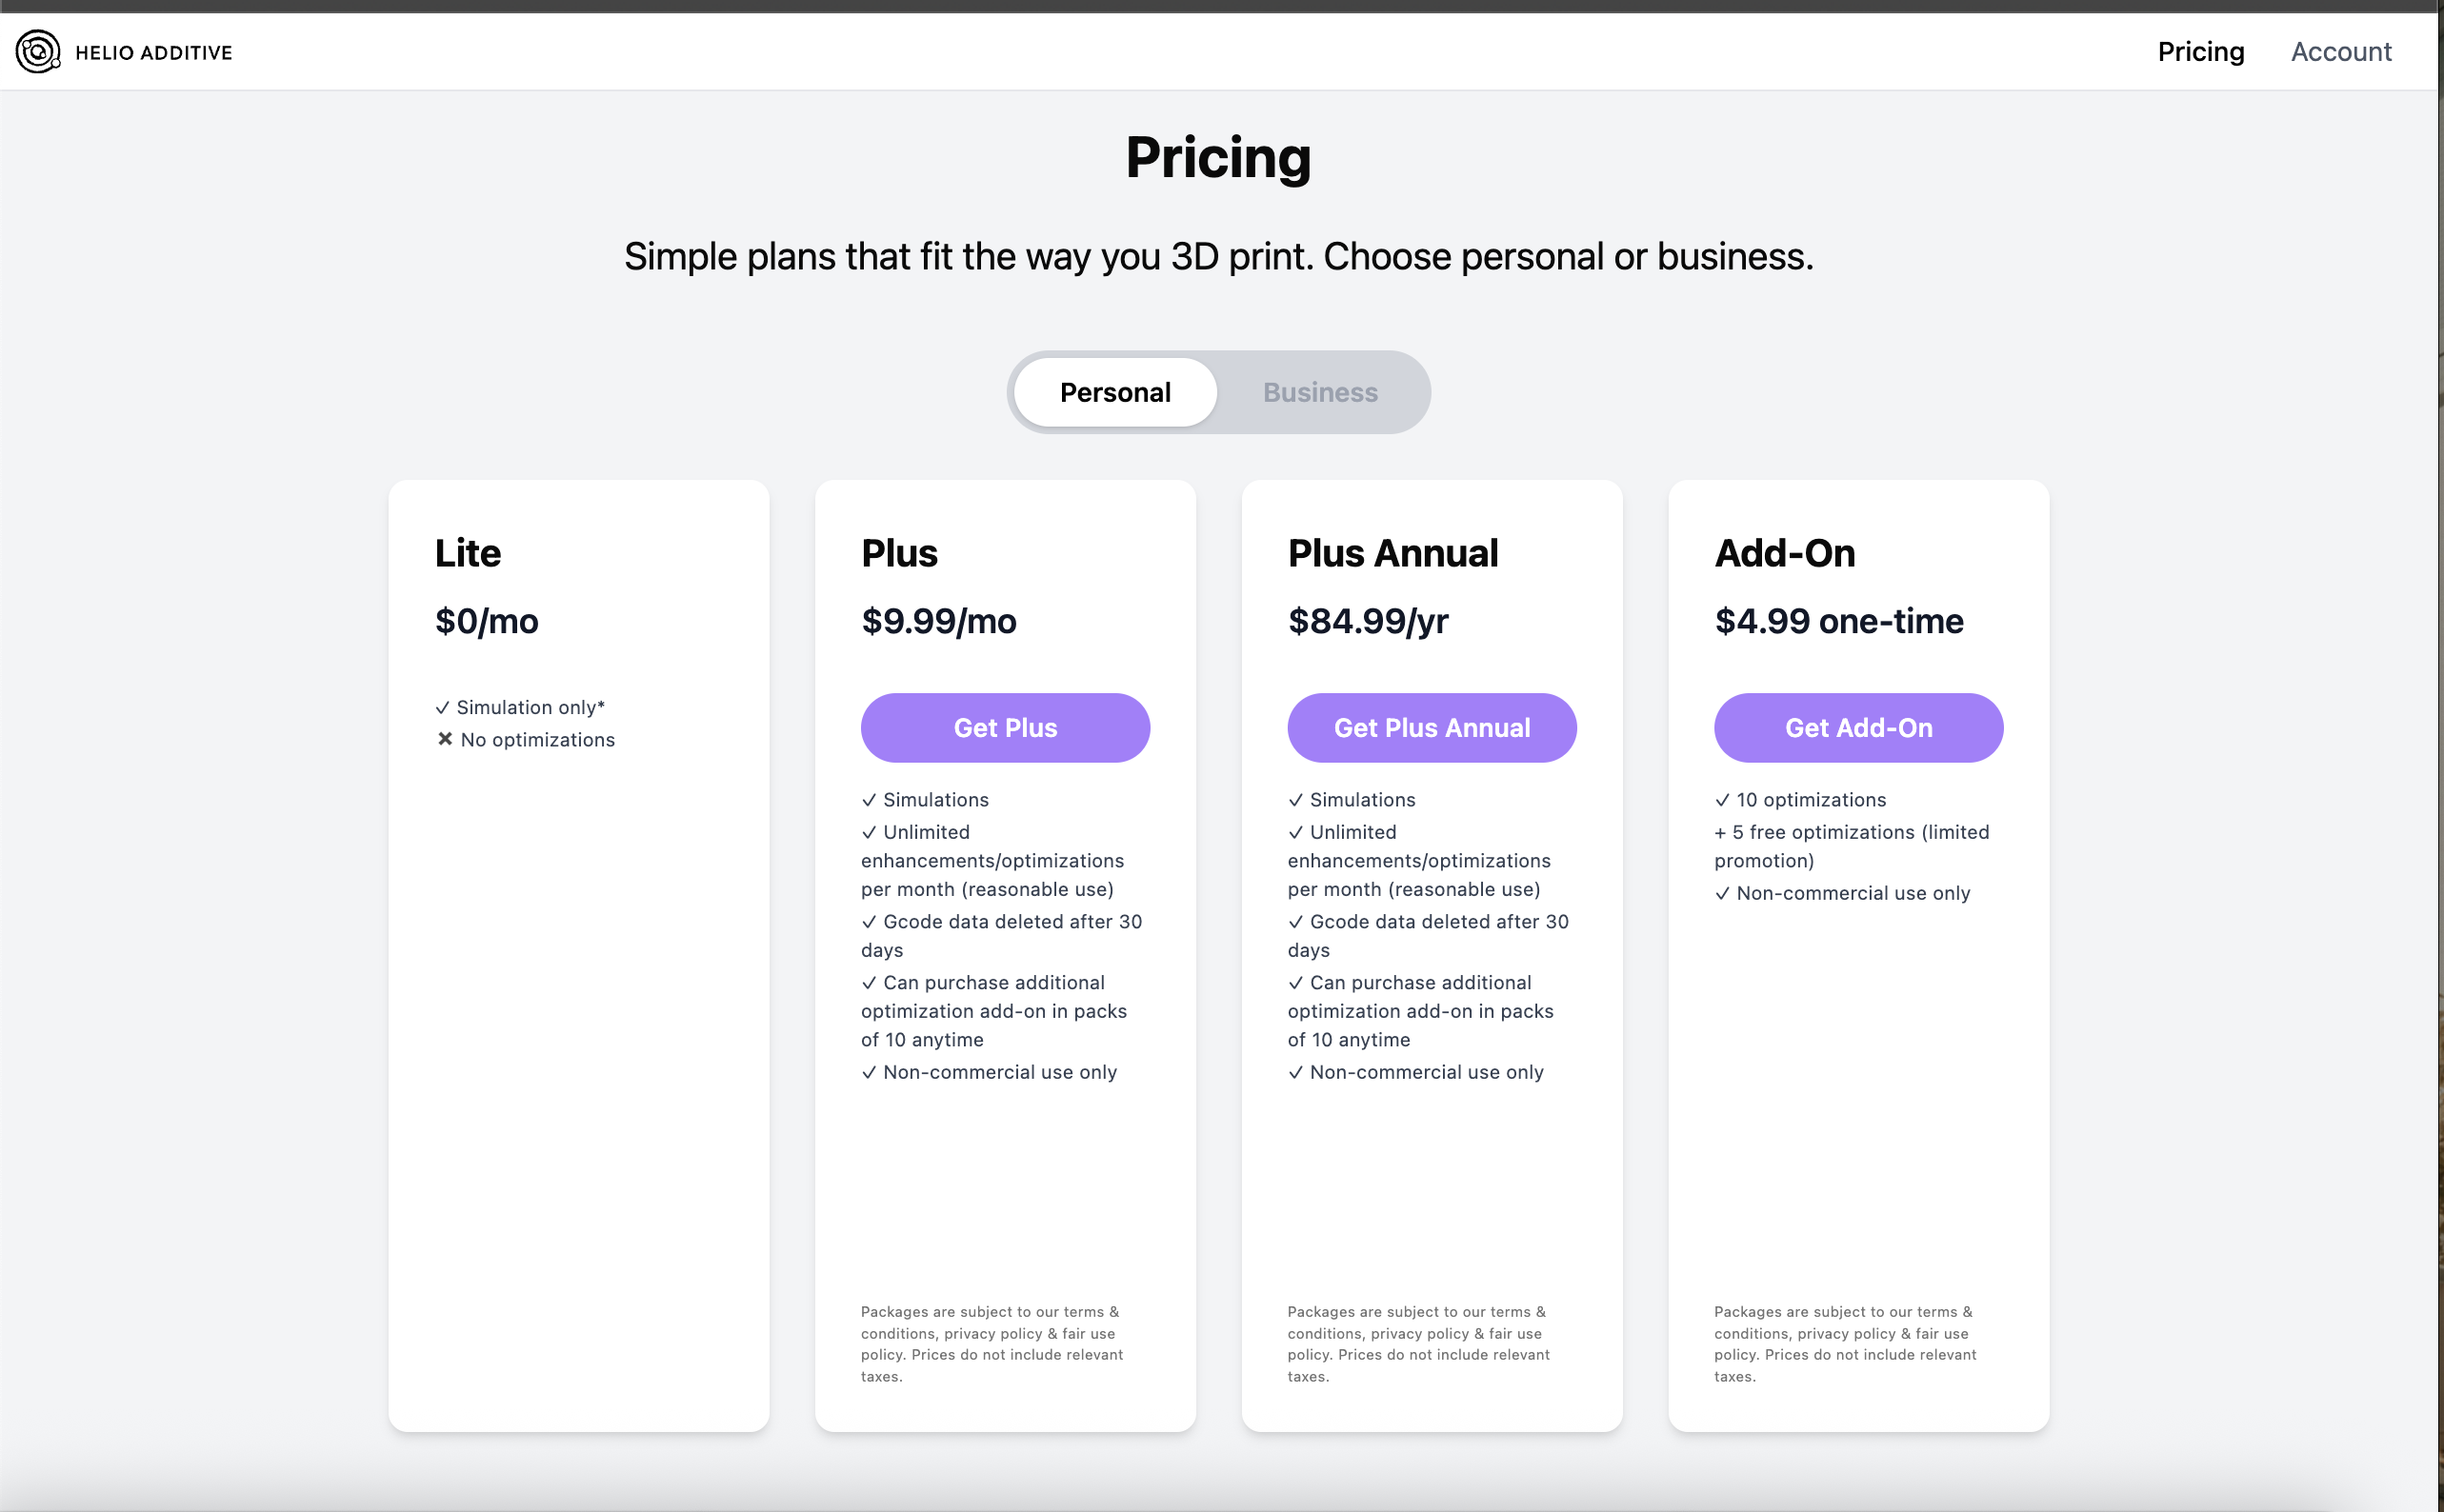
Click Plans/Upgrades → Verify your email → Purchase Subscription
 →
→
Close the store and return to Bambu Studio. Your subscription quota will be automatically updated:
ℹ️ Note: Only one subscription can be active per account at a time. See pricing details here.
▶️ Next: Follow steps 3.3 through 3.5 to enhance your prints.
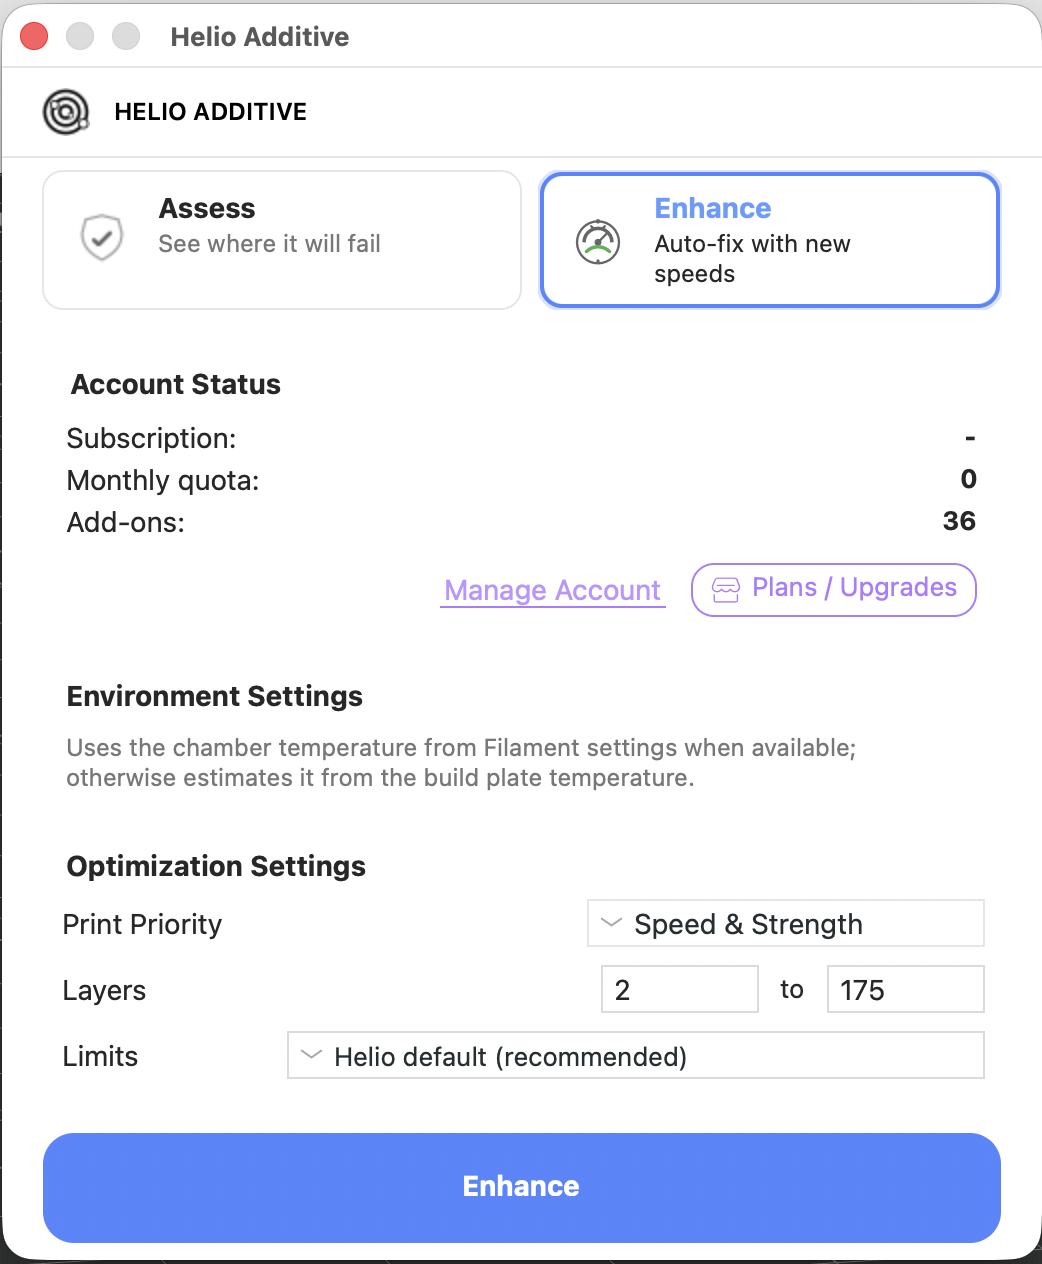
¶ 2.3 Set Parameters
In Enhance: Set Print Priority → select Limits to apply
¶ Print Priorities & Limits
Priorities
- Speed & Strength — optimises all safe sections for maximum performance and layer bonding
- Preserve Surface Finish — keeps original outer wall speeds to maintain the slicer-defined surface quality
- Enhance Surface Gloss (limited to specific materials) — adjusts outer wall speeds to achieve the best possible visual finish
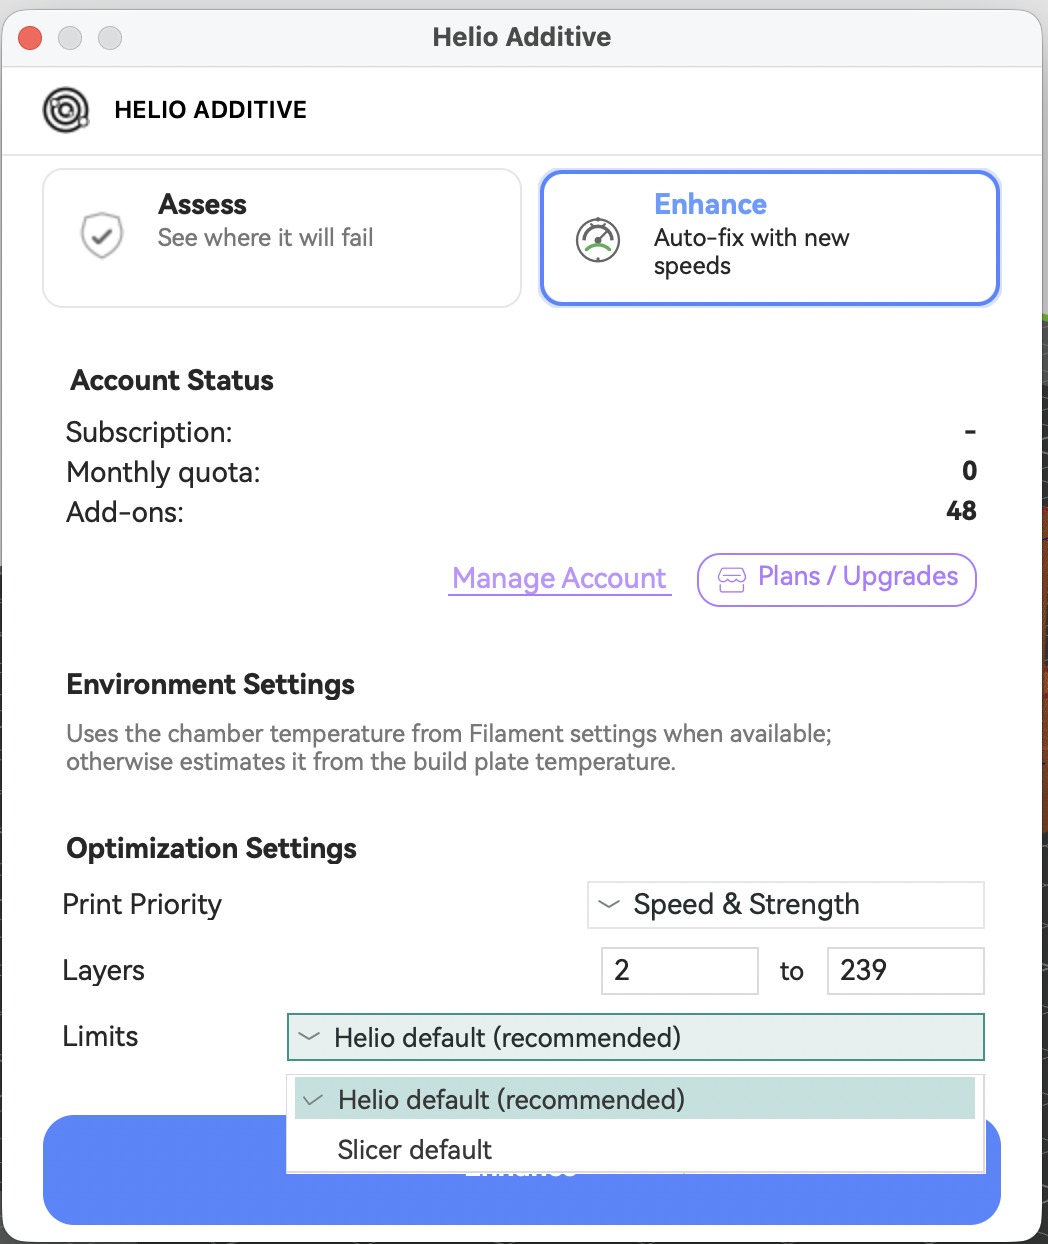
Limits
- Helio default: Optimises for maximum speed with minimal user input.
- Slicer default: Allows manual editing of speed and flow rate limits. See the detailed guide here.
⚠️ Only Slicer default limits can be used for prints layer heights below 0.2 mm (e.g. a 0.4 mm nozzle using a 0.16 mm Optimal process mode) & when using unsupported materials.

Helio Enhance Print Priorities
Helio Enhance Limits
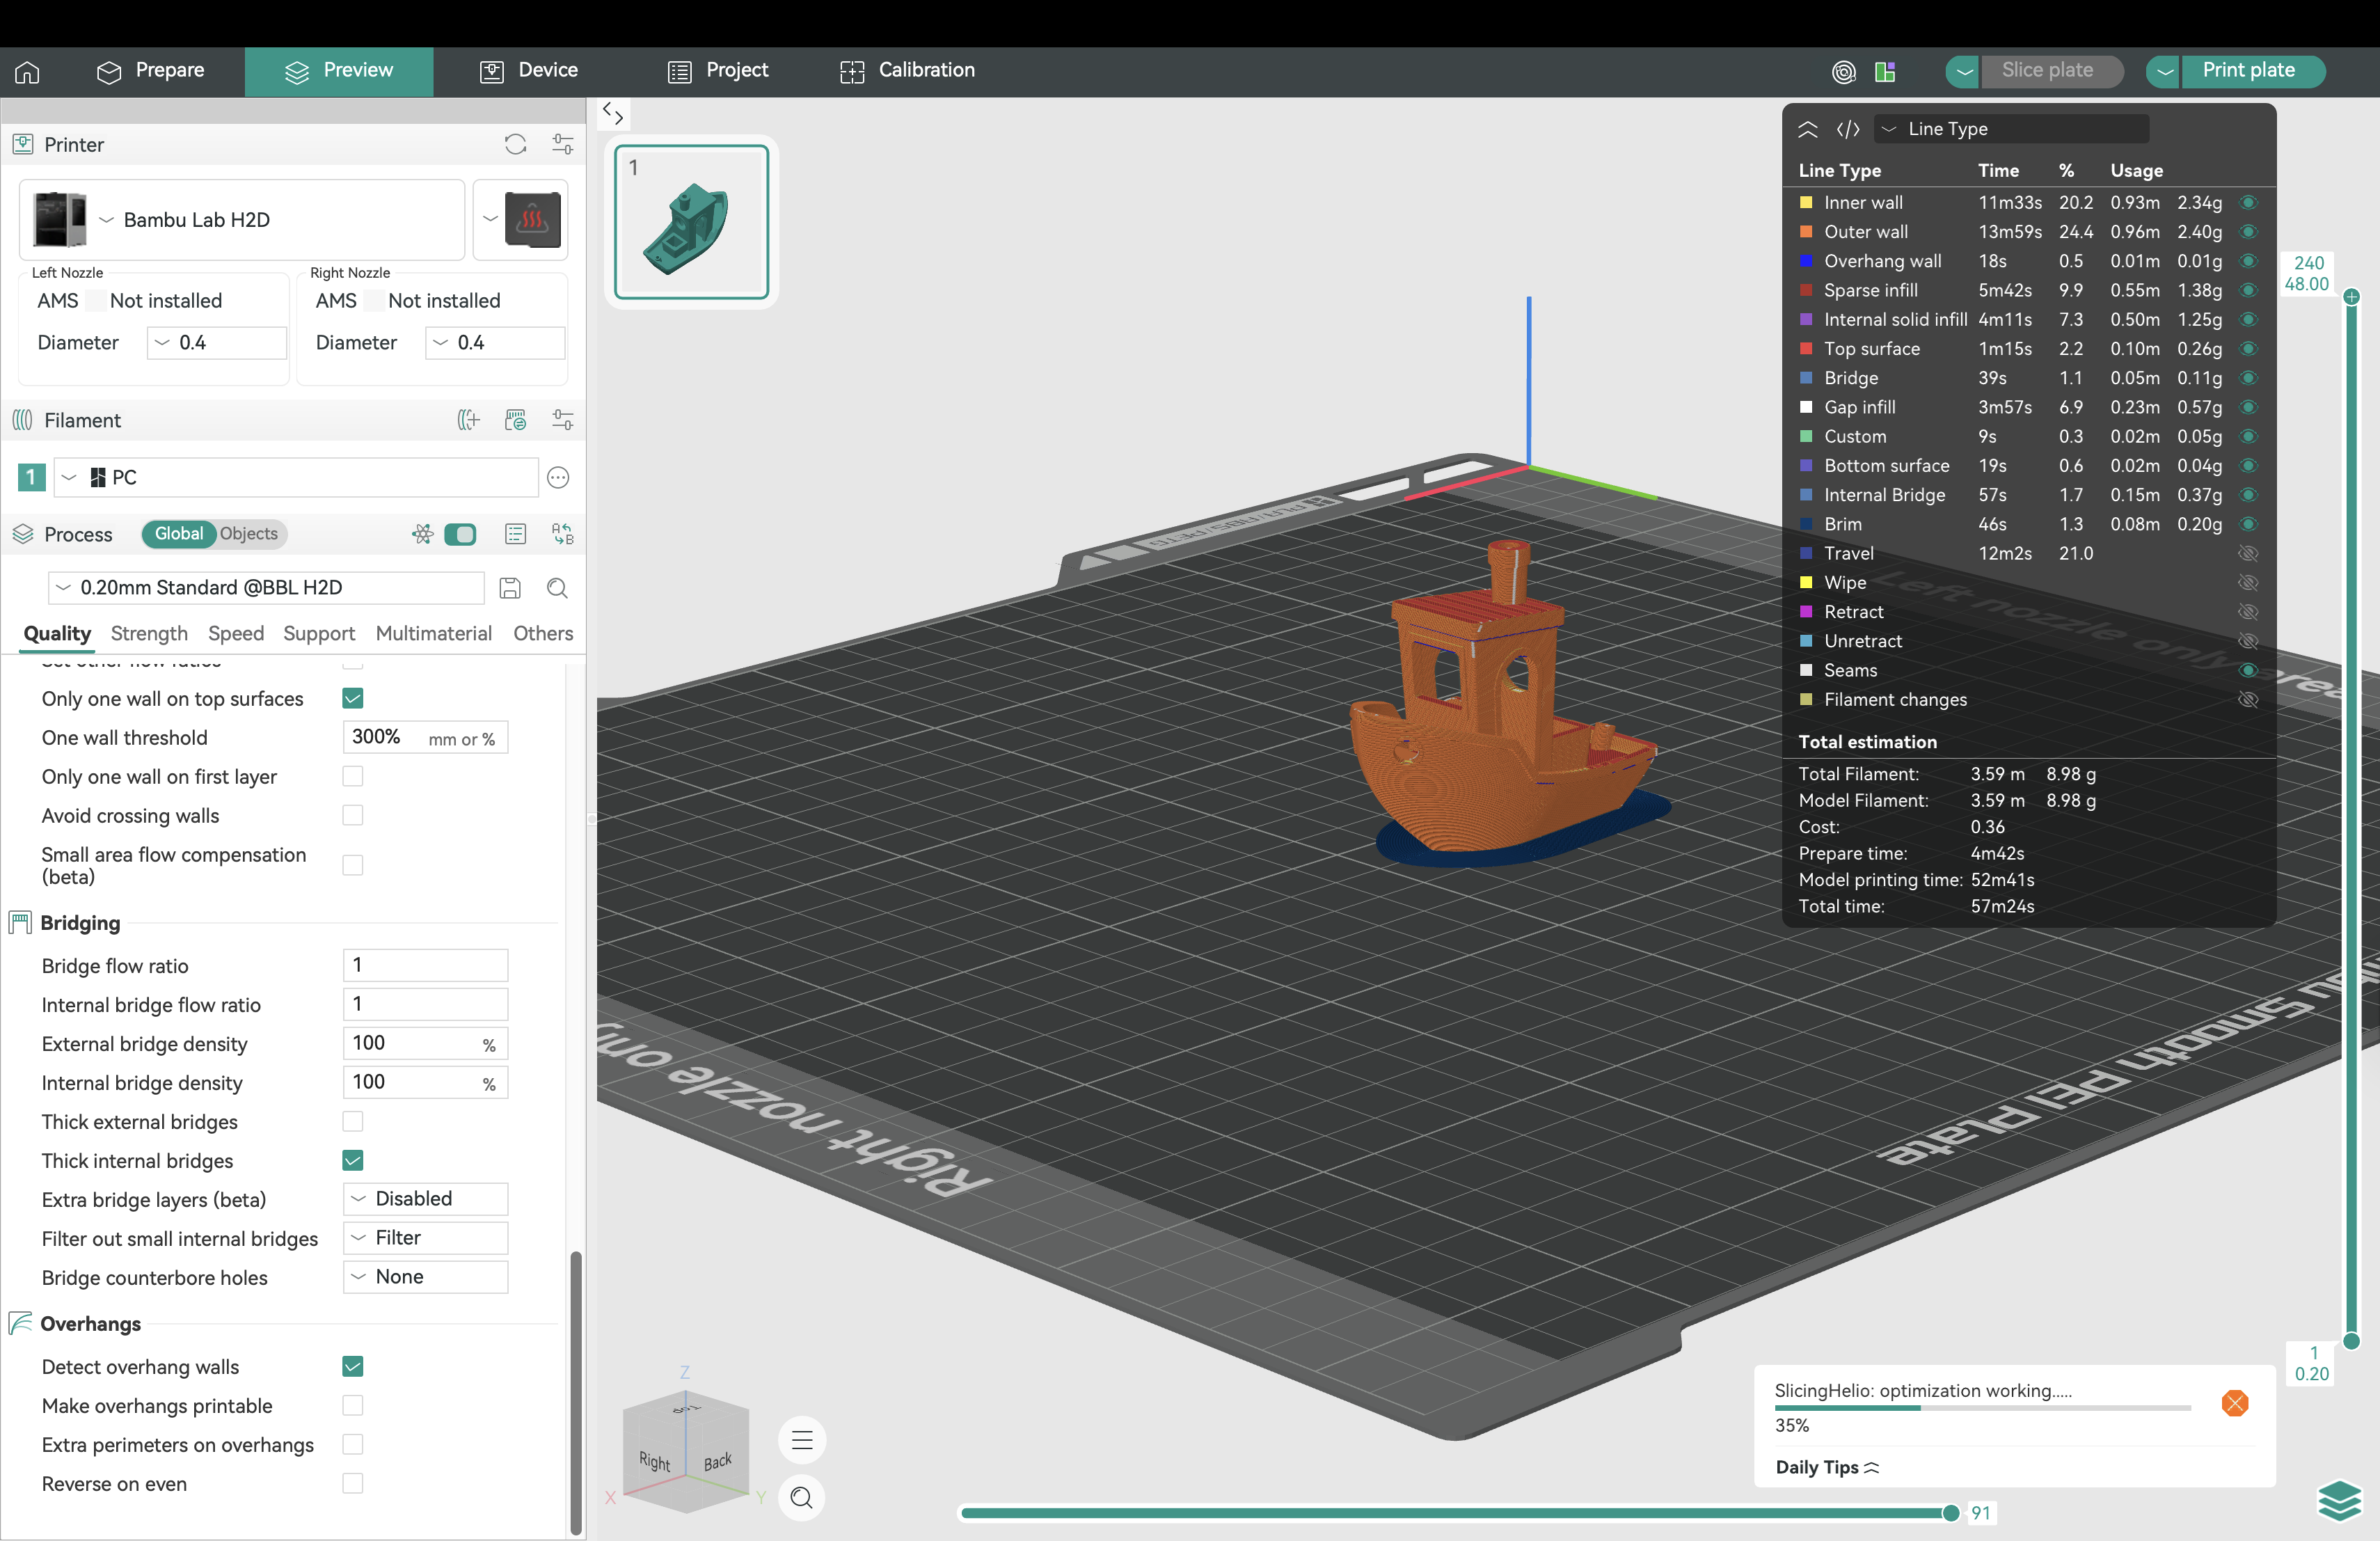
¶ 2.4 Wait for Enhancement
Watch the progress bar:
¶ 2.5 View Optimised Thermal Index Results
¶ Optimisation metrics summary New
Once complete, review the metrics summary:
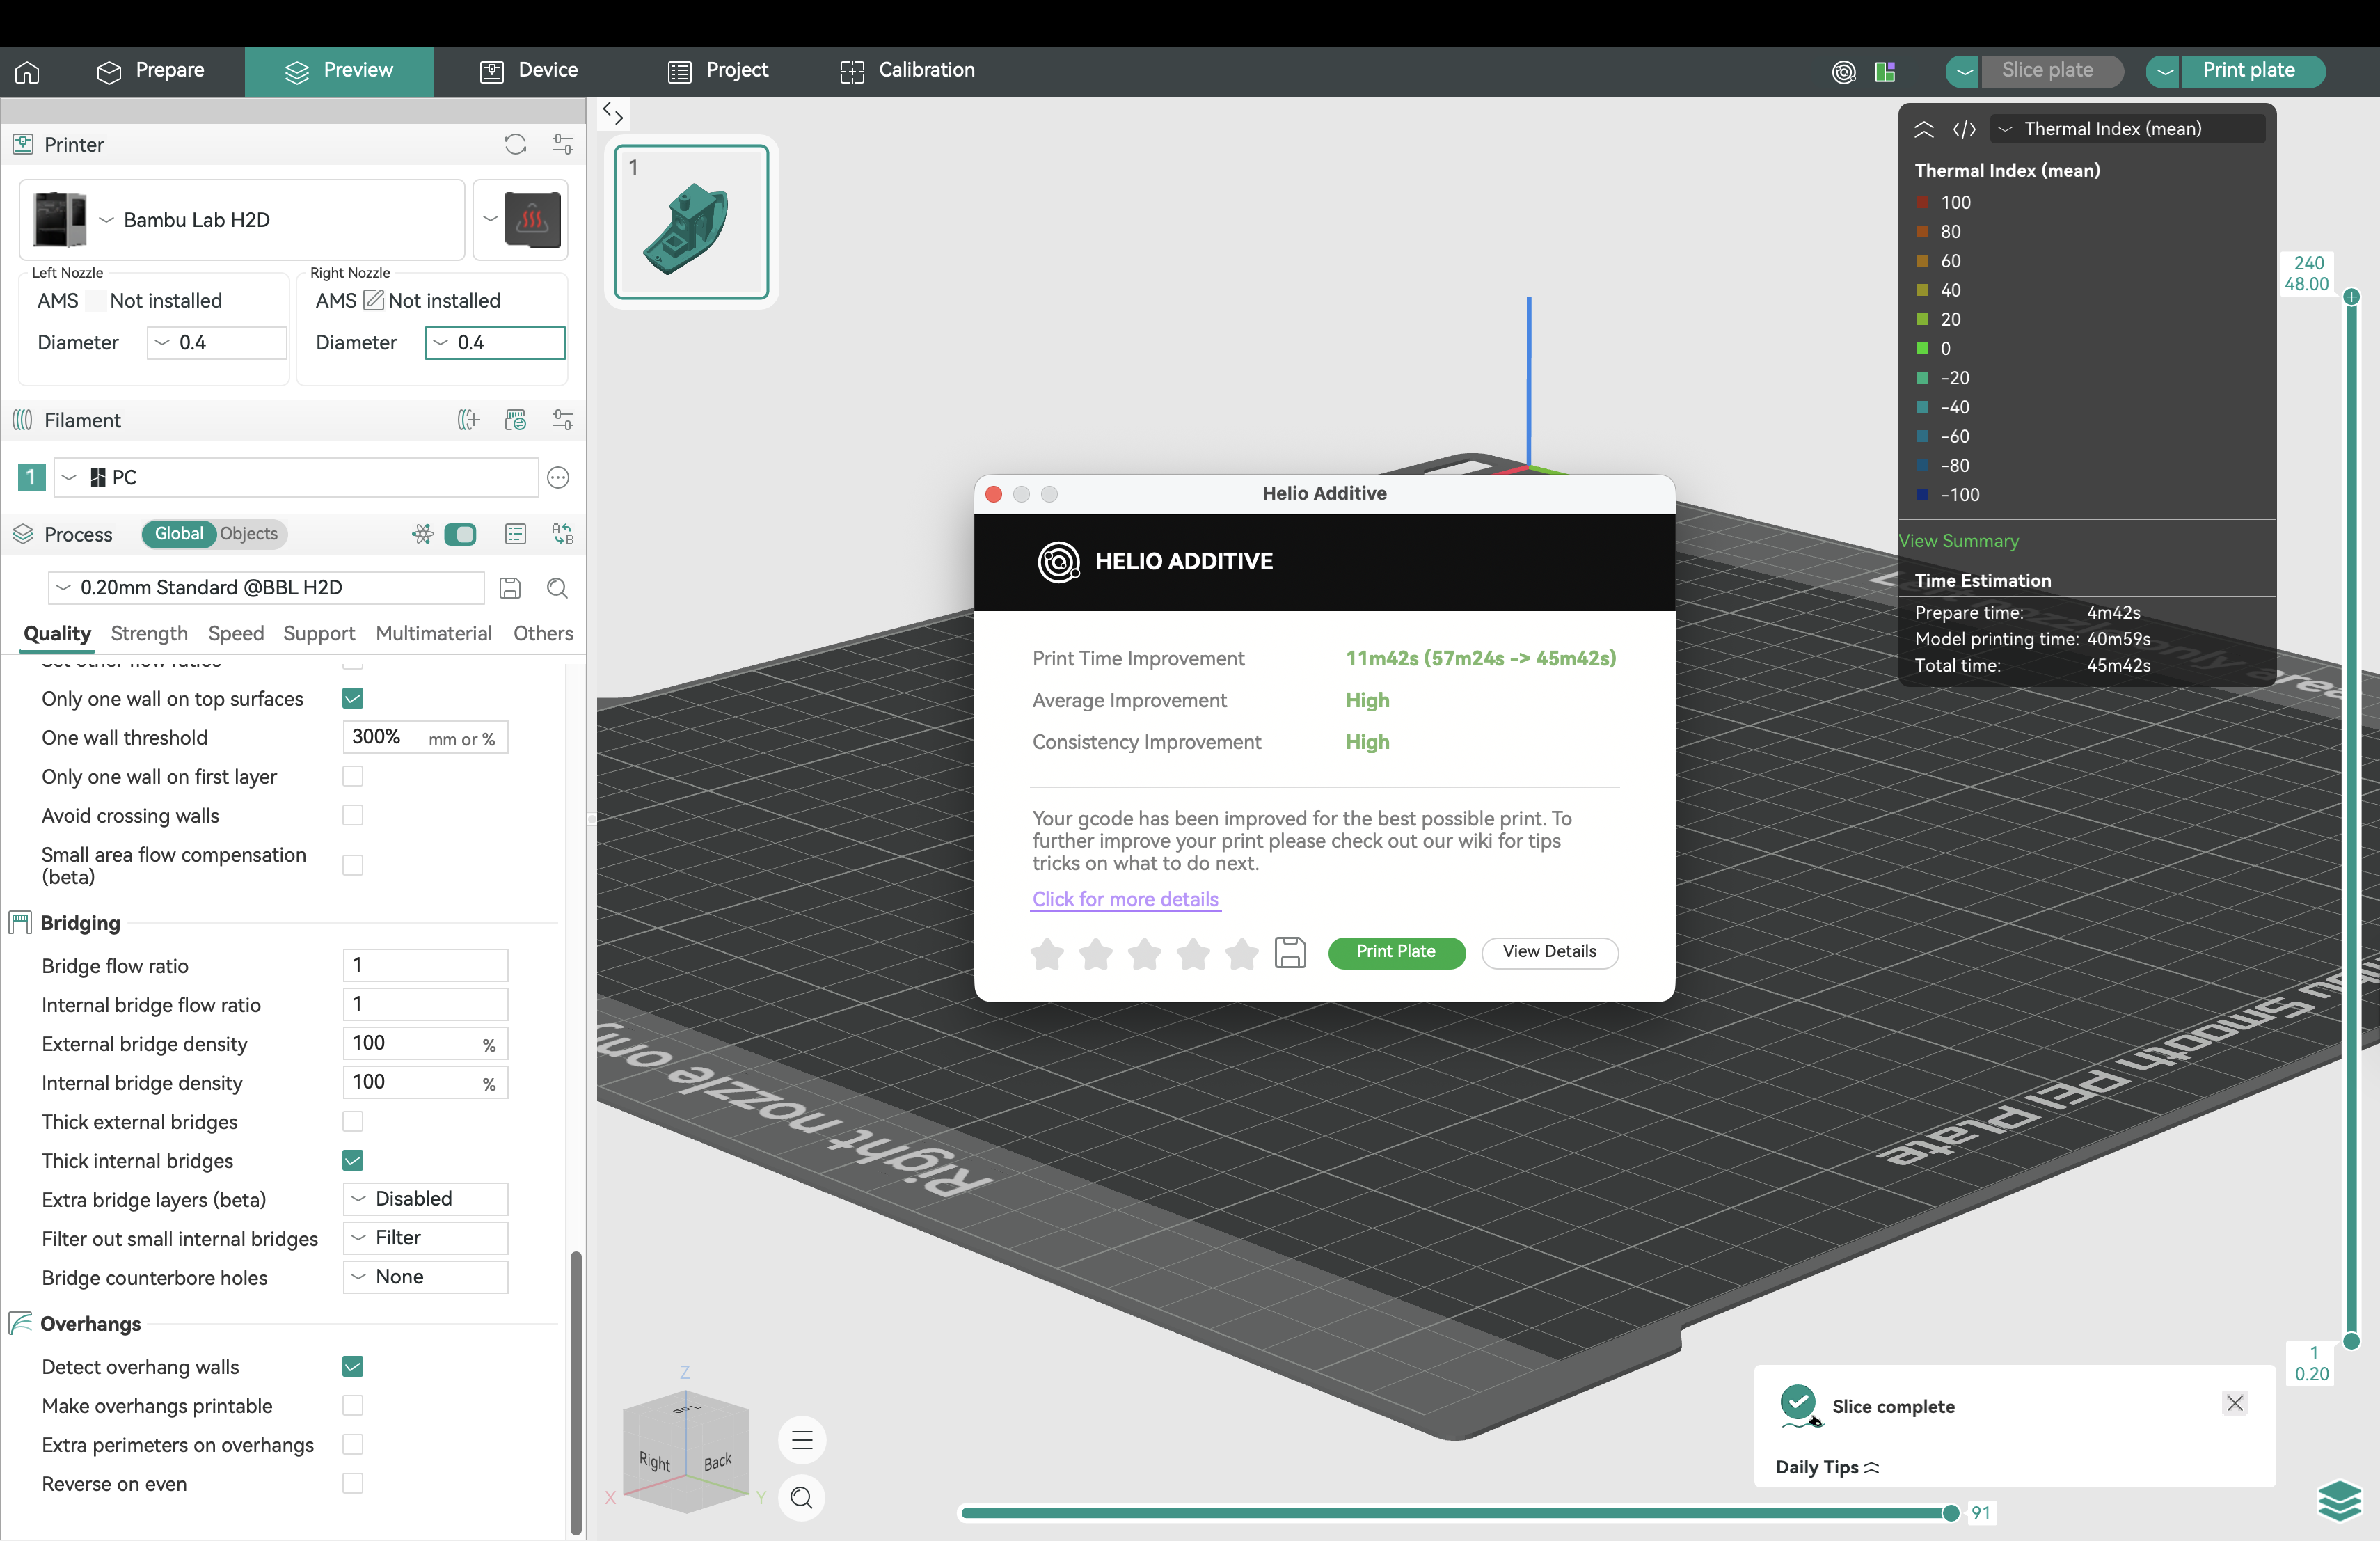
¶ Thermal quality index results
Click view details to review the Thermal Quality Index (TQI) results:

💡 Tips
- Click the Save icon at the bottom of the window to save the enhanced
.3mffile.- Click the stars below to rate the results.
- If satisfied, send the job directly to the printer by clicking Print Plate.
- Click View Summary in the preview panel picker to review the metrics again.
- See your Helio History: Third-party Icon → Enable Helio → History.
¶ 3. Assessment (Free)
Preview thermal behavior before printing.
¶ 3.1 Slice Your Model
Slice your model → Helio button:

¶ 3.2 Enter Environment / Chamber Temperature
Click Assess → enter Environment / Chamber Temperature:
Provide your estimated or actual printing environment temperature. Leave blank to allow Helio to automatically estimate it based on bed temperature and enclosure conditions.
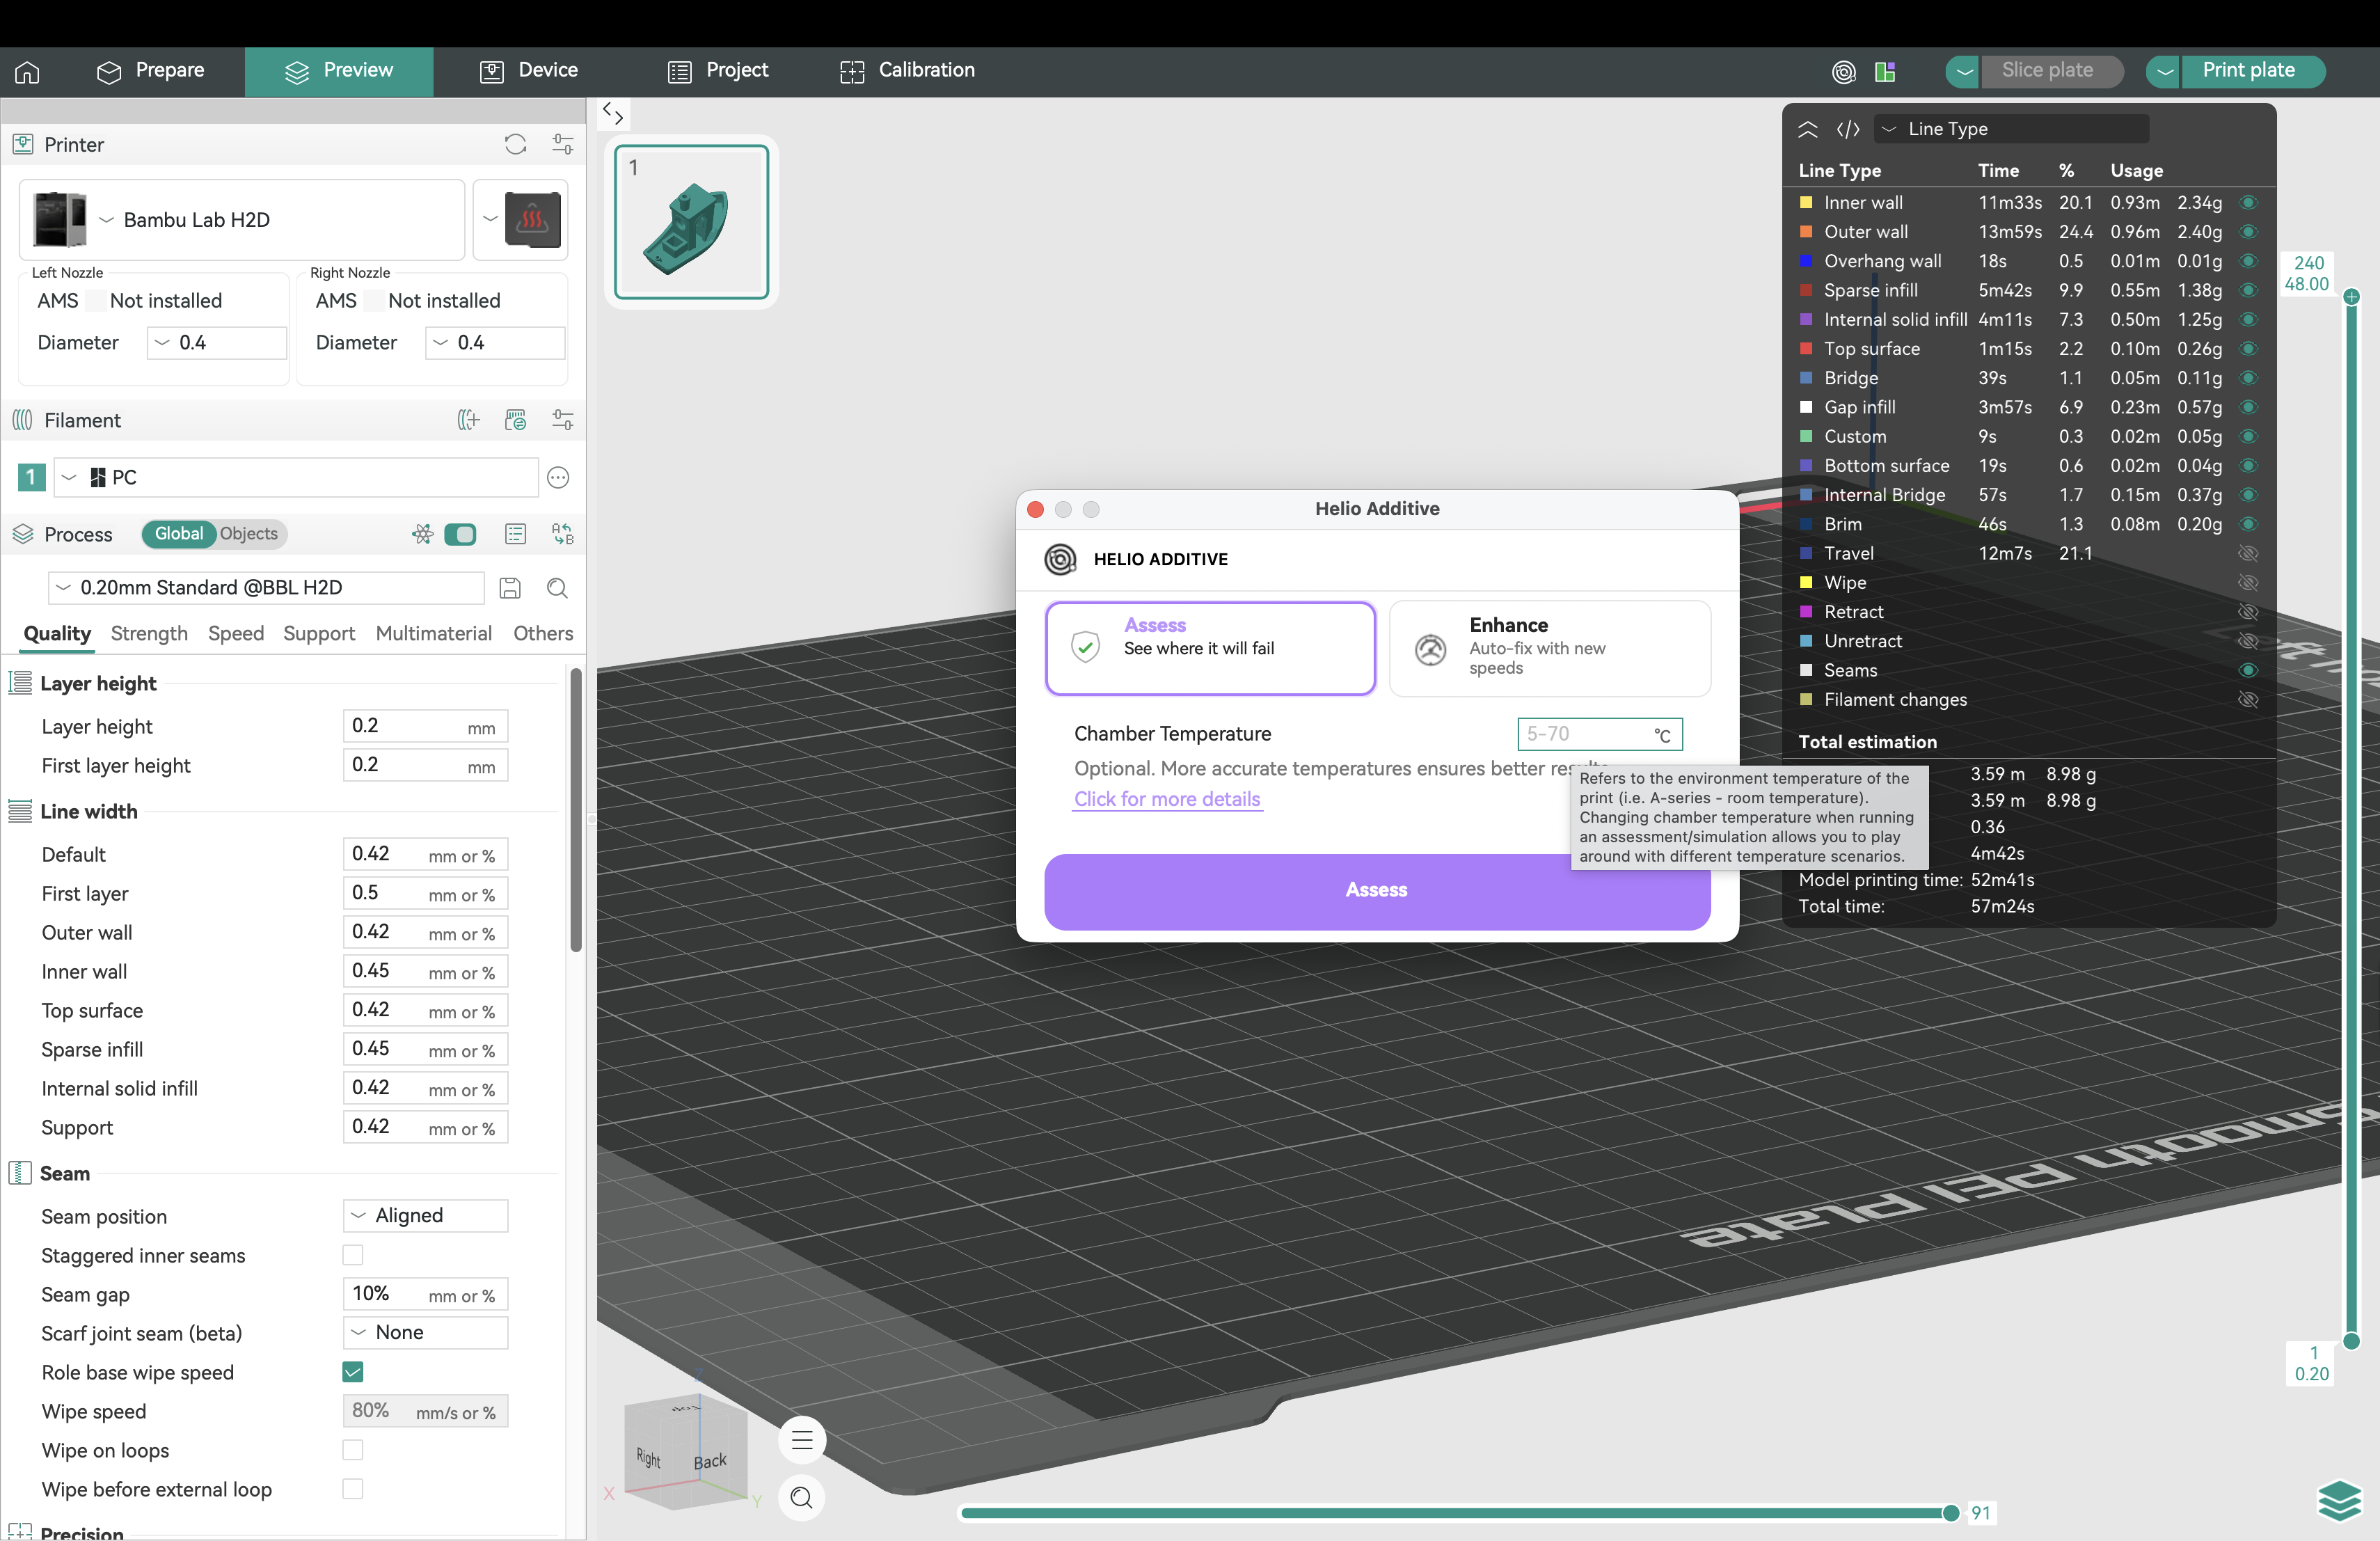
ℹ️ For printers with a controllable chamber (e.g., X1E), enter the chamber temperature from your material settings.
For printers without a chamber (e.g., P1P), enter the ambient air temperature.
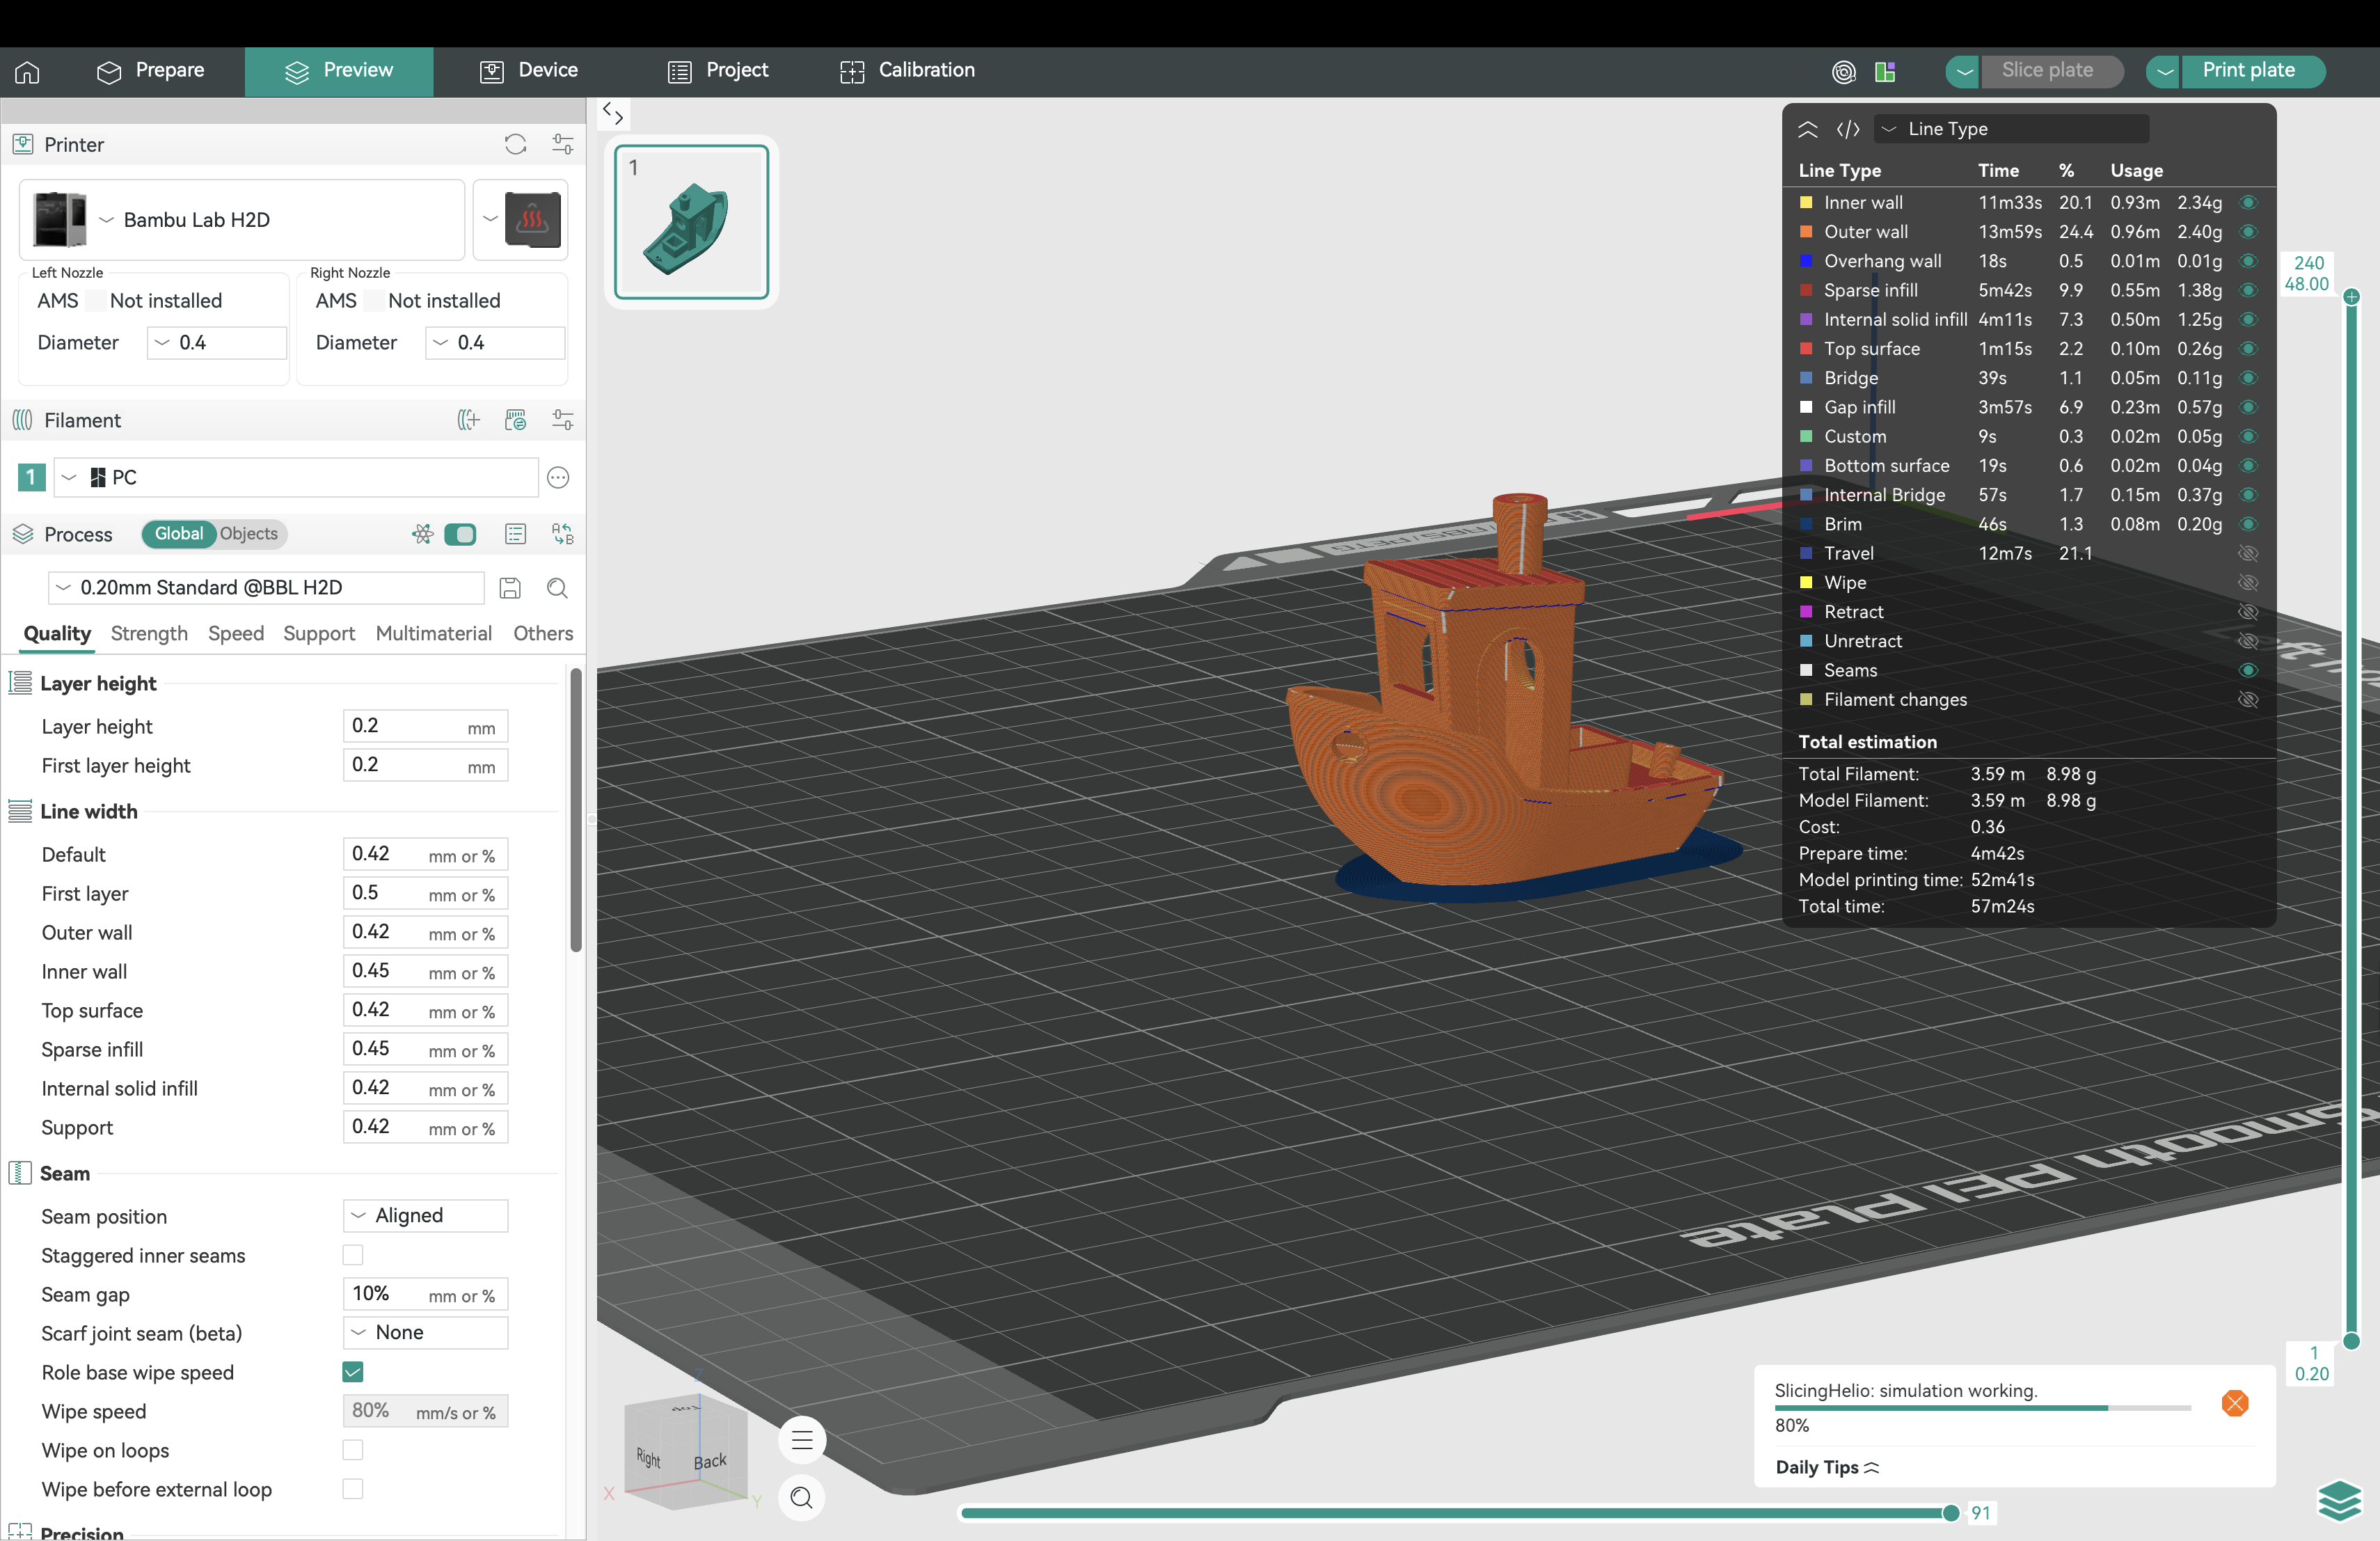
¶ 3.3 Wait for Assessment
Monitor the progress bar:
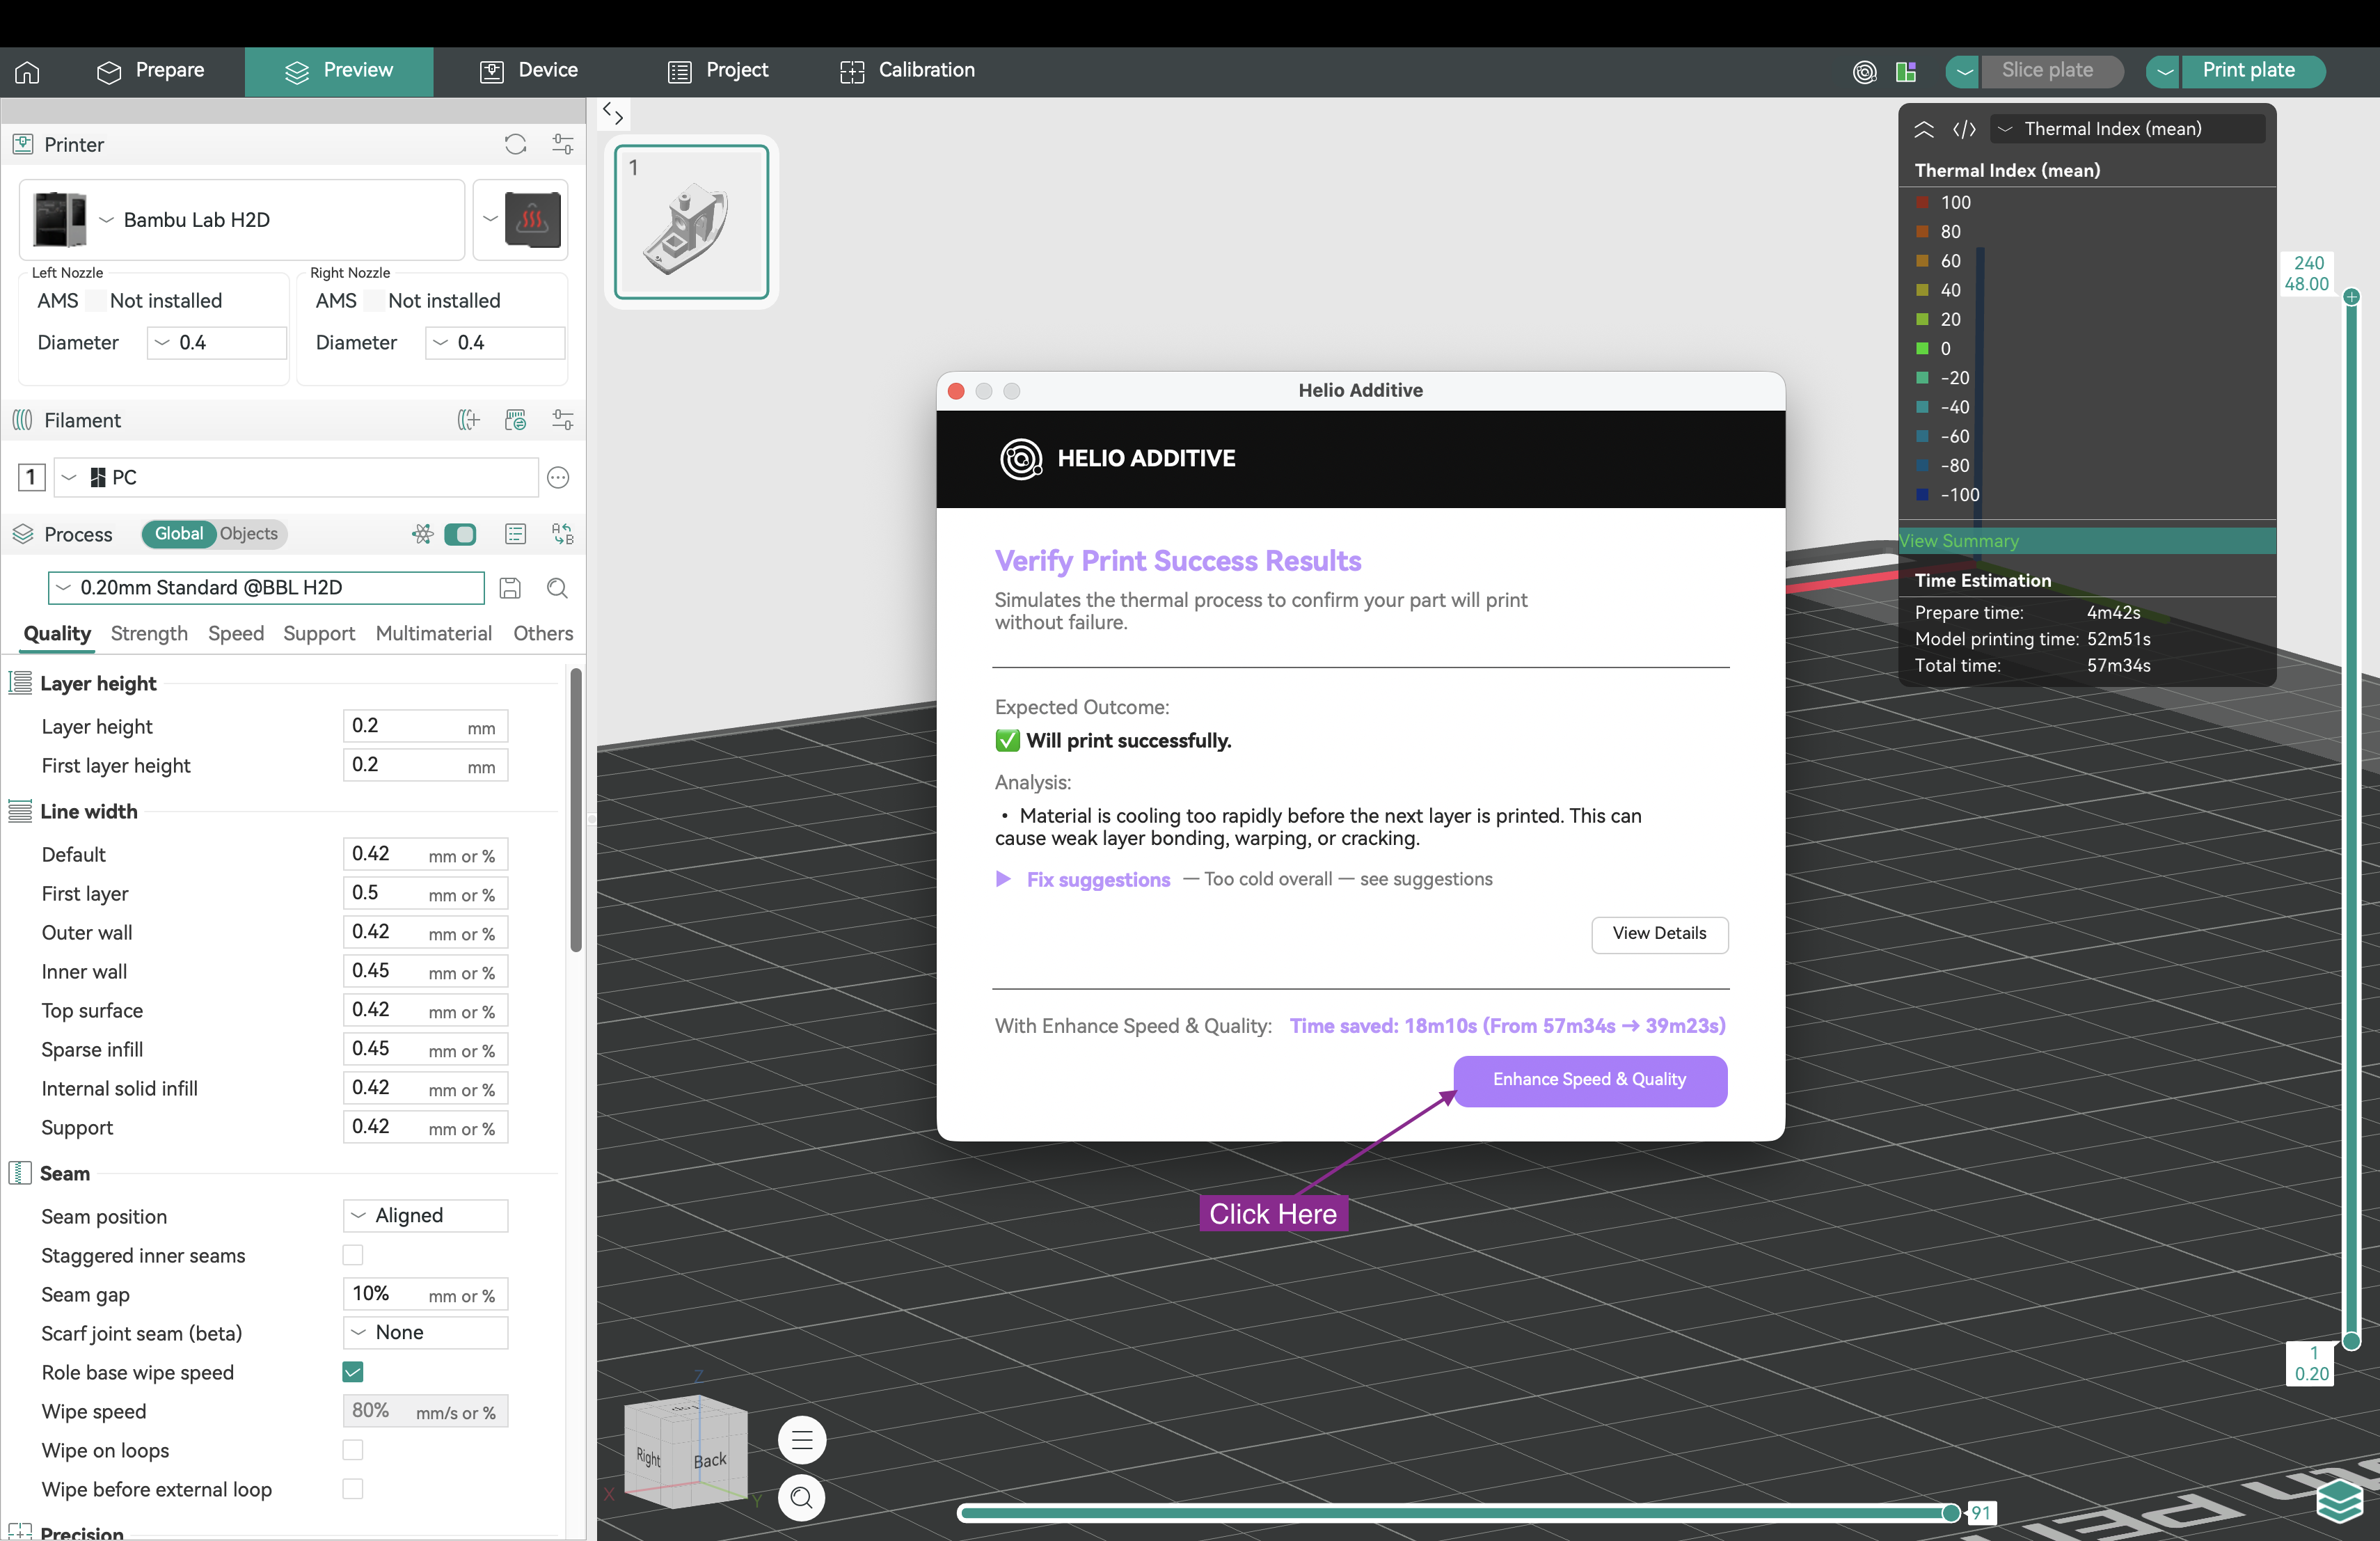
¶ 3.4 View Thermal Index Results
Once complete, review the assessment summary and suggested fixes:
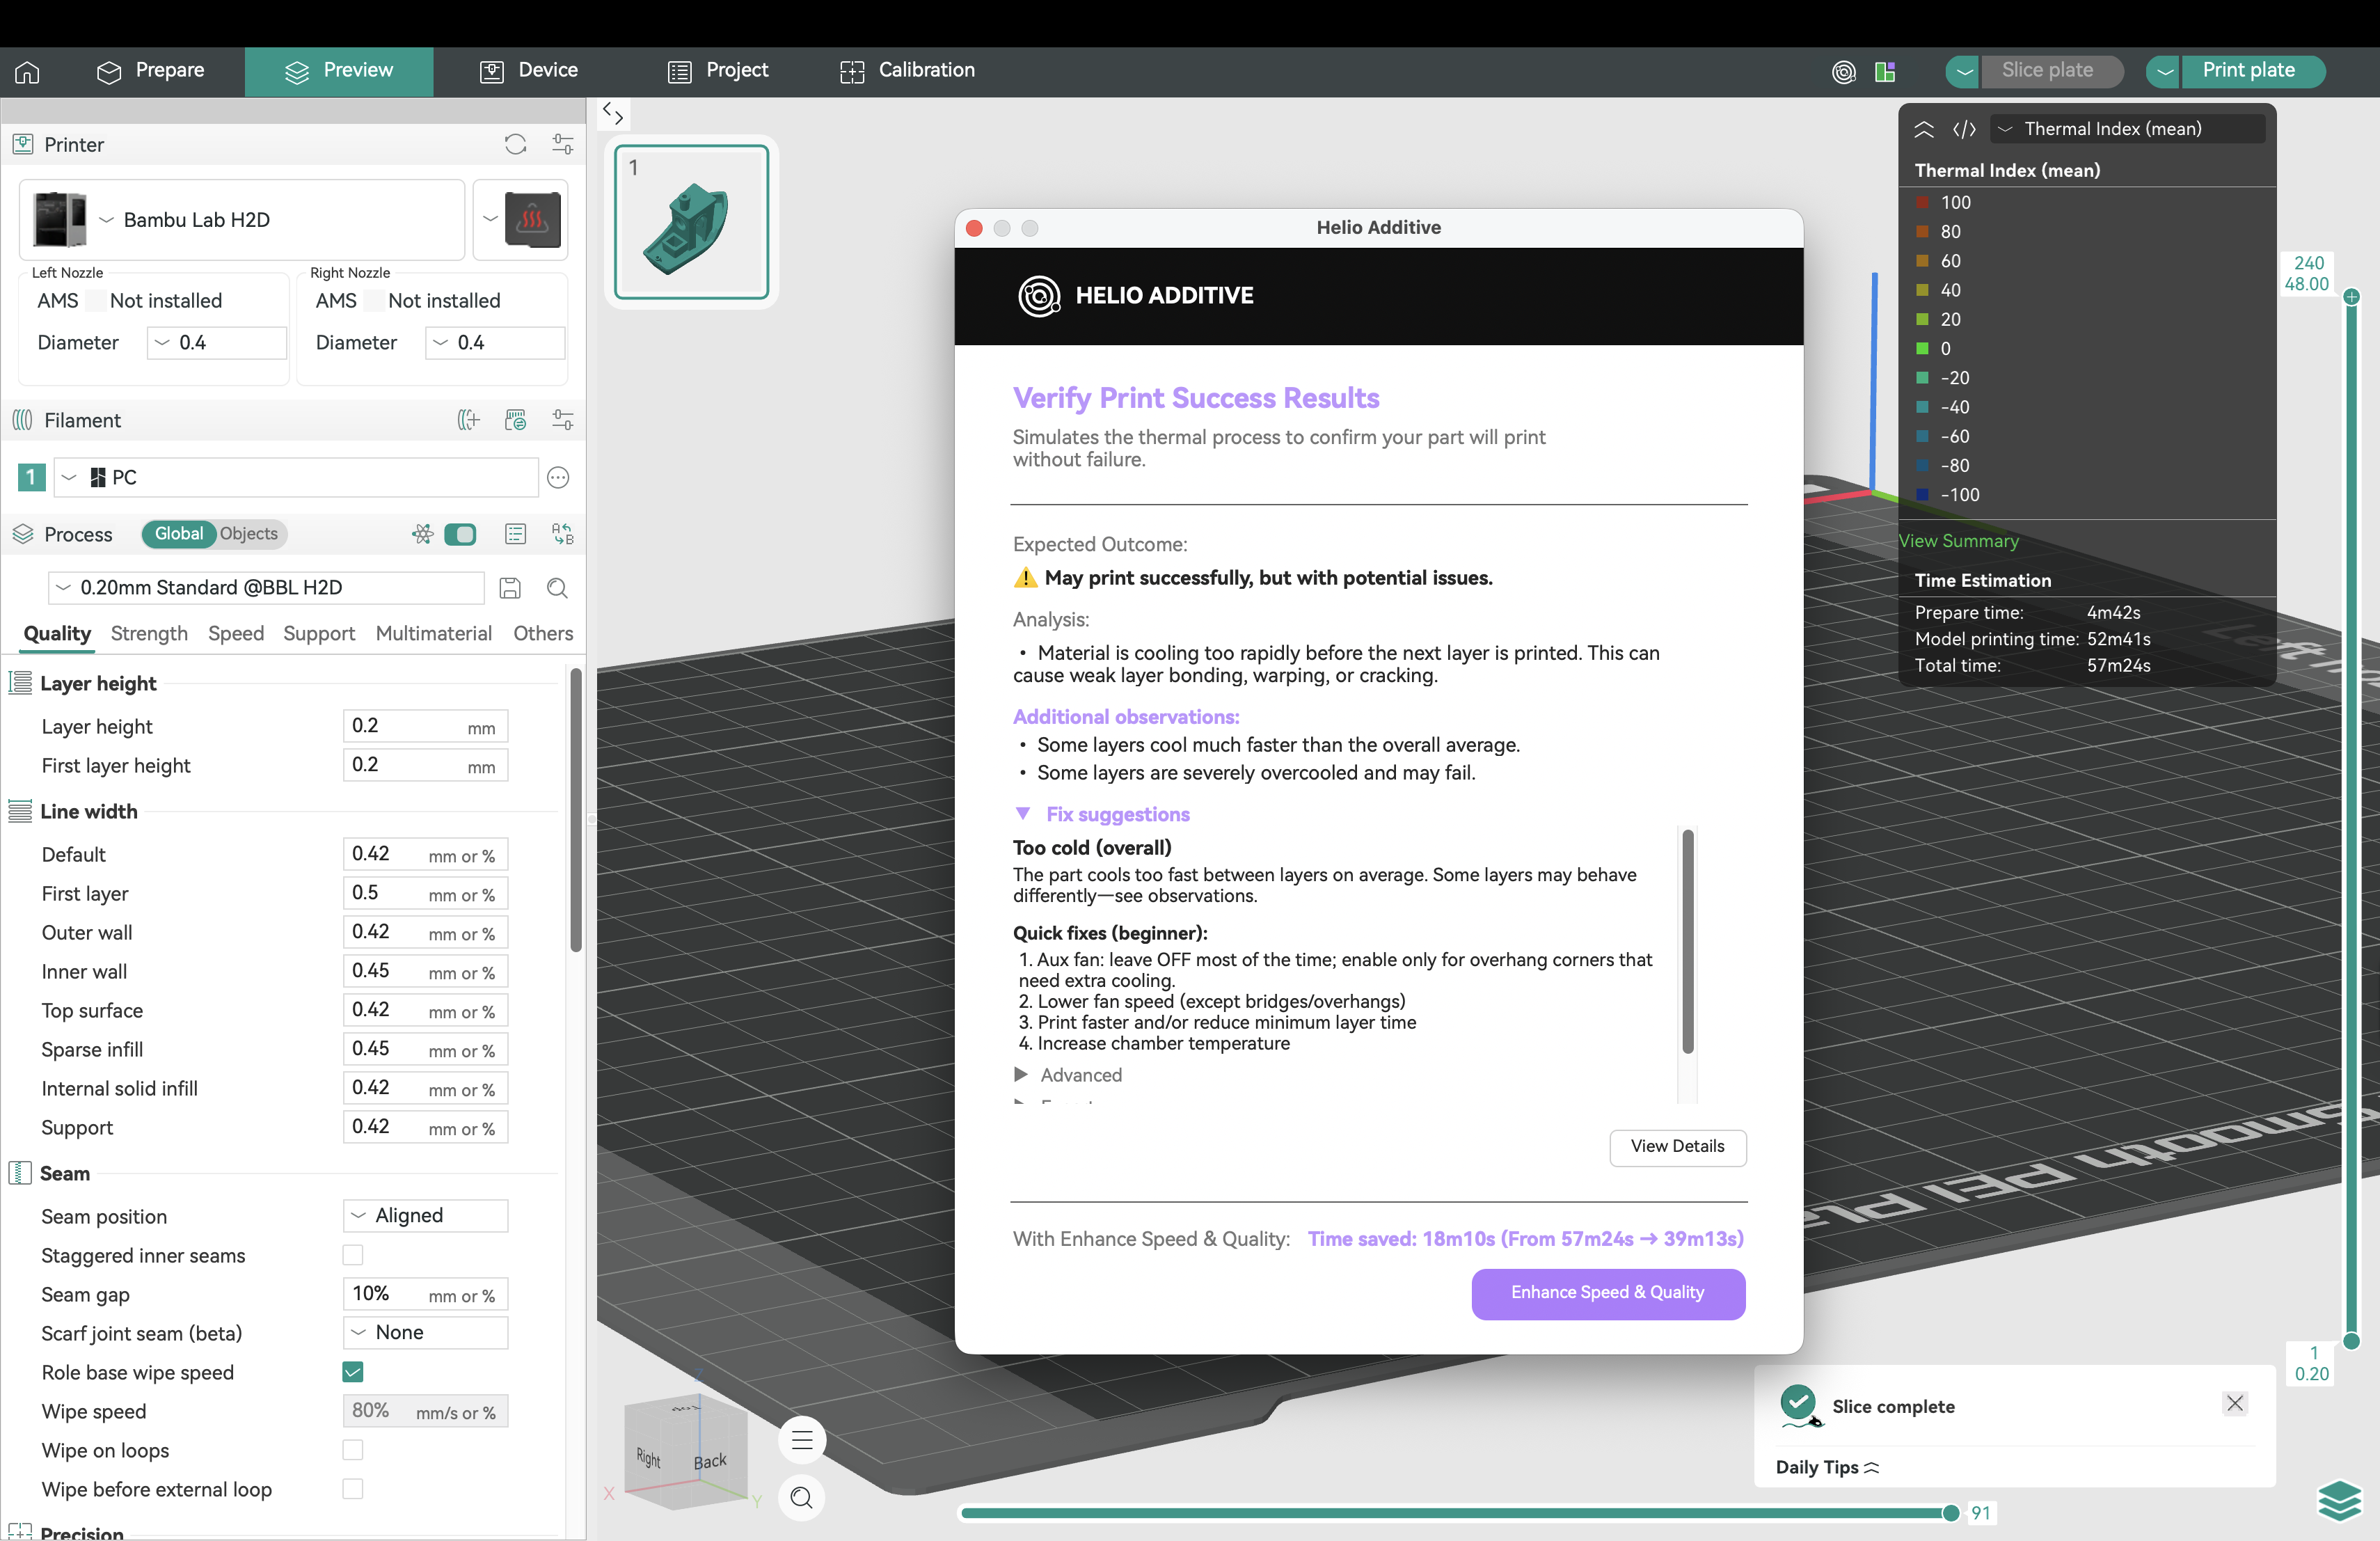
Example summary and fix suggestions for a cold print
¶ 3.5 Enhance Speed & Quality
- See potential time improvements at the bottom.
- Click Enhance Speed & Quality to autofix with the Enhance tool:
¶ 3.6 Explore Thermal Index Overlay
- Click View Details (or close the window) to see the thermal index overlay:
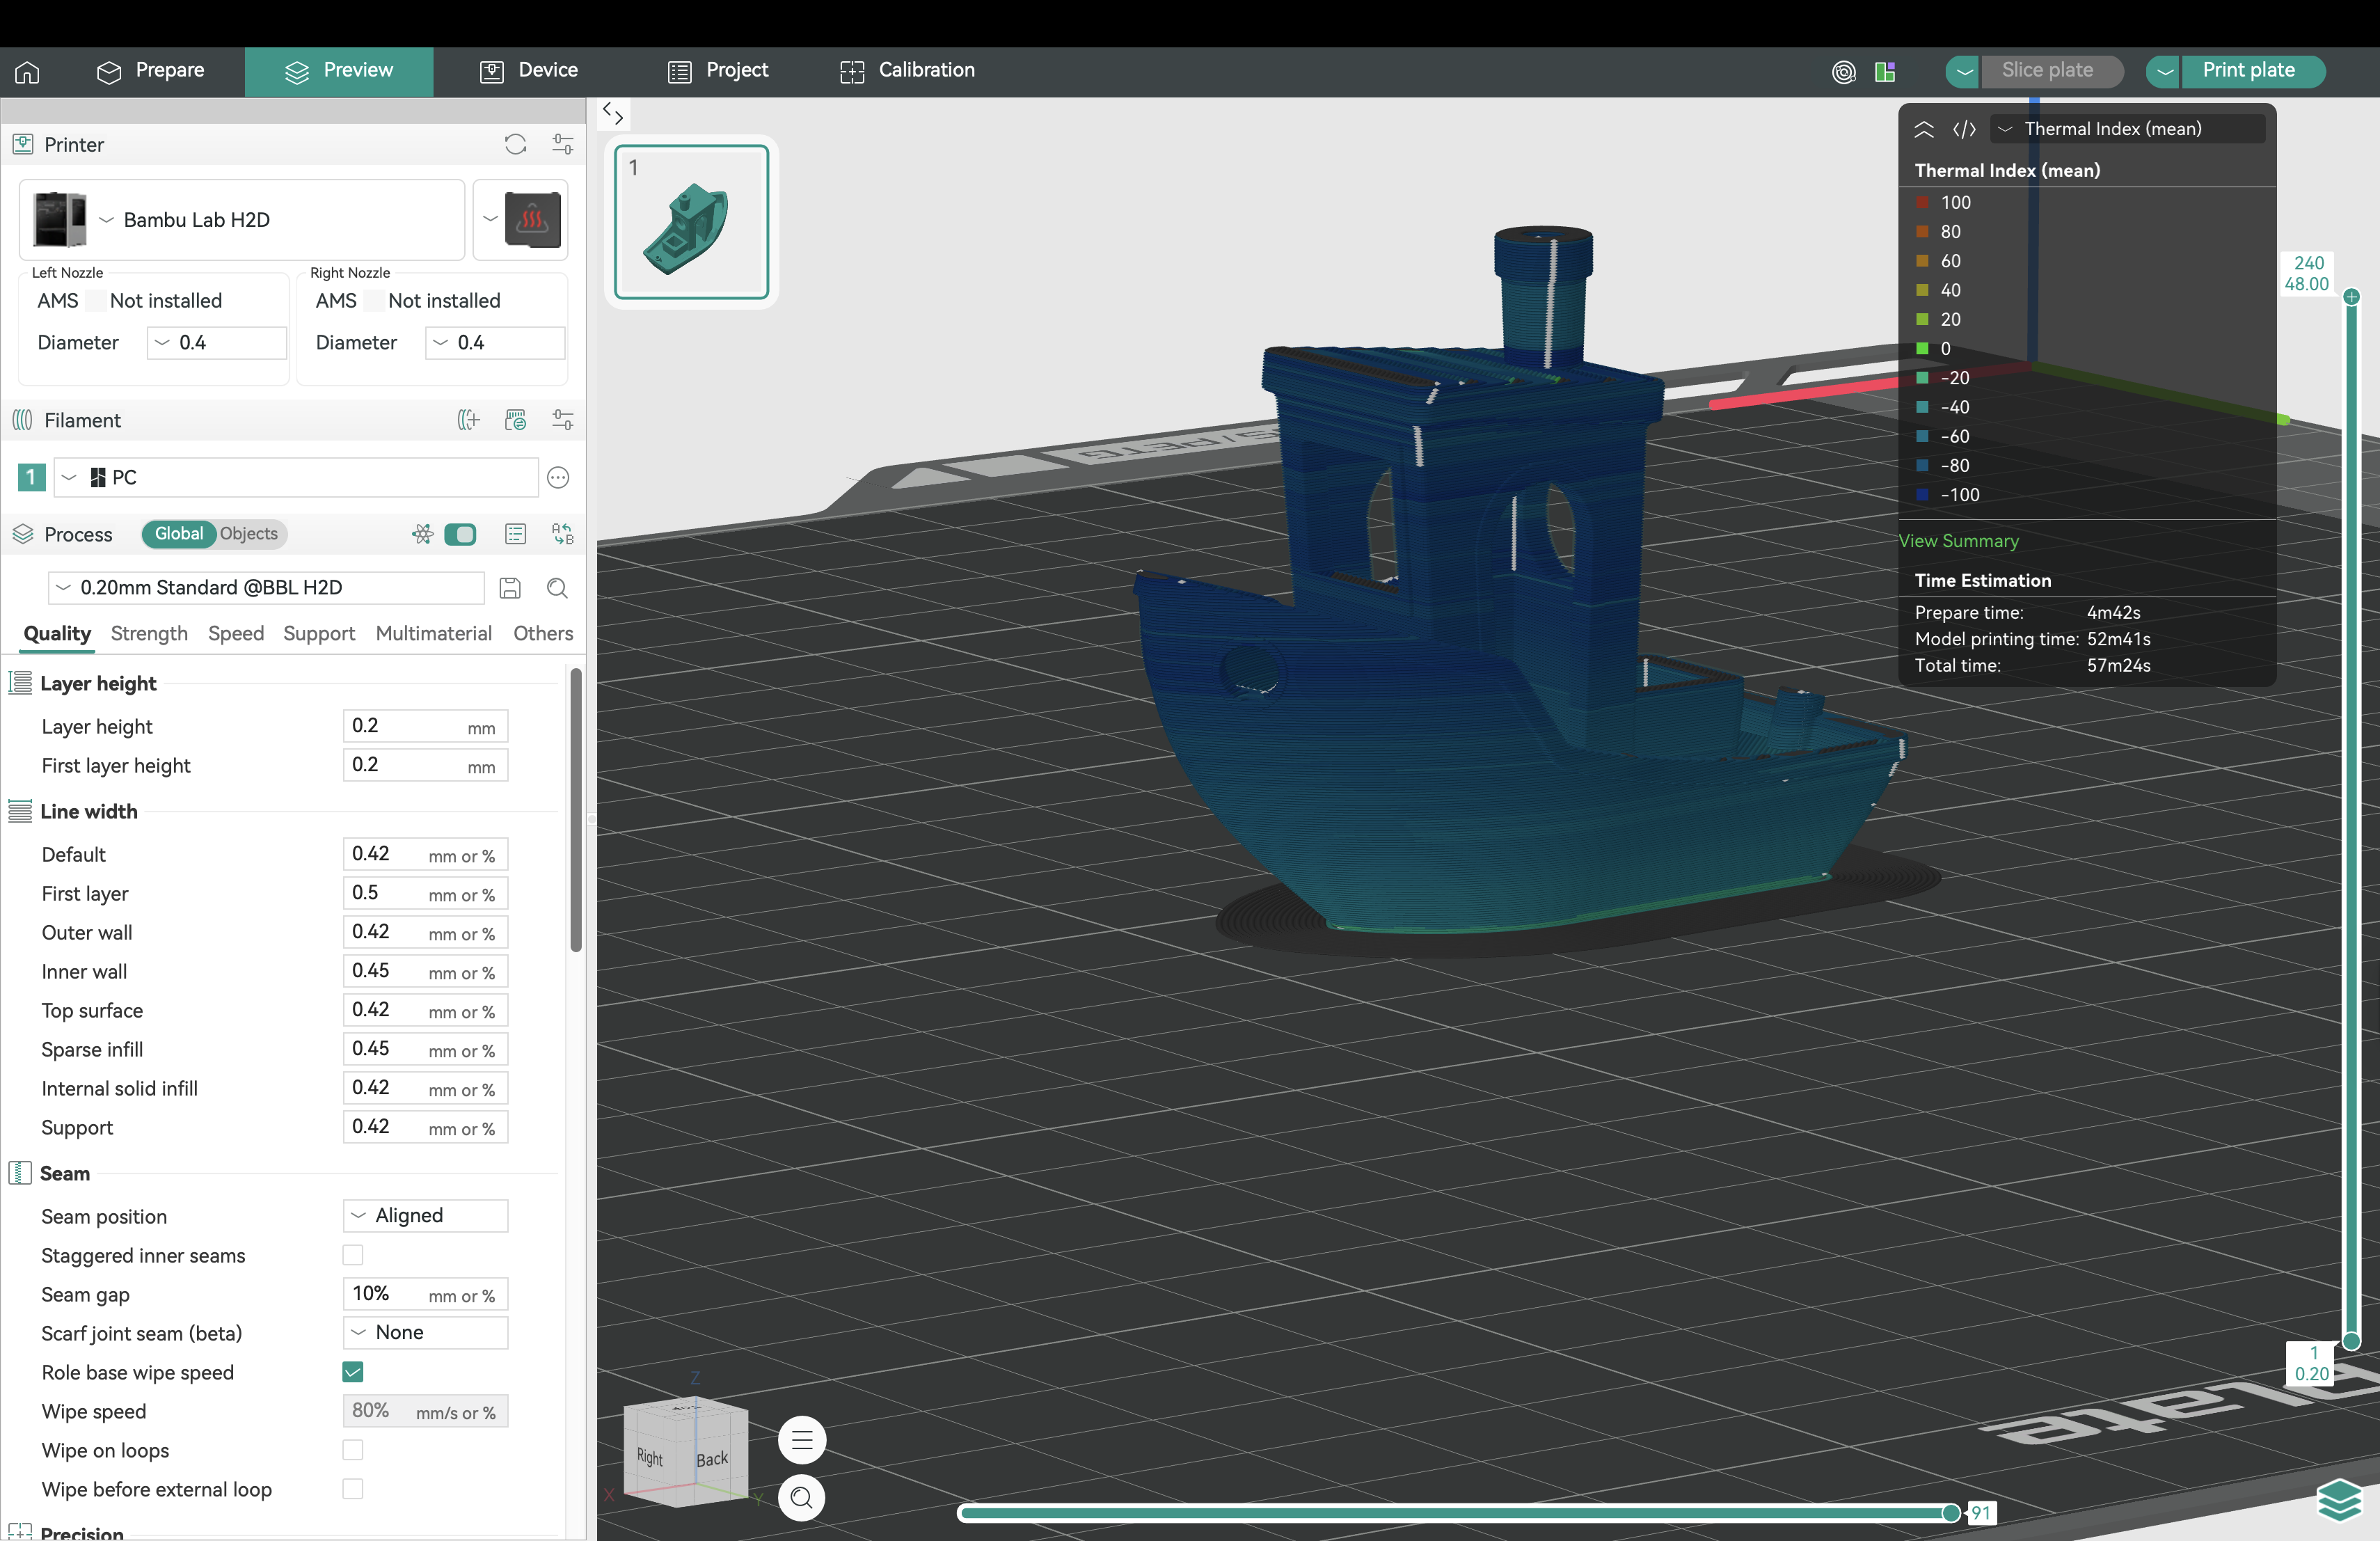
- Use the layer and toolpath sliders to view thermal data by G-code segment:
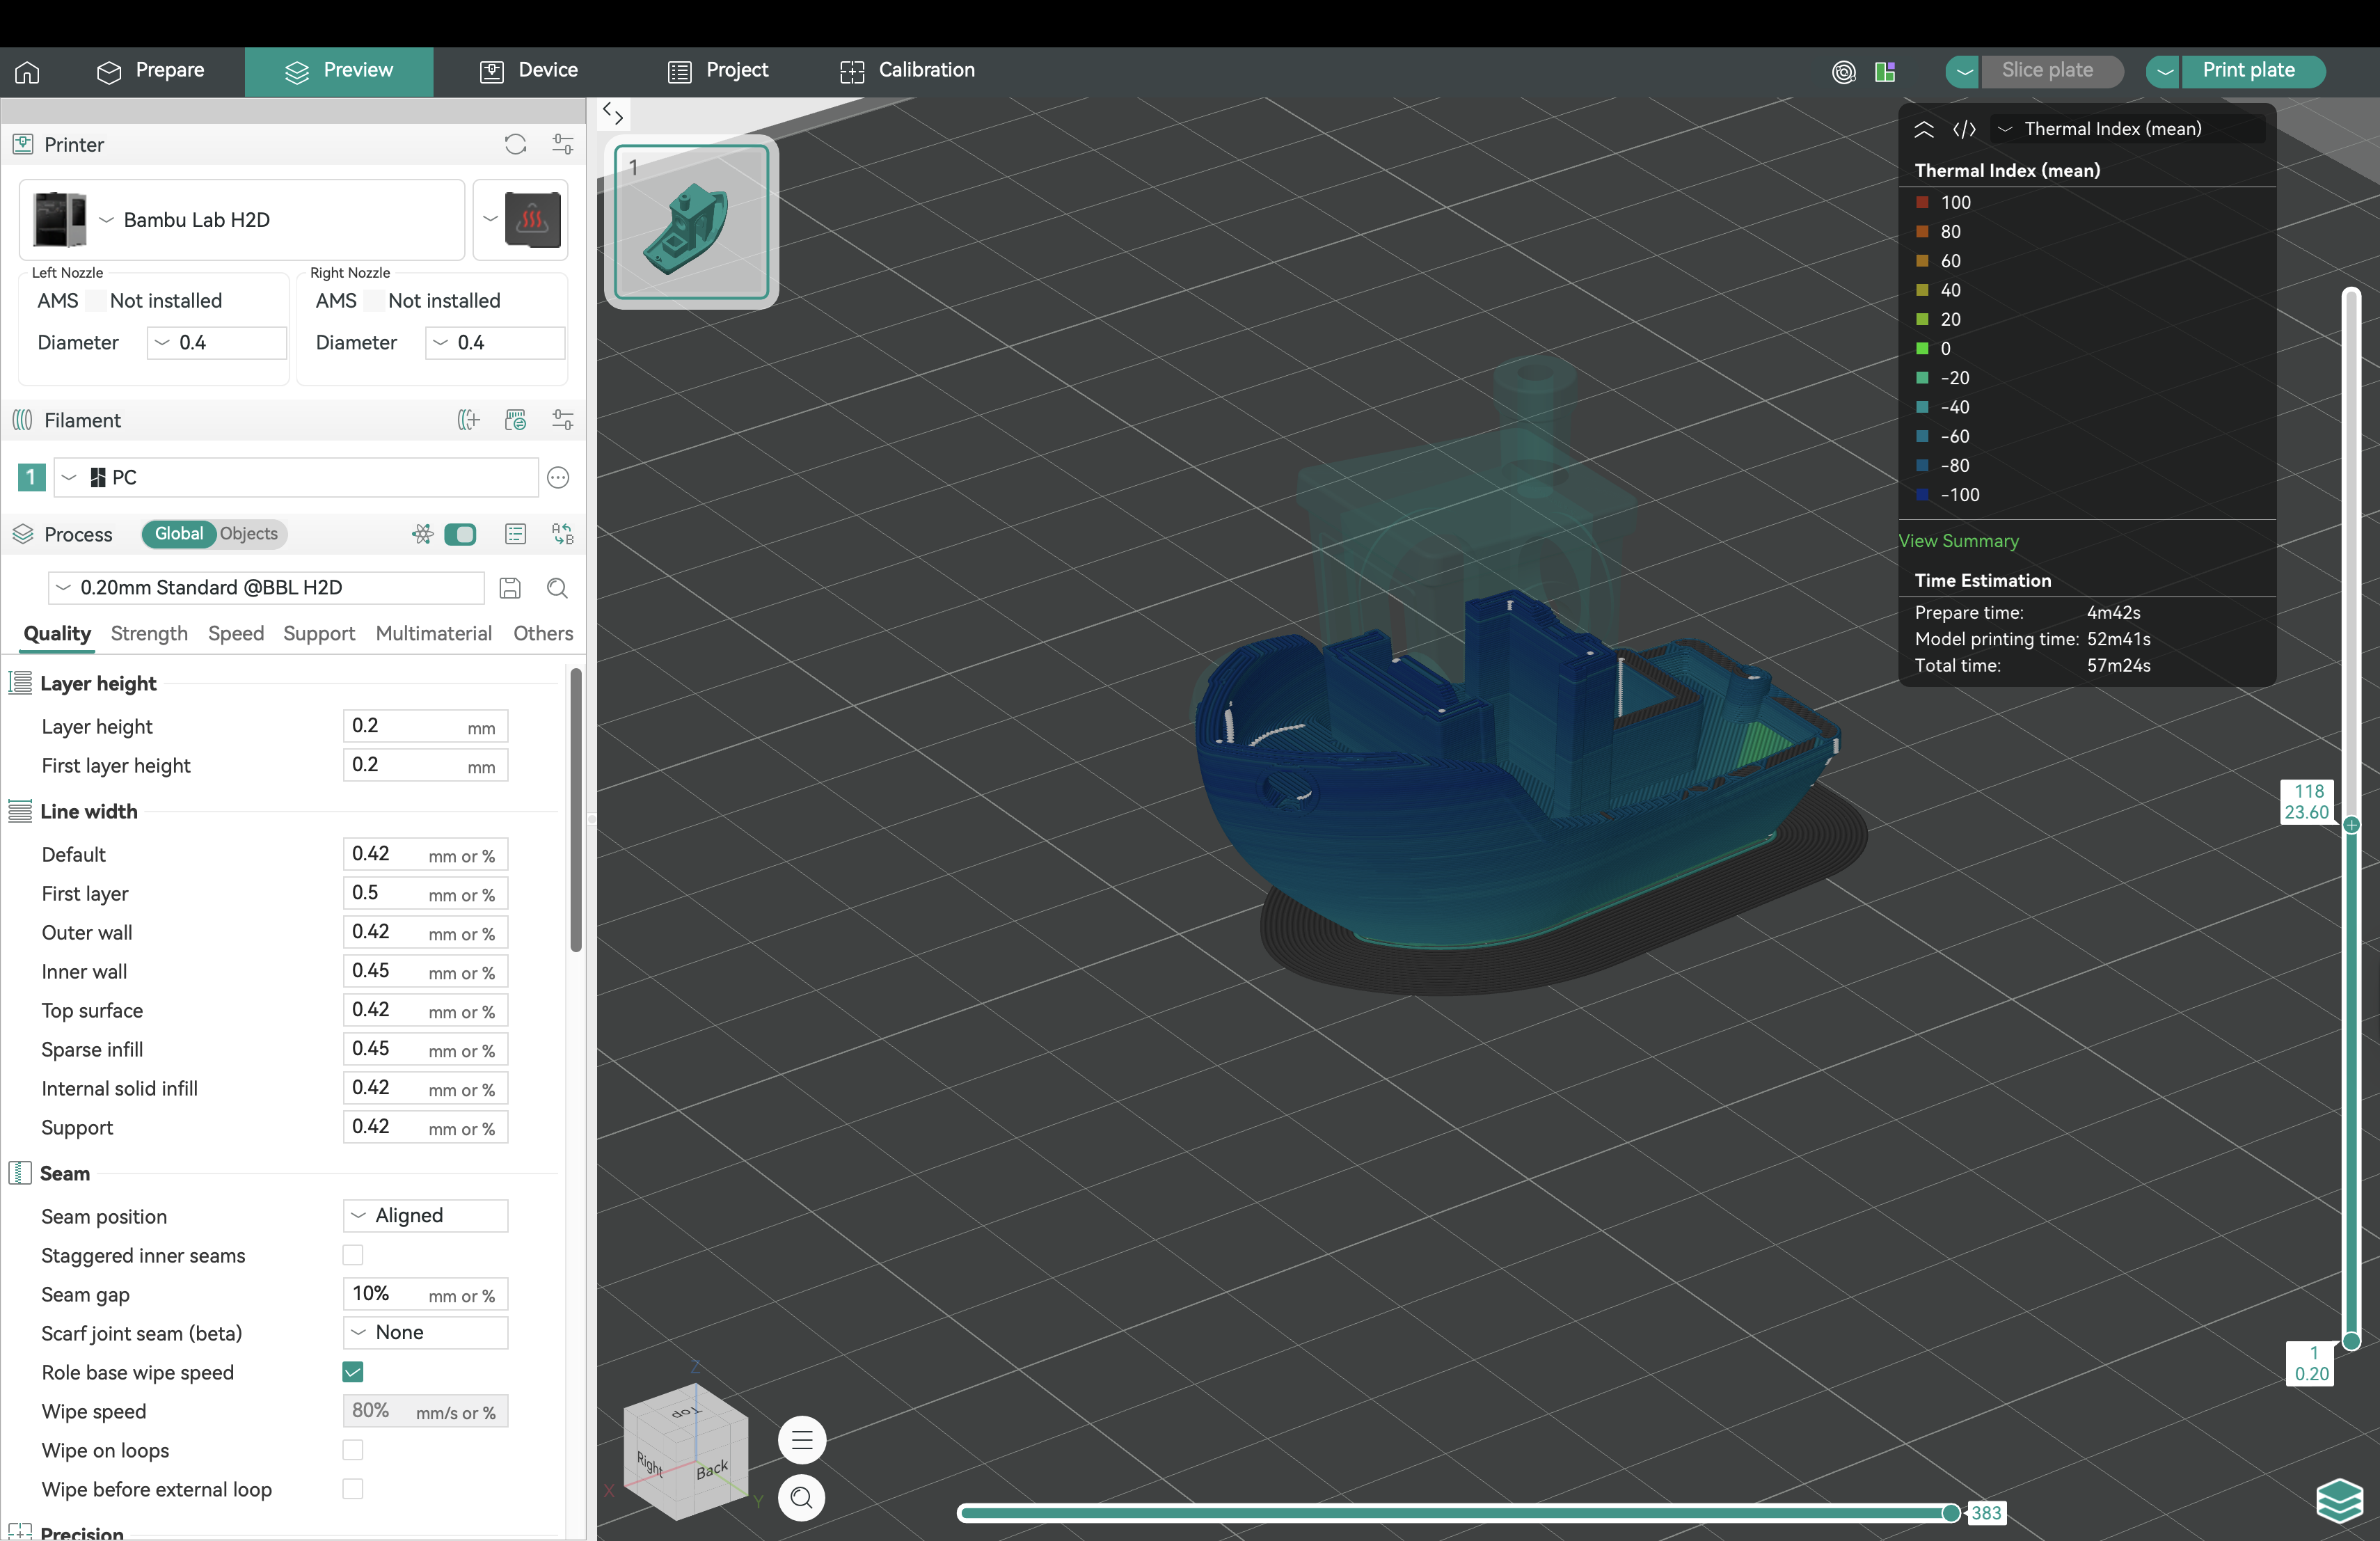
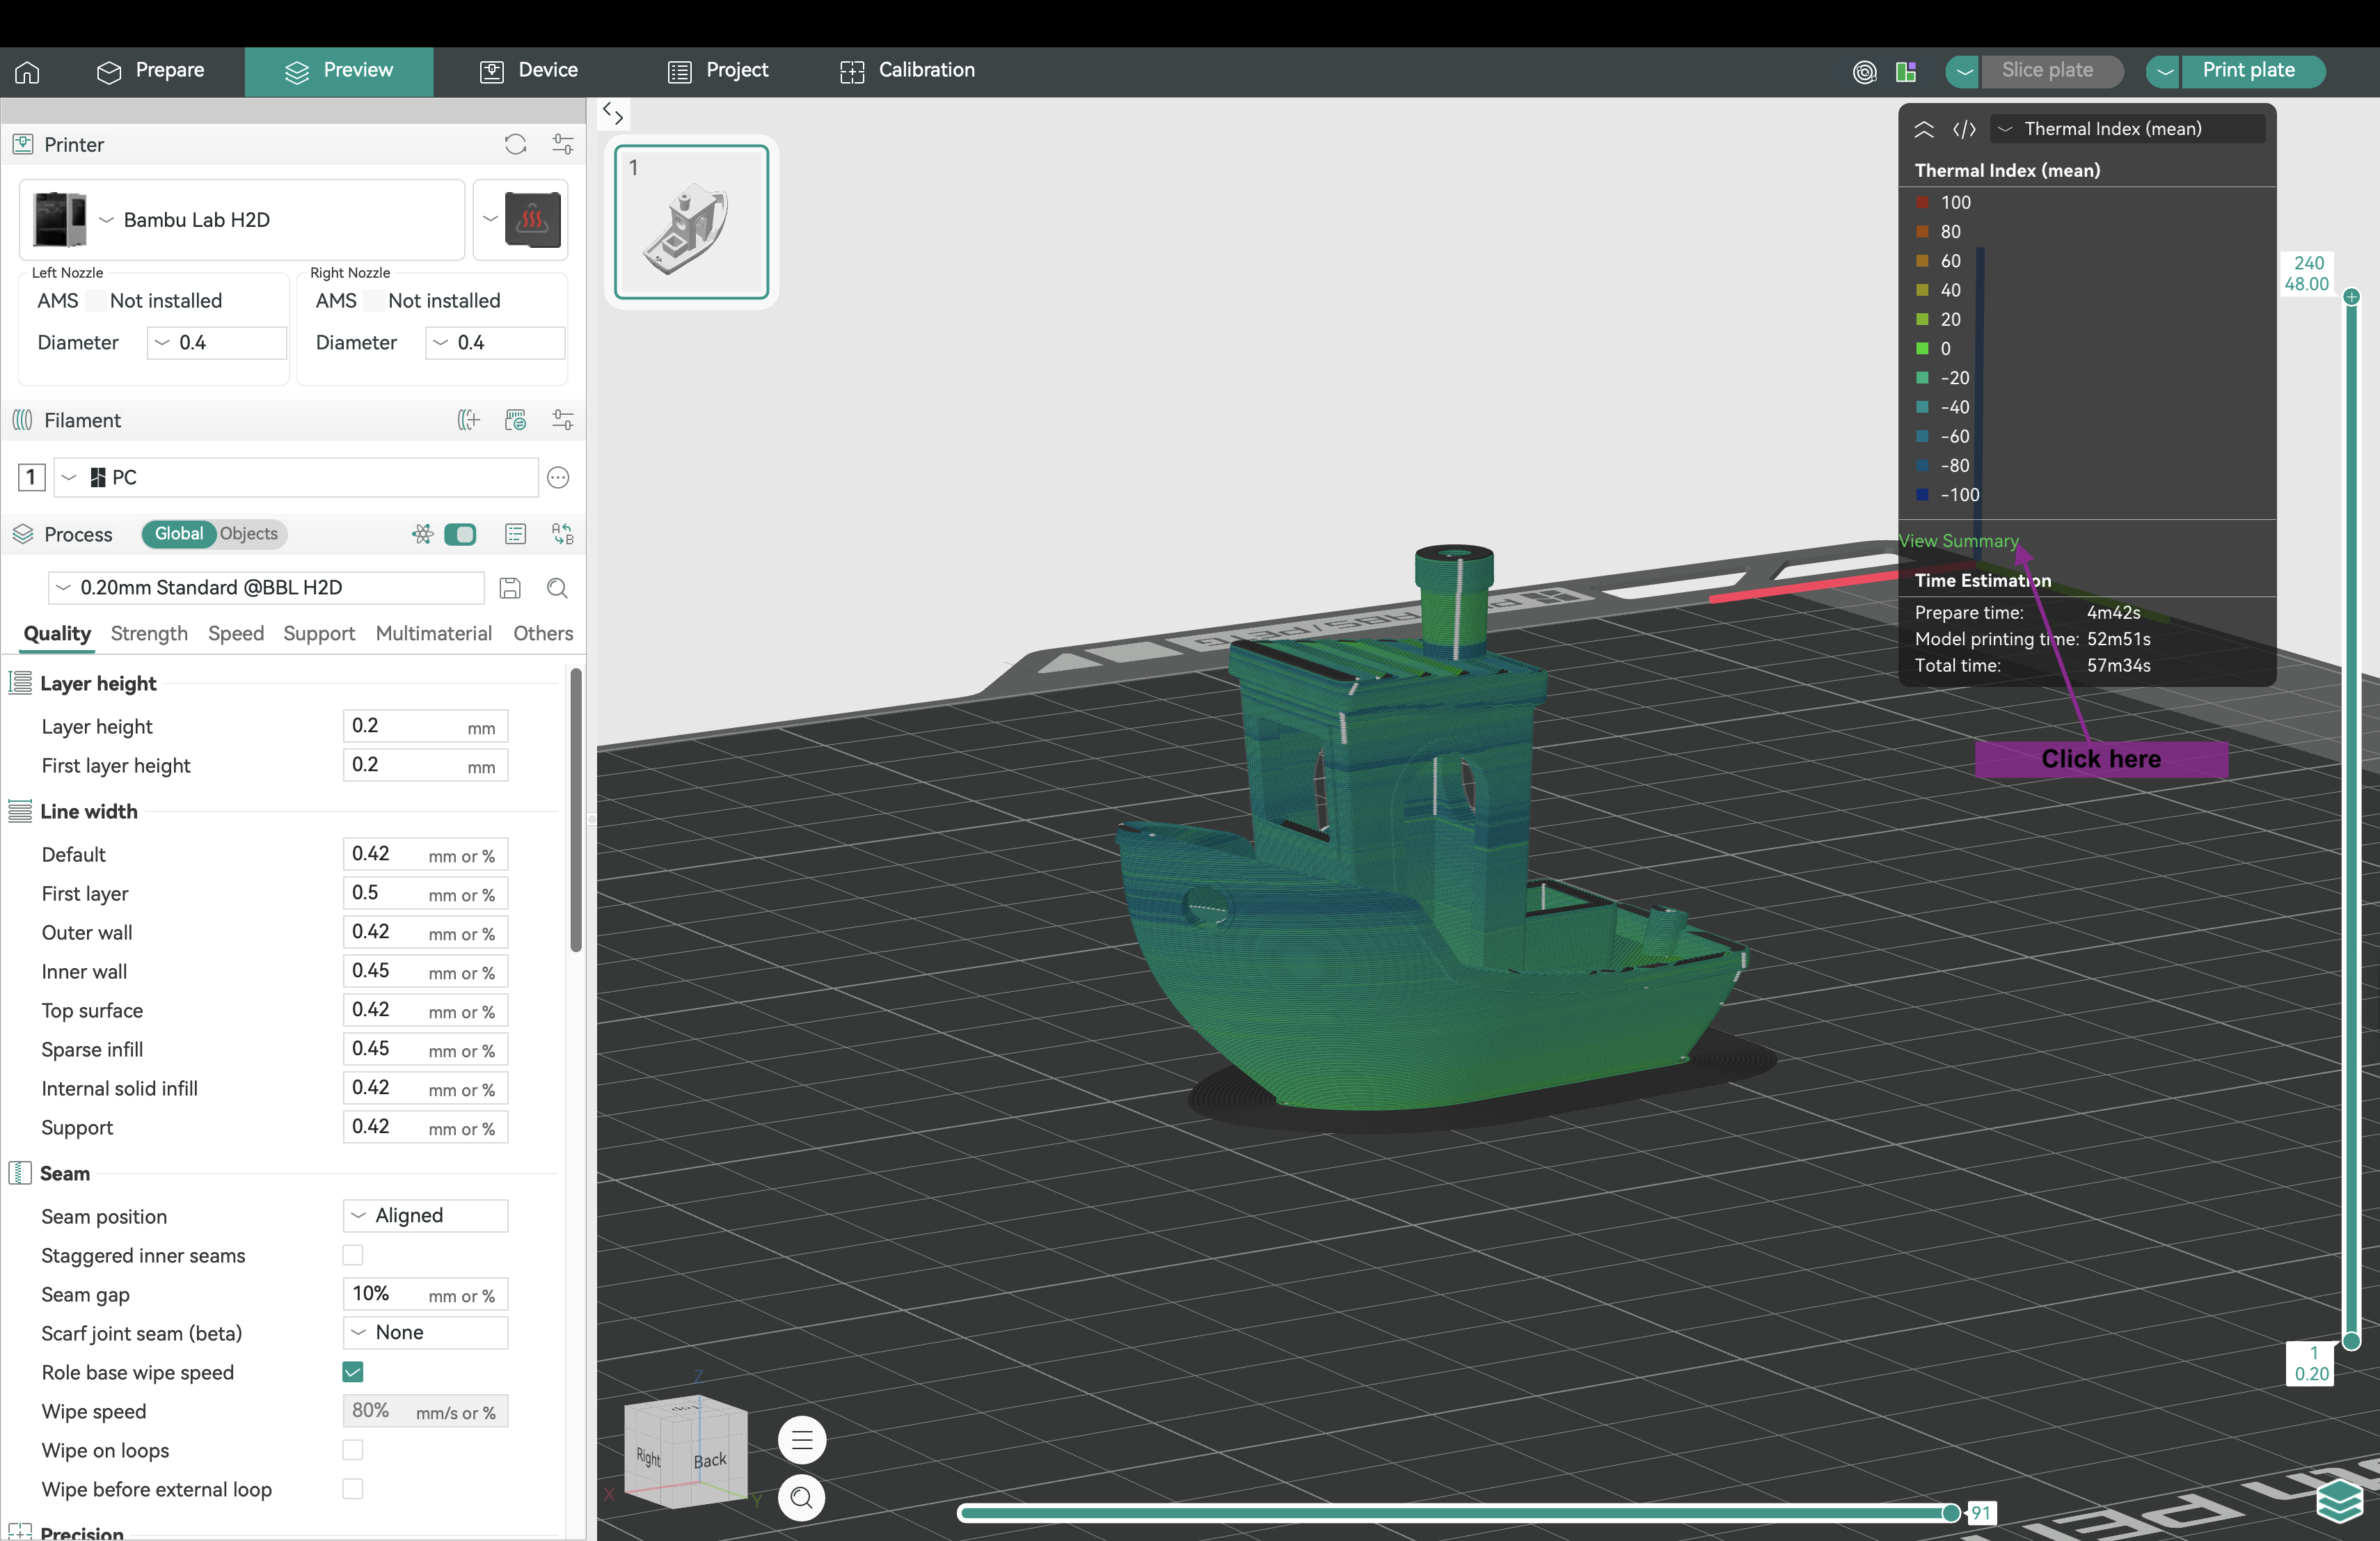
- In Thermal Quality Index Slicing Result, click View Summary to review the summary:
¶ ⚠️ Attention
Helio Optimisation requires your printer to be in good working condition:
- Printer must be well-maintained, not modified (e.g., no AMS Riser or top glass removed), and properly calibrated.
- Build plate must be clean (free of oils, dust, residue). Use the correct build plate for the material. The Bambu PEI plate works for most materials; PC/PA typically require glue.
- Filament must be dry — moisture causes extrusion issues and weak bonding.
- Disable any feature that introduces delays to layer time (e.g., time-lapse, pauses) — otherwise optimised G-code will be invalid.
- Review the G-code in the preview and confirm changes before printing. Helio only adjusts your print speeds. Your chamber, nozzle, and bed temps are set in your filament settings.
- Optimisation targets strength and reduced warping, which may trade off some aesthetics. You can balance this via suggestions in this manual here.
¶ 🌡️ Thermal Index Guide
- -100 (Too Cold): Poor bonding, at -50 Thermal Index tensile strength may drop by ~50%
- 0 (Ideal): Peak strength and dimensional accuracy
- +100 (Too Hot): Risk of sagging, soft layers, and deformation
Aim to keep most regions near 0 for optimal performance.
- Checkout the debugging flowchart for further guidance.
• We adjusted the TQI colour mapping based on customer feedback.
• A 50% drop in tensile strength—or entry into the warping-critical zone—maps to −50 TQI.
• Printable range is -50 to 0 TQI; 0 is the strongest, fastest print (with aesthetic trade-offs).
¶ ✅ Supported Setup
- Printers: Bambu Lab A1, A1 Mini, P1P, P1S, P2S, X1C, X1E, H2D, H2D Pro, H2S · 🌟 Snapmaker U1 (new!)
- Filaments: Commonly used Bambu, Polymaker, and Fiberon materials. See full compatibility here.
H2C: Supported in the Helio backend — Assess and Enhance will be available once OrcaSlicer adds native H2C support.
- G-code Requirements: Now supports multicolour and object–by-object print sequence. Multimaterial support now here! Learn how to use here. Note that this flow uses the Bambu Studio UI, but the flow is the same for Orca Slicer as well.
¶ 🎟️ Free Access For Assess
Assess is free for all users. When you enable Helio for the first time, a personal access token (PAT key) is automatically generated, and gives you free, lifetime access to Assess (Helio’s simulation-only tool). This is how our system verifies your access and securely uploads your G-code for analysis.
Helio is built to be lightweight, fast, and practical for everyday 3D printing, not a heavy FEA suite. Keeping Assess free is core to that.
¶ 🚀 Paid Access For Enhance
Helio’s Enhance service goes one step further than assess — it doesn’t just show you where prints may be too hot or too cold, it automatically adjusts layer times (via safe speed changes) to improve bonding, reduce warping, and often shorten print times.
Enhance is available via subscription, starting at $9.99/month. Each plan includes unlimited quota.
This pricing reflects a tool that normally exists only in high-end engineering software, now simplified and brought into your slicer.
We’ll continue to add value over time — including fan speed control, more supported filaments, and improved thermal models — all without requiring Studio updates.
The subscription ensures sustainability of our R&D and cloud infrastructure, while keeping Assess(simulation) free for learning and education.
🚀 Think of assess as the “map” and enhance as the “GPS” that helps you automatically find the fastest, safest route to a strong and reliable print.
¶ 💬 Join the Community
Questions? Feedback? Need help?
Join the Helio Additive community on Discord:
👉 https://discord.gg/EjQXDJP9kS